
Last Updated: 2023-02-12
Amazon Elastic Kubernetes Service
Kubernetes is an open source project (available on kubernetes.io) which can run on many different environments, from laptops to high-availability multi-node clusters, from public clouds to on-premise deployments, from virtual machines to bare metal.
The easiest way to run a Kubernetes cluster in AWS is using Amazon Elastic Kubernetes Service, a managed version of Kubernetes hosted on AWS. Amazon Elastic Kubernetes Service, also known as Amazon EKS, gives you the flexibility to start, run, and scale Kubernetes applications in the AWS cloud or on-premises. Amazon EKS helps you provide highly-available and secure clusters and automates key tasks such as patching, node provisioning, and updates.
What you'll build
In this codelab, you're going to deploy a Kubernetes cluster using Amazon Elastic Kubernetes Service. Your will:
- Manage node pools.
- Configure autoscaling.
- Add spot nodes
What you'll need
- A recent version of your favorite Web Browser
- Basics of BASH
- AWS Account
Support
If you want to support me, feel free to
Before you can use Kubernetes to deploy your application, you need a cluster of machines to deploy them to. The cluster abstracts the details of the underlying machines you deploy to the cluster.
Machines can later be added, removed, or rebooted and containers are automatically distributed or re-distributed across whatever machines are available in the cluster. Machines within a cluster can be set to autoscale up or down to meet demand. Machines can be located in different zones for high availability.
Open Cloud Shell
You will do some of the work from the Amazon Cloud Shell, a command line environment running in the Cloud. This virtual machine is loaded with all the development tools you'll need (aws cli, python) and offers a persistent 1GB home directory and runs in AWS, greatly enhancing network performance and authentication. Open the Amazon Cloud Shell by clicking on the icon on the top right of the screen:

You should see the shell prompt open in the new tab:

Initial setup
Before creating a cluster, you must install and configure the following tools:
kubectl– A command line tool for working with Kubernetes clusters.eksctl– A command line tool for working with EKS clusters that automates many individual tasks.
To install eksctl, run the following:
$ curl --silent --location "https://github.com/weaveworks/eksctl/releases/latest/download/eksctl_$(uname -s)_amd64.tar.gz" |\
  tar xz -C /tmp

$ sudo mv -v /tmp/eksctl /usr/local/bin
Confirm the eksctl command works:
$ eksctl version
To install kubectl, run the following:
$ curl -Lo kubectl https://storage.googleapis.com/kubernetes-release/release/$(curl -s https://storage.googleapis.com/kubernetes-release/release/stable.txt)/bin/linux/amd64/kubectl

$ chmod +x ./kubectl

$ sudo mv ./kubectl /usr/local/bin/kubectl
Create a Cluster
Using eksctl you can create a cluster by simply running the eksctl create cluster command and supplying all the required flags. But as there are many configuration options the command can become very large. Instead, we can create a YAML file with all the options and supply it as input (replacing your_name_here with your name):
$ export YOUR_NAME=your_name_here

$ cat << EOF > ekscfg.yaml
---
apiVersion: eksctl.io/v1alpha5
kind: ClusterConfig

metadata:
  name: ${YOUR_NAME}-eks
  region: us-east-1

managedNodeGroups:
- name: nodegroup
  tags: { ita_group: devops }
  desiredCapacity: 3
  instanceType: t2.small
  ssh:
    allow: false
cloudWatch:
  clusterLogging:
    enableTypes: ["api", "audit", "controllerManager"]
availabilityZones: ['us-east-1a', 'us-east-1b', 'us-east-1c', 'us-east-1d']
EOF
Next, create the cluster:
$ eksctl create cluster -f ekscfg.yaml
When you create a cluster, eksctl adds a new context to your kubectl configuration file (~/.kube/config). It then sets it as the current context, to let you operate on this cluster immediately.
$ kubectl config current-context
To test it, try a kubectl command line:
$ kubectl get nodes
NAME                             STATUS   ROLES    AGE     VERSION
ip-192-168-13-160.ec2.internal   Ready    <none>   3m32s   v1.18.9-eks-d1db3c
ip-192-168-62-17.ec2.internal    Ready    <none>   3m23s   v1.18.9-eks-d1db3c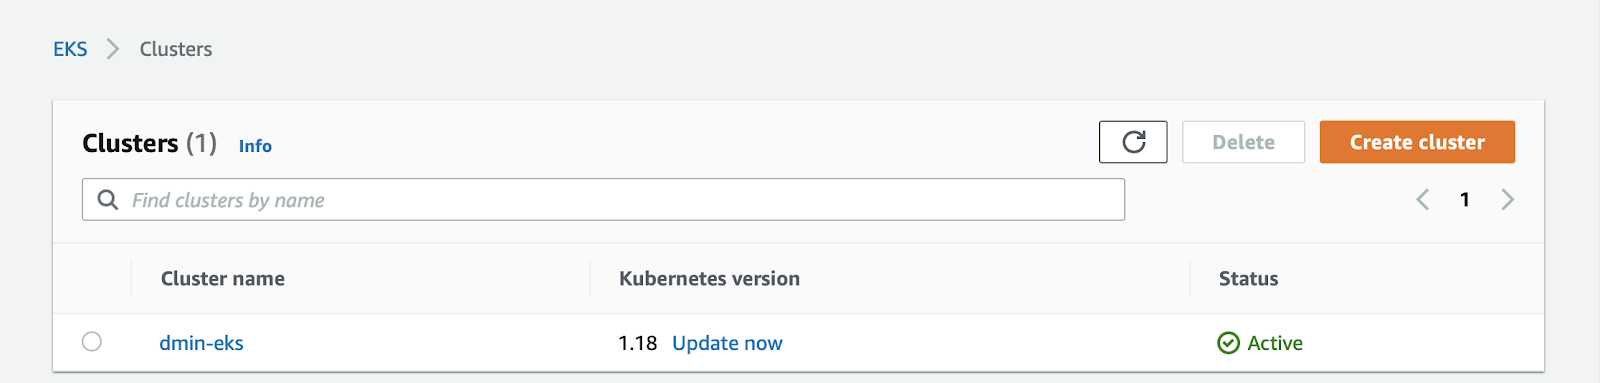
ip-192-168-9-239.ec2.internal Ready <none> 3m35s v1.18.9-eks-d1db3cIf you navigate to "Elastic Kubernetes Service" in the AWS console
You will see the cluster listed:
Run a Deployment
Most Kubernetes labs start by having you run a handful of containers, and this one won't be different :).
$ kubectl create deployment hello-k8s --image=kennethreitz/httpbin \
       --port=80 --replicas=3

$ kubectl get pods -o wide
In this example, there are three replicas, all running on different nodes. You may have slightly different results.
Check the Dashboard
Workloads that are deployed to your EKS cluster are displayed in the AWS Console. Navigate to your EKS cluster and then Workloads.
You can see the hello-k8s deployment we just created.
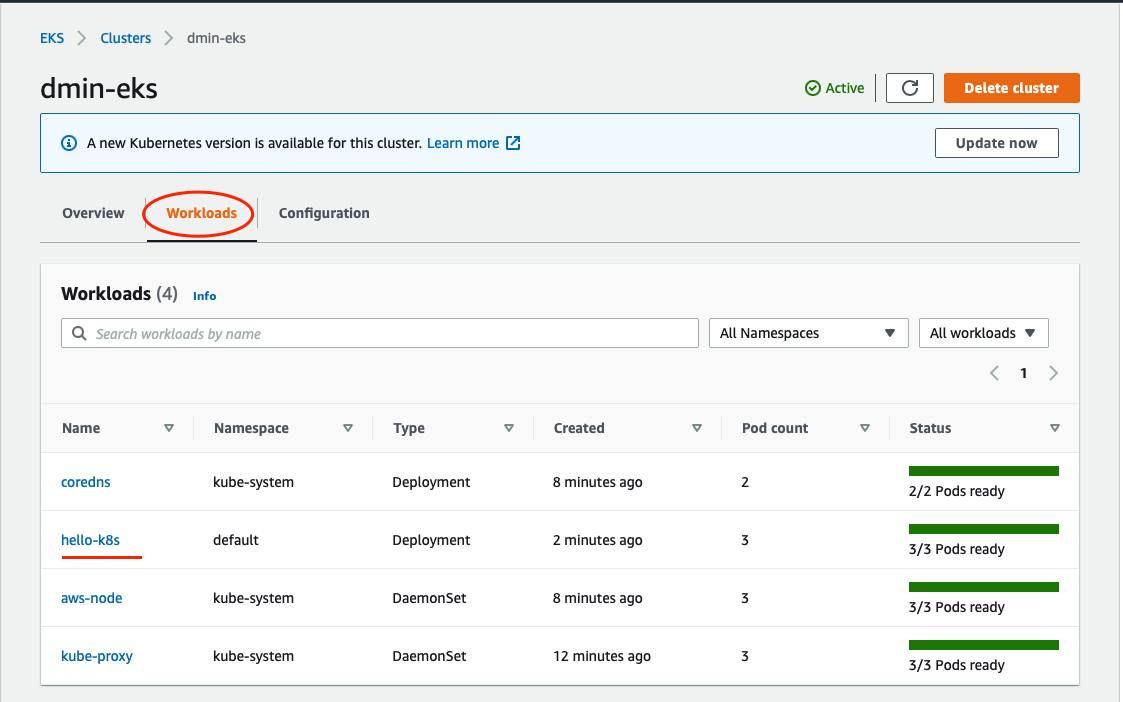
Click on it, and explore the user interface.
Amazon EKS cluster consists of a master and nodes. A node group is a subset of node instances within a cluster that all have the same configuration. You can add or remove them as you wish to change the shape of your cluster.
In the previous example, you created a cluster with three t2.small nodes in a node group, which we can inspect:
$ eksctl get nodegroup --cluster ${YOUR_NAME}-eks
If you want to add more nodes of this type, you can grow this node group. If you want to add more nodes of a different type, you can add other node groups.
A common method of moving a cluster to larger nodes is to add a new node group, move the work from the old nodes to the new, and delete the old node pool.
Let's add a second node group, and migrate our workload over to it. We can use the same config file for cluster and add a new nodegroup (replacing your_name_here with your name):
$ export YOUR_NAME=your_name_here

$ cat << EOF > ekscfg.yaml
---
apiVersion: eksctl.io/v1alpha5
kind: ClusterConfig

metadata:
  name: ${YOUR_NAME}-eks
  region: us-east-1

managedNodeGroups:
- name: nodegroup
  tags: { ita_group: devops }
  desiredCapacity: 3
  instanceType: t2.small
  ssh:
    allow: false
- name: newgroup
  desiredCapacity: 3
  minSize: 2
  maxSize: 6
  instanceType: t2.small
  ssh:
    allow: false
    withAddonPolicies:
      autoScaler: true
      albIngress: true
  tags:
    # EC2 tags required for cluster-autoscaler auto-discovery
    k8s.io/cluster-autoscaler/enabled: "true"
    k8s.io/cluster-autoscaler/${YOUR_NAME}-eks: "owned"
    ita_group: "devops"
cloudWatch:
  clusterLogging:
    enableTypes: ["api", "audit", "controllerManager"]
availabilityZones: ['us-east-1a', 'us-east-1b', 'us-east-1c', 'us-east-1d']
EOF
Now, create a node group:
$ eksctl create nodegroup --config-file=ekscfg.yaml
Verify that you have two node groups:
$ eksctl get nodegroup --cluster ${YOUR_NAME}-eks
Check the nodes (you should have 6 nodes):
$ kubectl get nodes
Kubernetes does not reschedule Pods as long as they are running and available, so your workload remains running on the nodes in the first nodegroup.
Look at one of your nodes using kubectl describe. Just like you can attach labels to pods, nodes are automatically labeled with useful information which lets the scheduler make decisions and the administrator perform action on groups of nodes.
Replace NODE_NAME with the name of one of your nodes from the previous step.
$ kubectl describe node NODE_NAME
Name:               ip-192-168-92-153.ec2.internal
Roles:              <none>
Labels:             beta.kubernetes.io/arch=amd64
                    beta.kubernetes.io/instance-type=t2.small
                    beta.kubernetes.io/os=linux
                    eks.amazonaws.com/capacityType=ON_DEMAND
                    eks.amazonaws.com/nodegroup=nodegroup
                    eks.amazonaws.com/nodegroup-image=ami-091f6e311130bd848
                    eks.amazonaws.com/sourceLaunchTemplateId=lt-03a5bafbcd28d9c65
                    eks.amazonaws.com/sourceLaunchTemplateVersion=1
                    failure-domain.beta.kubernetes.io/region=us-east-1
                    failure-domain.beta.kubernetes.io/zone=us-east-1b
                    kubernetes.io/arch=amd64
                    kubernetes.io/hostname=ip-xxx.ec2.internal
                    kubernetes.io/os=linux
                    node.kubernetes.io/instance-type=t2.small
                    topology.kubernetes.io/region=us-east-1
                    topology.kubernetes.io/zone=us-east-1b
You can also select nodes by node group using the eks.amazonaws.com/nodegroup label. Let's use this powerful construct
$ kubectl get nodes -l eks.amazonaws.com/nodegroup=nodegroup
Migrating pods to the new Node Pool
To migrate your pods to the new node pool, you must perform the following steps:
- Cordon the existing node group: This operation marks the nodes in the existing node group as unschedulable. Kubernetes stops scheduling new Pods to these nodes once you mark them as unschedulable.
- Drain the existing node group: This operation evicts the workloads running on the nodes of the existing node group gracefully.
You could cordon an individual node using the kubectl cordon command, but running this command on each node individually would be tedious. To speed up the process, we can embed the command in a loop.
$ for node in $(kubectl get nodes -l eks.amazonaws.com/nodegroup=nodegroup -o=name); do kubectl cordon "$node"; done
After running the loop, you should see that the nodes in the first node group have SchedulingDisabled status in the node list:
$ kubectl get nodes
Next, we want to evict the Pods already scheduled on each node. To do this, we will construct another loop, this time using the kubectl drain command:
$ for node in $(kubectl get nodes -l eks.amazonaws.com/nodegroup=nodegroup -o=name); do kubectl drain --force --ignore-daemonsets --delete-emptydir-data "$node"; done
As each node is drained, the pods running on it are evicted. Because the node group is unschedulable, the pods are now running on the new node group:
$ kubectl get pods -o wide
You can now delete the original node group (once again, we're using our config file but providing a filter that only deletes a single node group):
$ eksctl delete nodegroup \
  --config-file=ekscfg.yaml \
  --include=nodegroup \
  --approve
EKS includes the ability to scale the cluster based on scheduled workloads. EKS uses the cluster autoscaler add-on to automatically resize clusters based on the demands of the workloads you want to run.
We configured our new node group to have all the required labels and instance roles, so we can install cluster autoscaler:
$ curl -sSL https://raw.githubusercontent.com/kubernetes/autoscaler/master/cluster-autoscaler/cloudprovider/aws/examples/cluster-autoscaler-autodiscover.yaml |\
  sed "s/<YOUR CLUSTER NAME>/${YOUR_NAME}-eks/g" |\
  kubectl apply -f -
Once auto scaling is enabled, it will automatically add new nodes to your cluster if you have created new Pods that don't have enough capacity to run; conversely, if a node in your cluster is underutilized, Autoscaler can scale down the cluster by deleting the node.
Let us simulate some additional load to our web application by increasing the number of replicas:
$ kubectl scale deployment hello-k8s --replicas=40
This is more work than we have space in our cluster to handle:
$ kubectl get pods
We can see that there are many pods that are stuck with the status of "Pending". This means that Kubernetes has not yet been able to schedule that pod to a node.
Copy the name of one of the pods marked Pending, and look at its events with kubectl describe. You should see a message like the following:
$ kubectl describe pod hello-k8s-xxxxx-xxx
Events:
  Type     Reason            Age                  From               Message
  ----     ------            ----                 ----               -------
  Warning  FailedScheduling  67s (x7 over 6m48s)  default-scheduler  0/3 nodes are available: 1 Insufficient cpu.
The scheduler was unable to assign this pod to a node because there is not sufficient CPU space left in the cluster. We can add nodes to the cluster in order to have enough resources for all of the pods in our Deployment.
The autoscaler has noticed that there are pods in Pending, and creates new nodes to give them somewhere to go. After a few more minutes, you will see a new node has been created, and all the pods are now Running:
$ kubectl get nodes

# You should see more nodes

$ kubectl get pods

# All pods should have Running state
Cluster Autoscaler will scale down as well as up. If you were to resize to one Pod, or delete the Deployment and wait about 10 minutes, you would see that all but 2 of your nodes are considered unnecessary, and removed.
$ kubectl delete deployment hello-k8s
A Spot Instance is an unused EC2 instance that is available for less than the On-Demand price. Because Spot Instances enable you to request unused EC2 instances at steep discounts, you can lower your Amazon EC2 costs significantly. The hourly price for a Spot Instance is called a Spot price. The Spot price of each instance type in each Availability Zone is set by Amazon EC2, and is adjusted gradually based on the long-term supply of and demand for Spot Instances. Your Spot Instance runs whenever capacity is available and the maximum price per hour for your request exceeds the Spot price.
Spot Instances are a cost-effective choice if you can be flexible about when your applications run and if your applications can be interrupted. For example, Spot Instances are well-suited for data analysis, batch jobs, background processing, and optional tasks.
Go to Spot Instance requests.
And click the Pricing history button.

In the pricing history, select:
- Graph - Instance types
- Instance types - t2.small
- Availability Zone - us-east-1a
- Platform - Linux
- Date range - 1 week
You should see a graph of average Spot prices for the last week. Note the value, as we'll use the double the average price as our max spot price in configuration.

Before we create it, how do we schedule work on the spot VMs? These would be a special set of nodes for a special set of work - probably low priority or batch work. For that we'll use a combination of a NodeSelector and taints/tolerations.
Let's add a Spot instance group to our config file (once again, replace your_name_here):
$ export YOUR_NAME=your_name_here

$ cat << EOF > ekscfg.yaml
---
apiVersion: eksctl.io/v1alpha5
kind: ClusterConfig

metadata:
  name: ${YOUR_NAME}-eks
  region: us-east-1

managedNodeGroups:
- name: newgroup
  desiredCapacity: 3
  minSize: 2
  maxSize: 6
  instanceType: t2.small
  ssh:
    allow: false
    withAddonPolicies:
      autoScaler: true
      albIngress: true
  tags:
    # EC2 tags required for cluster-autoscaler auto-discovery
    k8s.io/cluster-autoscaler/enabled: "true"
    k8s.io/cluster-autoscaler/${YOUR_NAME}-eks: "owned"
    ita_group: "devops"
nodeGroups:
- name: spot
  minSize: 0
  maxSize: 10
  instancesDistribution:
    # set your own max price. AWS spot instance prices no longer cross OnDemand prices.
    # Comment out the field to default to OnDemand as max price.
    maxPrice: 0.014
    instanceTypes: ["t2.small"]
    onDemandBaseCapacity: 0
    onDemandPercentageAboveBaseCapacity: 0
    spotAllocationStrategy: capacity-optimized
  labels:
    lifecycle: Ec2Spot
    aws.amazon.com/spot: "true"
  taints:
    spotInstance: "true:PreferNoSchedule"
  tags:
    k8s.io/cluster-autoscaler/node-template/label/lifecycle: Ec2Spot
    ita_group: "devops"
    k8s.io/cluster-autoscaler/node-template/label/aws.amazon.com/spot: "true"
    k8s.io/cluster-autoscaler/node-template/taint/spotInstance: "true:PreferNoSchedule"
    k8s.io/cluster-autoscaler/enabled: "true"
    k8s.io/cluster-autoscaler/${YOUR_NAME}-eks: "owned"
    withAddonPolicies:
      autoScaler: true
      albIngress: true
cloudWatch:
  clusterLogging:
    enableTypes: ["api", "audit", "controllerManager"]
availabilityZones: ['us-east-1a', 'us-east-1b', 'us-east-1c', 'us-east-1d']
EOF
Now, create a node group:
$ eksctl create nodegroup --config-file=ekscfg.yaml --include=spot
We now have two node groups, but the new "spot" group is autoscaled and is sized to zero initially so we only see the 2-3 nodes from the autoscaled node group that we created in the previous section.
Usually as far as Kubernetes is concerned, all nodes are valid places to schedule pods. We may prefer to reserve the spot pool for workloads that are explicitly marked as suiting accidental termination — workloads which can be replaced if they die, versus those that generally expect their nodes to be long-lived.
To direct the scheduler to schedule pods onto the nodes in the spot group we first label the new nodes.
We marked the spot nodes with a taint, which makes the scheduler avoid using it for certain Pods.
We can then mark pods that we want to run on the spot nodes with a matching toleration, which says they are OK to be assigned to nodes with that taint.
Let's create a new workload that's designed to run on spot nodes and nowhere else.
$ cat <<EOF | kubectl apply -f -
apiVersion: apps/v1
kind: Deployment
metadata:
  labels:
    run: hello-k8s
  name: hello-spot
spec:
  replicas: 20
  selector:
    matchLabels:
      run: hello-k8s
  template:
    metadata:
      labels:
        run: hello-k8s
    spec:
      containers:
      - image: kennethreitz/httpbin
        name: hello-k8s
        ports:
        - containerPort: 80
          protocol: TCP
        resources:
          requests:
            cpu: "50m"
      tolerations:
      - key: spotInstance
        operator: Equal
        value: "true"
        effect: PreferNoSchedule
      nodeSelector:
        lifecycle: Ec2Spot
EOF
Wait ~10 minutes and run:
$ kubectl get nodes
You should see more nodes coming up. And check the pods:
$ kubectl get pods -o wide

# You should see all pods running on Spot nodes
Because of the NodeSelector initially there were no nodes on which we could schedule the work. The scheduler works in tandem with the Cluster Autoscaler to provision new nodes in the group with the node labels that match the NodeSelector. We haven't demonstrated it here but the taint would mean preferring to prevent workloads with pods that don't tolerate the taint from being scheduled on these nodes.
As we do the cleanup for this section, let's delete the spot node group and see what happens to the pods that we just created. This isn't something you would want to do in production :).
$ eksctl delete nodegroup \
  --config-file=ekscfg.yaml \
  --include=spot \
  --approve
After the nodes are deleted check the pods. All pods should be in pending state again:
$ kubectl get pods
As you can see, because of the NodeSelector, none of the pods are running. Now delete the deployment.
$ kubectl delete deployment hello-spot
Delete the cluster and all node groups
$ eksctl delete cluster \
  --config-file=ekscfg.yaml
Thank you! :)