
Last Updated: 2020-09-23
Overview
Google Cloud Platform (GCP) is a suite of cloud computing services that runs on the same infrastructure that Google uses internally for its end-user products, such as Google Search, Gmail, Drive and YouTube. Alongside a set of management tools, it provides a series of modular cloud services including computing, data storage, data analytics and machine learning.
Google Cloud Platform provides infrastructure as a service, platform as a service, and serverless computing environments.
But what do you do when you move to the cloud? Cloud migration is not just about migrating from bare-metal workload to VM-based workload! Cloud applications need to be adapted to the new environments that are fully managed and require less to no manual operation.
What you'll build
In this codelab, you'll learn how to replace the external dependencies that you would need to maintain and operate yourself with fully managed services on Google Cloud Platform..
You will:
- Configure CloudSQL Database.
- Use Pub/Sub for distributed messaging.
- Use StackDriver for distributed tracing and monitoring.
- Integrate with GCP APIs.
What you'll learn
- How to create and manage cloud databases
- How to create and manage different GCP services for cloud native applications
What you'll need
- A recent version of your favourite Web Browser
- Basics of BASH
- GCP Trial account
Create an Account
In this step, you register for the Google Cloud Platform free trial and create a project. The free trial provides you:
- $300 Credit for Free
- Access to Google Cloud Platform Products
- You Won't be Billed (though you need to enter your credit card)
- Build with the Power, Speed, Security, Reliability, and Scalability of Google
To register for the free trial open the free trial Registration page.
If you do not have a Gmail account, follow the steps to create one. Otherwise, login and complete the registration form.
Read and agree to the terms of service. Click Accept and start a free trial.
Create a Project
Next, create your first project using the Google Cloud Platform Console. The project is used to complete the rest of the lab.
To create a project in the Google Cloud Platform Console, click Select a project > Create a project.
In the New Project dialog: for Project name, type whatever you like. Make a note of the Project ID in the text below the project name box; you need it later. Then click Create.
Upgrade Account (Optional)
In the upper-right corner of the console, a button will appear asking you to upgrade your account. Click Create a Project when you see it. If the Upgrade button does not appear, you may skip this step. If the button appears later, click it when it does.
When you upgrade your account, you immediately have access to standard service quotas, which are higher than those available on the free trial.
Finalize
On the GCP Console, use the left-hand side menu to navigate to Compute Engine and ensure that there are no errors.
At the end of this lab, you may delete this project and close your billing account if desired.
Open CloudShell
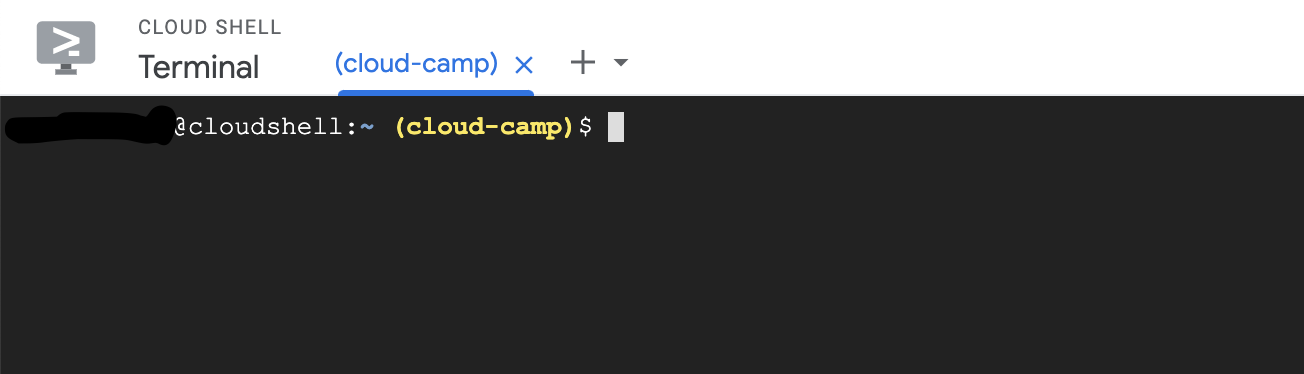
You will do most of the work from the Google Cloud Shell, a command line environment running in the Cloud. This virtual machine is loaded with all the development tools you'll need (docker, gcloud, kubectl and others) and offers a persistent 5GB home directory and runs in Google Cloud, greatly enhancing network performance and authentication. Open the Google Cloud Shell by clicking on the icon on the top right of the screen:

You should see the shell prompt at the bottom of the window:
Once connected to Cloud Shell, you should see that you are already authenticated and that the project is already set to your project ID.
Run the following command in Cloud Shell to confirm that you are authenticated
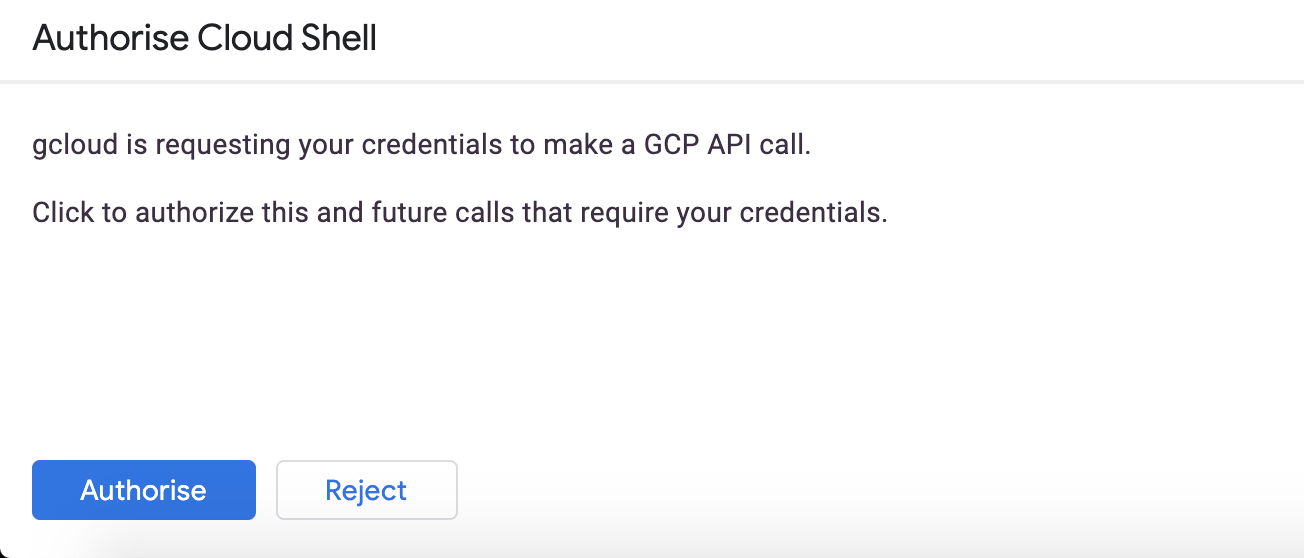
gcloud auth listIf it's the first time you are running Cloud Shell - authorize it.
You might need to run the command again after authorization. Command output:
 Credentialed Accounts
ACTIVE  ACCOUNT
*       <my_account>@<my_domain.com>

To set the active account, run:
$ gcloud config set account `ACCOUNT`Check if your project is set correctly.
gcloud config list projectCommand output
[core]
project = <PROJECT_ID>
If it is not, you can set it with this command:
gcloud config set project <PROJECT_ID>Bootstrap Backend
Generate a new Spring Boot app with Spring Initializr.
$ curl https://start.spring.io/starter.tgz \
    -d type=gradle-project \
    -d language=kotlin \
    -d bootVersion=2.3.4.RELEASE \
    -d dependencies=web,data-jpa,data-rest,hsql \
    -d baseDir=guestbook-backend | tar -xzvf -
If you are not familiar with a text-based editor, like vi, nano, or emacs, you can use the web-based code editor. Click on the Code Editor icon on the right hand side of the Cloud Shell.

This will launch the web-based editor.
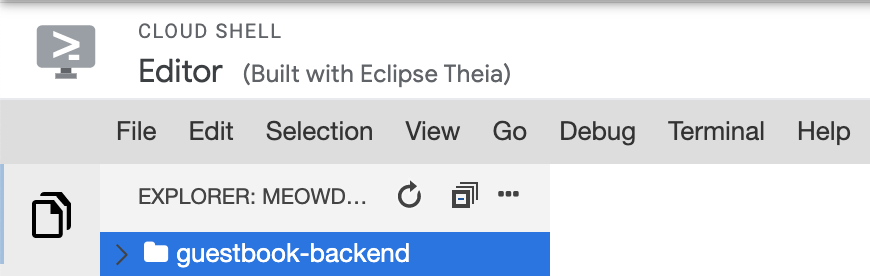
In the Code Editor expand the guestbook-backend -> src -> main -> resources and click the application.properties file. Paste the following code there to run the server on port 8081:
server.port=${PORT:8081}Next, edit the file guestbook-backend/src/main/kotlin/com/example/demo/DemoApplication.kt and replace it entirely with the following code:
package com.example.demo

import org.springframework.boot.autoconfigure.SpringBootApplication
import org.springframework.boot.runApplication
import org.springframework.data.repository.PagingAndSortingRepository
import org.springframework.data.rest.core.annotation.RepositoryRestResource
import javax.persistence.Entity
import javax.persistence.GeneratedValue
import javax.persistence.GenerationType
import javax.persistence.Id


@SpringBootApplication
class DemoApplication

fun main(args: Array<String>) {
        runApplication<DemoApplication>(*args)
}

@Entity
data class Message(
                @Id
                @GeneratedValue(strategy = GenerationType.IDENTITY)
                var id: Long,
                var name: String,
                var message: String,
                var imageUri: String? = null
)

@RepositoryRestResource
interface GuestbookMessageRepository : PagingAndSortingRepository<Message, Long>
Test it out in Cloud Shell:
$ cd ~/guestbook-backend
$ ./gradlew bootRun
This will start the backend on port 8081. As you configured in the src/main/resources/application.properties file.
While the service is still running, open a new Cloud Shell session tab, and test the service.

In the new tab run:
$ curl http://localhost:8081/messagesYou can post a new message.
$ curl -XPOST -H "content-type: application/json" \
  -d '{"name": "Vasya", "message": "Hello"}' \
  http://localhost:8081/messages
Check if the message is saved:
$ curl http://localhost:8081/messagesKeep the backend running in the first tab.
Bootstrap Frontend
In the second tab generate a new Spring Boot app with Spring Initializr.
$ curl https://start.spring.io/starter.tgz \
    -d type=gradle-project \
    -d language=kotlin \
    -d bootVersion=2.3.4.RELEASE \
    -d dependencies=web,thymeleaf,cloud-feign,hateoas \
    -d baseDir=guestbook-frontend | tar -xzvf -
In the Code Editor expand the guestbook-frontend -> src -> main -> resources and click the application.properties file. Paste the following code there to run the server on port 8080:
server.port=${PORT:8080}Now, right click the templates folder and click New File. Name the file index.html.
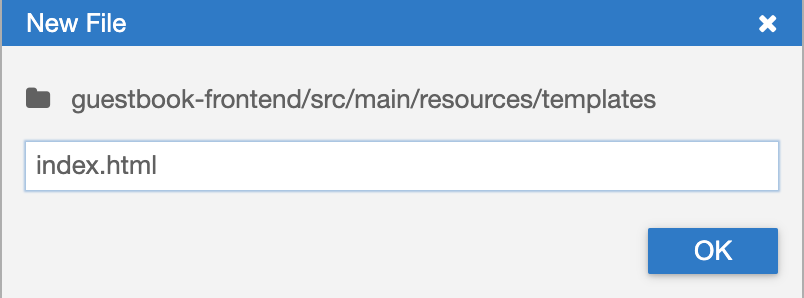
Finally, paste the following content there:
<html lang="en">

<head>
    <title>Demo Guestbook</title>
    <link rel="stylesheet" href="https://stackpath.bootstrapcdn.com/bootstrap/4.5.0/css/bootstrap.min.css"
        integrity="sha384-9aIt2nRpC12Uk9gS9baDl411NQApFmC26EwAOH8WgZl5MYYxFfc+NcPb1dKGj7Sk" crossorigin="anonymous">
    <meta charset="utf-8">
    </meta>
    <meta name="viewport" content="width=device-width, initial-scale=1">
    </meta>
    <style>
        body {
            padding-top: 80px;
        }

        form span {
            font-weight: bold;
            padding-right: 1em;
            display: block;
        }

        form input[type="submit"] {
            display: block;
            margin-top: 1em;
        }

        .greeting {
            padding-bottom: 0.5em;
        }

        .messages {
            border-top: 1px solid black
        }

        .message {
            display: block;
        }

        .message span {
            padding-top: 0.5em;
        }

        .message .username {
            font-weight: bold;
            width: 100px;
            float: left;
        }
    </style>
</head>

<body>
    <nav class="navbar navbar-inverse navbar-fixed-top">
        <div class="container">
            <div class="navbar-header">
                <a class="navbar-brand" href="#">Guestbook</a>
            </div>
        </div>
    </nav>

    <div class="main container">
        <div class="input">
            <form action="/post" method="post">
                <span>Your name:</span><input type="text" name="name" th:value="${name}" />
                <span>Message:</span><input type="text" name="message" />
                <input type="submit" value="Post" />
            </form>
        </div>

        <div th:if="${greeting != null}" class="greeting">
            <span th:text="${greeting}">Greeting</span>
        </div>

        <div class="messages">
            <div th:each="message: ${messages}" class="message">
                <span th:text="${message.name}" class="username">Username</span>
                <span th:text="${message.message}" class="message">Message</span>
            </div>
        </div>

    </div>

    <script src="https://code.jquery.com/jquery-3.5.1.slim.min.js"
        integrity="sha384-DfXdz2htPH0lsSSs5nCTpuj/zy4C+OGpamoFVy38MVBnE+IbbVYUew+OrCXaRkfj"
        crossorigin="anonymous"></script>
    <script src="https://cdn.jsdelivr.net/npm/popper.js@1.16.0/dist/umd/popper.min.js"
        integrity="sha384-Q6E9RHvbIyZFJoft+2mJbHaEWldlvI9IOYy5n3zV9zzTtmI3UksdQRVvoxMfooAo"
        crossorigin="anonymous"></script>
    <script src="https://stackpath.bootstrapcdn.com/bootstrap/4.5.0/js/bootstrap.min.js"
        integrity="sha384-OgVRvuATP1z7JjHLkuOU7Xw704+h835Lr+6QL9UvYjZE3Ipu6Tp75j7Bh/kR0JKI"
        crossorigin="anonymous"></script>
</body>

</html>
Next, edit the file guestbook-frontend/src/main/kotlin/com/example/demo/DemoApplication.kt and replace it entirely with the following code:
package com.example.demo

import org.springframework.beans.factory.annotation.Autowired
import org.springframework.beans.factory.annotation.Value
import org.springframework.boot.autoconfigure.SpringBootApplication
import org.springframework.boot.runApplication
import org.springframework.cloud.openfeign.EnableFeignClients
import org.springframework.cloud.openfeign.FeignClient
import org.springframework.hateoas.PagedModel
import org.springframework.hateoas.RepresentationModel
import org.springframework.hateoas.config.EnableHypermediaSupport
import org.springframework.stereotype.Controller
import org.springframework.ui.Model
import org.springframework.web.bind.annotation.*


@SpringBootApplication
// Enable consumption of HATEOS payloads
@EnableHypermediaSupport(type = [EnableHypermediaSupport.HypermediaType.HAL])
// Enable Feign Clients
@EnableFeignClients
class DemoApplication

fun main(args: Array<String>) {
    runApplication<DemoApplication>(*args)
}

data class Message(
                var id: String? = null,
                var name: String,
                var message: String,
                var imageUri: String? = null
) : RepresentationModel<Message>()

// We can use a number of different clients. For the lab, we'll use Feign.
// For simplicity, we'll just use Map to represent the entities.
// We'll default the endpoint to localhost for now, this will be overridden.
@FeignClient(
                value = "messages",
                url = "\${messages.endpoint:http://localhost:8081/messages}"
)
interface MessagesClient {
        @get:RequestMapping(method = [RequestMethod.GET], path = ["/"])
        val messages: PagedModel<Message>

        @RequestMapping(method = [RequestMethod.GET], path = ["/{id}"])
        fun getMessage(@PathVariable("id") messageId: Long): Message

        @RequestMapping(method = [RequestMethod.POST], path = ["/"])
        fun add(@RequestBody message: Message): Message
}

@Controller
@SessionAttributes("name")
class FrontendController @Autowired constructor(
                private val client: MessagesClient
) {

        @Value("\${greeting:Hello}")
        private val greeting: String? = null
        @GetMapping("/")
        fun index(model: Model): String {
                if (model.containsAttribute("name")) {
                        val name = model.asMap()["name"] as String
                        model.addAttribute("greeting", "$greeting $name")
                }
                model.addAttribute("messages", client.messages.content)
                return "index"
        }

        @PostMapping("/post")
        fun post(@RequestParam name: String, @RequestParam message: String?, model: Model): String {
                model.addAttribute("name", name)
                message?.let { msg ->
                        if (msg.trim().isNotEmpty()) {
                                // Post the message to the backend service
                                val payload = Message(name = name, message = msg)
                                client.add(payload)
                        }
                }
                return "redirect:/"
        }
}
Test it out in Cloud Shell:
$ cd ~/guestbook-frontend
$ ./gradlew bootRun
This should launch the frontend application on port 8080. Use Cloud Shell's web preview for port 8080.
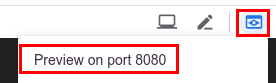
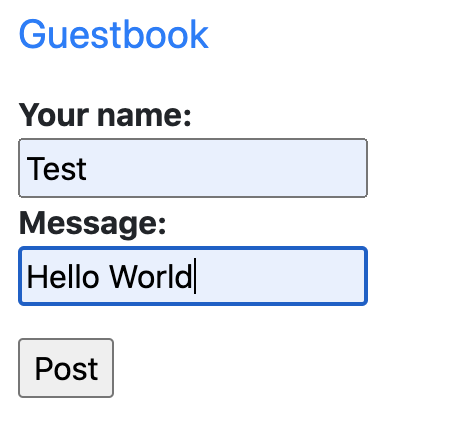
This will open a new browser tab.
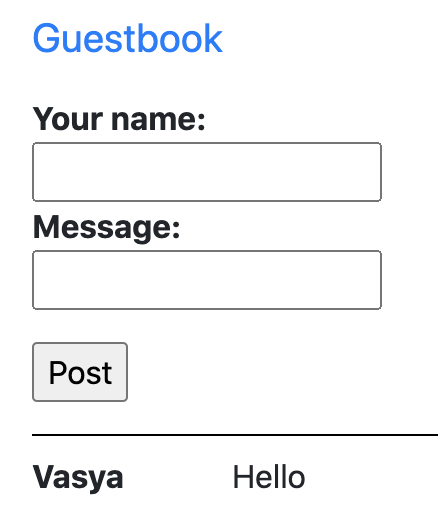
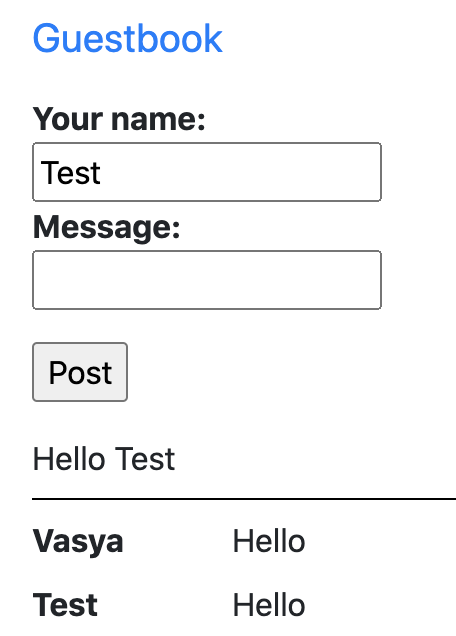
Try to post the name and the message. Once done, you should see the messages listed below.
That's a quick way to put together a simple microservice application composed of a backend and a frontend consuming it.
For now, stop the frontend app with Control+C. In the second shell tab, you can list all the messages you added via the backend API:
$ curl -s http://localhost:8081/messages \
  | jq -r '._embedded.messages[] | {name: .name, message: .message}'
Finally, go to the first tab and stop the backend app with Control+C.
Rather than maintaining your own MySQL instance, in the cloud, you should use managed services as much as possible to reduce operation overhead and increase reliability. Google Cloud Platform has a managed MySQL and PostgreSQL service called CloudSQL.
Create a new Cloud SQL Instance
Enable the Cloud SQL Admin API.
$ gcloud services enable sqladmin.googleapis.comTo list your CloudSQL instances run (you should have 0 for now):
$ gcloud sql instances listProvision a new CloudSQL instance (this will take some time).
$ gcloud sql instances create guestbook --region=europe-west3Create a new messages database within the MySQL instance.
$ gcloud sql databases create messages --instance guestbookConnect to CloudSQL and create the schema
CloudSQL, by default, is not accessible via any public IP addresses. There are several different ways to connect to it:
- Using a local CloudSQL proxy
- Use
gcloudto connect via a CLI client - From Java application, using the MySQL JDBC driver with an SSL Socket Factory for secured connection
Use gcloud CLI to connect to the database. This will temporarily whitelist the IP address for connection. The root password is empty by default.
$ gcloud sql connect guestbookList the databases.
mysql> show databases;
+--------------------+
| Database           |
+--------------------+
| information_schema |
| messages           |
| mysql              |
| performance_schema |
| sys                |
+--------------------+
4 rows in set (0.01 sec)
Switch to the messages database and create the table.
mysql> use messages;
Database changed
mysql> CREATE TABLE message (
  id BIGINT NOT NULL AUTO_INCREMENT,
  name CHAR(128) NOT NULL,
  message CHAR(255),
  image_uri CHAR(255),
  PRIMARY KEY (id)
);
mysql> exit
Add Spring Cloud GCP CloudSQL Starter
From a Java application, you can consume the CloudSQL instance using the JDBC driver. However, the JDBC driver configuration can be a little bit more complicated than most due to additional security that Google Cloud Platform put in place.
To make this configuration Google created a Spring Cloud GCP project that can easily auto-configure your Spring Boot applications to consume GCP services, including CloudSQL.
Update the Guestbook Backend's build.gradle.kts to use the Spring Cloud GCP Cloud SQL Starter. The starter dependency is included in Spring Cloud BOM.
Edit guestbook-backend/build.gradle.kts and change the dependencies section to look as follows:
extra["springCloudVersion"] = "Hoxton.SR8"

dependencyManagement {
        imports {
                mavenBom("org.springframework.cloud:spring-cloud-dependencies:${property("springCloudVersion")}")
        }
}

dependencies {
        implementation("org.springframework.boot:spring-boot-starter-data-jpa")
        implementation("org.springframework.cloud:spring-cloud-gcp-starter-sql-mysql")
        implementation("org.springframework.boot:spring-boot-starter-data-rest")
        implementation("org.springframework.boot:spring-boot-starter-web")
        implementation("com.fasterxml.jackson.module:jackson-module-kotlin")
        implementation("org.jetbrains.kotlin:kotlin-reflect")
        implementation("org.jetbrains.kotlin:kotlin-stdlib-jdk8")
        runtimeOnly("org.hsqldb:hsqldb")
        testImplementation("org.springframework.boot:spring-boot-starter-test") {
                exclude(group = "org.junit.vintage", module = "junit-vintage-engine")
        }
}
For local testing, you can continue to use a local database or an embedded database. For example, this lab uses embedded HSQL database for local runs. You can disable CloudSQL starter in the default profile.
Update the existing guestbook-backend/src/main/resources/application.properties:
server.port=${PORT:8081}

# Disable Cloud SQL for development
spring.cloud.gcp.sql.enabled=false
When deploying the application into the cloud, you'll want to use the production managed CloudSQL instance. To do this, we'll use Spring's configuration profile and create a new cloud profile.
Find the Instance Connection name using the command line.
$ gcloud sql instances describe guestbook --format='value(connectionName)'Create a new guestbook-backend/src/main/resources/application-cloud.properties. Paste the following:
spring.cloud.gcp.sql.enabled=true
spring.cloud.gcp.sql.database-name=messages
spring.cloud.gcp.sql.instance-connection-name=YOUR_INSTANCE_CONNECTION_NAME
You can configure the JDBC connection pool just like you do with any other Spring Boot applications using the spring.datasource.* configuration properties. Reduce the connection pool size in application-cloud.properties by adding:
spring.datasource.hikari.maximum-pool-size=5Test the new backend database
Make sure you are in the guestbook-backend directory.
$ cd ~/guestbook-backendStop the Guestbook Backend that's already running, and restart it with the cloud profile.
$ ./gradlew bootRun --args='--spring.profiles.active=cloud'During the application startup, validate that you see CloudSQL related connection logs.
...    : Connecting to Cloud SQL instance [cloud-camp:europe-west3:guestbook] via SSL socket.
...    : First Cloud SQL connection, generating RSA key pair.
...
...    : Connecting to Cloud SQL instance [cloud-camp:europe-west3:guestbook] via SSL socket.
...
In a new Cloud Shell tab, make a few calls using curl.
$ curl -XPOST -H "content-type: application/json" \
  -d '{"name": "Vasya", "message": "Hello CloudSQL"}' \
  http://localhost:8081/messages
You can also list all the messages.
$ curl http://localhost:8081/messagesYou can also use CloudSQL client to validate. First, connect to the instance:
$ gcloud sql connect guestbookThen check the database:
mysql> use messages;
mysql> select * from message;
+----+-------+----------------+-----------+
| id | name  | message        | image_uri |
+----+-------+----------------+-----------+
|  1 | Vasya | Hello CloudSQL | NULL      |
+----+-------+----------------+-----------+
1 row in set (0.04 sec)
mysql> exit;
Finally, if you run the frontend, you can use the Web Preview feature to see the frontend, and interact with the backend.
In a microservices architecture, you need distributed tracing to get better observability for complicated service calls. E.g., when service A calls B that calls C, which service is having issues? This typically requires you to run and operate your own Zipkin backend, but in GCP you can forward the trace request to Stackdriver Trace instead!
In the Cloud Shell tab, enable Stackdriver Trace API first In order to use Stackdriver Trace to store your trace data.
$ gcloud services enable cloudtrace.googleapis.comConfigure tracing for Backend
Add the Spring Cloud GCP Trace starter to guestbook-backend/build.gradle.kts.
dependencies {
    implementation("org.springframework.cloud:spring-cloud-gcp-starter-trace")
        ...
}
For testing purposes, we'll disable trace in the local profile in guestbook-backend/src/main/resources/application.properties.
...
spring.cloud.gcp.trace.enabled=false
For the cloud profile, we'll enable trace sampling for 100% of the requests in guestbook-backend/src/main/resources/application-cloud.properties.
...
spring.cloud.gcp.trace.enabled=true
spring.sleuth.sampler.probability=1.0
spring.sleuth.scheduled.enabled=falseConfigure tracing for Frontend
Add the Spring Cloud GCP Trace starter to guestbook-frontend/build.gradle.kts.
dependencies {
    implementation("org.springframework.cloud:spring-cloud-gcp-starter-trace")
        ...
}
For testing purposes, we'll disable trace in the local profile in guestbook-frontend/src/main/resources/application.properties.
...
spring.cloud.gcp.trace.enabled=false
For the cloud profile, we'll enable trace sampling for 100% of the requests in guestbook-backend/src/main/resources/application-cloud.properties. Create the application-cloud.properties.
spring.cloud.gcp.trace.enabled=true
spring.sleuth.sampler.probability=1.0
spring.sleuth.scheduled.enabled=false
Setup a Service Account
For this codelab, you'll need to use a service account with the proper permissions to propagate Trace data to Stackdriver Trace.
Create a service account specific to the Guestbook application.
$ export PROJECT_ID=$(gcloud config list --format 'value(core.project)')
$ gcloud iam service-accounts create guestbook
Add the Project Editor role to this service account.
$ gcloud projects add-iam-policy-binding ${PROJECT_ID} \
  --member serviceAccount:guestbook@${PROJECT_ID}.iam.gserviceaccount.com \
--role roles/editorGenerate the JSON key file to be used by the application to identify itself using the service account.
$ gcloud iam service-accounts keys create \
    ~/service-account.json \
--iam-account guestbook@${PROJECT_ID}.iam.gserviceaccount.comTest the StackDriver Tracing
To test, restart both applications, but with the additional spring.cloud.gcp.credentials.location property to specify the location of the service account credential you created.
Stop the existing Guestbook Backend and restart it.
$ cd ~/guestbook-backend
$ export SPRING_CLOUD_GCP_CREDENTIALS_LOCATION=file:///$HOME/service-account.json
$ ./gradlew bootRun --args='--spring.profiles.active=cloud'
Stop the existing Guestbook Frontend and restart it (open a new Cloud Shell tab if needed).
$ cd ~/guestbook-frontend
$ export SPRING_CLOUD_GCP_CREDENTIALS_LOCATION=file:///$HOME/service-account.json
$ ./gradlew bootRun --args='--spring.profiles.active=cloud'
Make a request from Cloud Shell web preview. or, make a couple of requests from Cloud Shell.
$ curl http://localhost:8080Examine the traces
The trace would've been generated and propagated by Spring Cloud Sleuth, and in a few seconds or so, it'll be propagated to Stackdriver Trace.
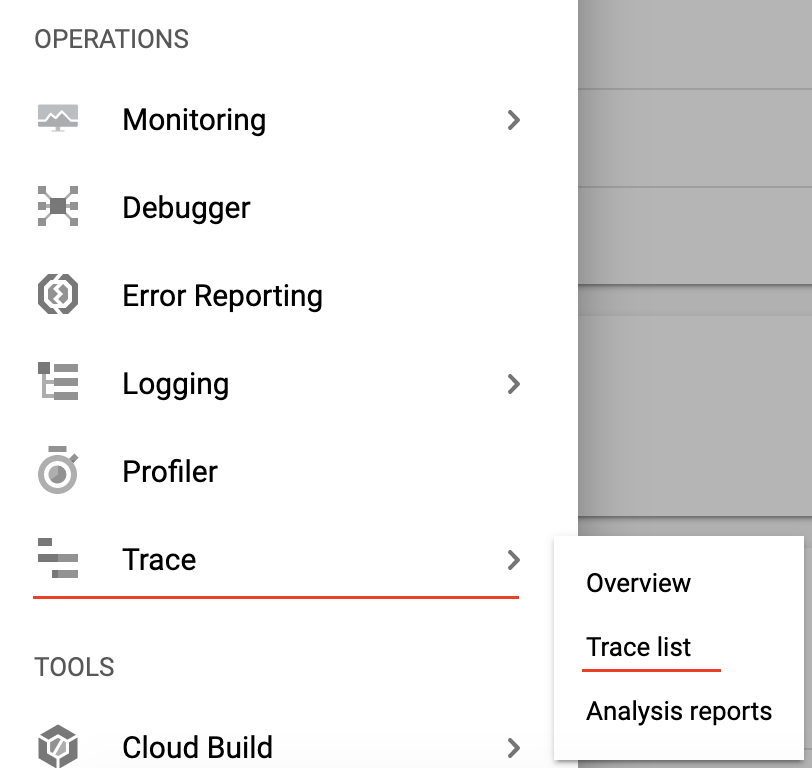
In a new browser tab, from the Google Cloud Platform console, navigate to Operations → Trace → Trace List. You should see the traces for the requests you've made.
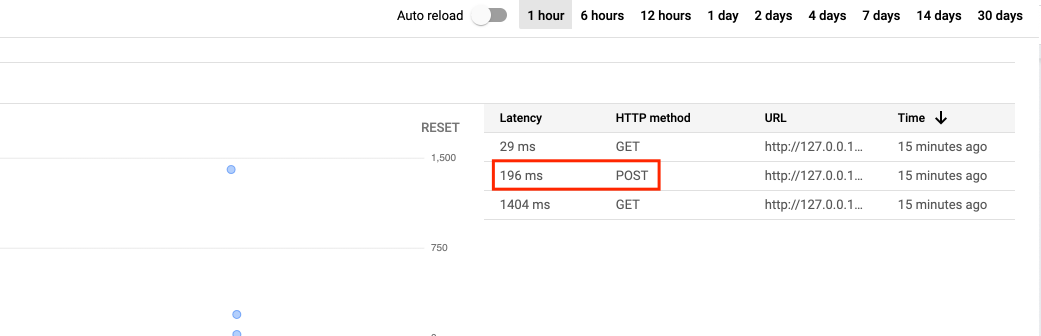
On the top, narrow down the time range to 1 hour. By default, Auto Reload is off, so you need to enable it. As trace data arrives, it will show up in the console.

The trace data should show up in ~30 seconds or so.
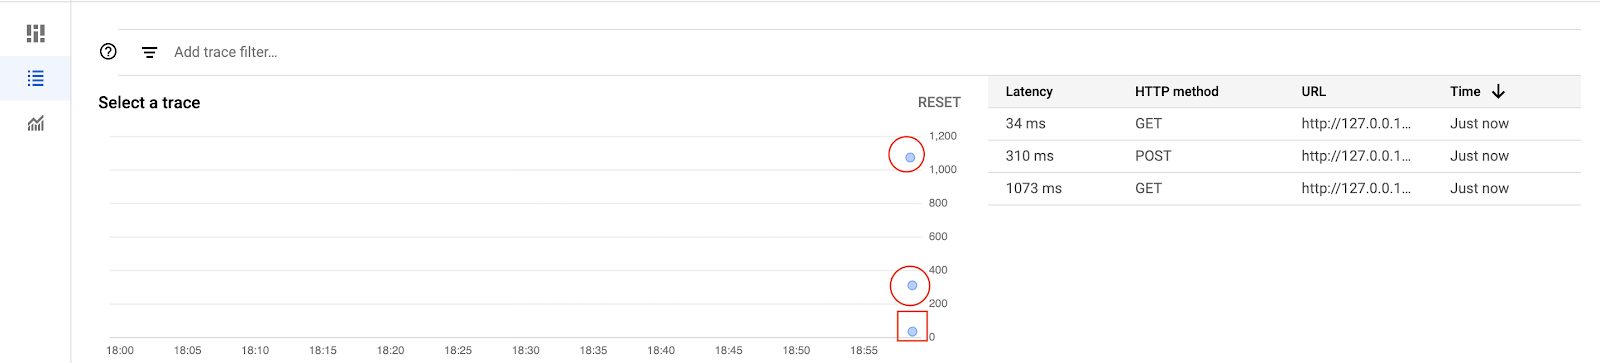
Click the blue dot to see trace detail.
When running multiple microservices, it's useful to be able to aggregate logs into a centralized logging infrastructure. This is typically done using the ELK (ElasticSearch, LogStash, Kibana) stack. On Google Cloud Platform, you can use Stackdriver Logging.
If you run your application on-premise, you can stream logs to Stackdriver Logging via the API. If you run your application in Google Cloud environments, such as App Engine, Kubernetes Engine, or Cloud Run, you can output the logs to STDOUT and the entries will be automatically aggregated.
In a Cloud Shell tab, enable Stackdriver Logging API. It might've already been enabled by other products you've used.
$ gcloud services enable logging.googleapis.comConfigure logging for Frontend
Add some log messages to the Frontend Controller. Edit the guestbook-frontend/src/main/kotlin/com/example/demo/DemoApplication.kt.
First, at the top of the file at the end of the import statements add:
// Logger imports
import org.slf4j.Logger
import org.slf4j.LoggerFactory
Then, at the end of the file find the FrontendController class and add logger property:
@Controller
@SessionAttributes("name")
class FrontendController @Autowired constructor(
                private val client: MessagesClient
) {

        val logger: Logger = LoggerFactory.getLogger(FrontendController::class.java)
     // ... other code
}
Finally, find the post function and edit it to include logging messages:
        @PostMapping("/post")
        fun post(@RequestParam name: String, @RequestParam message: String?, model: Model): String {
                model.addAttribute("name", name)
                message?.let { msg ->
                        if (msg.trim().isNotEmpty()) {
                                // Add a log message at the beginning
                                logger.info("Saving message")
                                // Post the message to the backend service
                                val payload = Message(name = name, message = msg)
                                client.add(payload)
                                // Add a log message at the end.
                                logger.info("Saved message")
                        }
                }
                return "redirect:/"
        }
Add the Spring Cloud GCP Logging starter to guestbook-frontend/build.gradle.kts.
dependencies {
        implementation("org.springframework.cloud:spring-cloud-gcp-starter-logging")
        // other dependencies
}
To send log entries to Stackdriver Logging, create a logback-spring.xml and configure it to use the Stackdriver Logging appender. Create a new file guestbook-frontend/src/main/resources/logback-spring.xml. Paste the following:
<configuration>
    <include resource="org/springframework/boot/logging/logback/defaults.xml" />
    <include resource="org/springframework/boot/logging/logback/console-appender.xml" />

    <springProfile name="cloud">
        <include resource="org/springframework/cloud/gcp/logging/logback-appender.xml"/>
        <root level="INFO">
            <appender-ref ref="STACKDRIVER"/>
            <appender-ref ref="CONSOLE"/>
        </root>
    </springProfile>
    <springProfile name="default">
        <root level="INFO">
            <appender-ref ref="CONSOLE"/>
        </root>
    </springProfile>
</configuration>
This configuration uses only the Console appender in development. It uses both Console appender and the Stackdriver appender when using the cloud profile.
Test Logging
To test, restart both applications. Don't forget the additional spring.cloud.gcp.credentials.location property to specify the location of the service account credential you created.
Stop the existing Guestbook Backend and restart it.
$ cd ~/guestbook-backend
$ export SPRING_CLOUD_GCP_CREDENTIALS_LOCATION=file:///$HOME/service-account.json
$ ./gradlew bootRun --args='--spring.profiles.active=cloud'
Stop the existing Guestbook Frontend and restart it (open a new Cloud Shell tab if needed).
$ cd ~/guestbook-frontend
$ export SPRING_CLOUD_GCP_CREDENTIALS_LOCATION=file:///$HOME/service-account.json
$ ./gradlew bootRun --args='--spring.profiles.active=cloud'
Use Web Preview to see the frontend application.
Post a message.
In the Frontend's console output, examine the message that should look something like:
... INFO [,5f915fb1aca708339f5599f2effd58ce,9f5599f2effd58ce,true] 15139 --- [nio-8080-exec-3] com.example.demo.FrontendController      : Saving message
... INFO [,5f915fb1aca708339f5599f2effd58ce,9f5599f2effd58ce,true] 15139 --- [nio-8080-exec-3] com.example.demo.FrontendController      : Saved message
Because you enabled Tracing, each log message is also associated with the trace ID, span ID, and sampled bit (which is always true, because we set the probability to 1.0 - 100%).
Examine the Stackdriver logs & traces
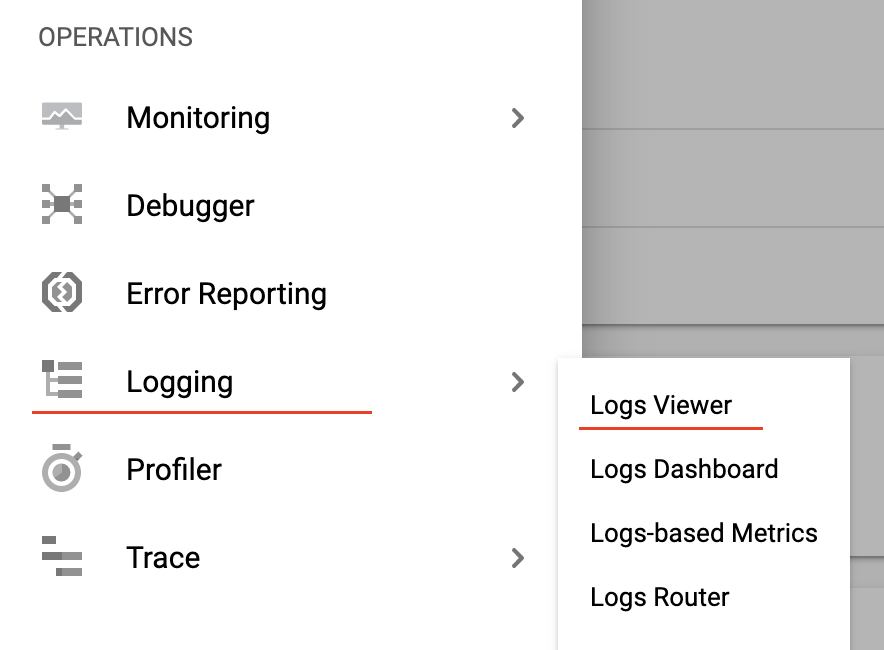
In a new browser tab, from the Google Cloud Platform console, navigate to Operations → Logging → Logs Viewer.
Click the Query preview and paste the following query:
resource.type="gce_instance"Then click Run Query.

You can now see the log message in Stackdriver Logging. Notice that if you expand the "Saved message", you will see the trace and spanId attributes.
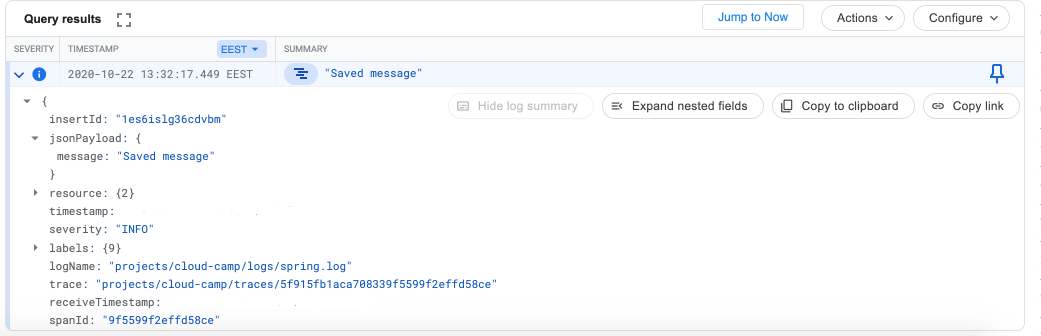
Each log entry is associated with the corresponding Trace ID and Span ID. Stackdriver Logging can automatically correlate the traces to the log messages too.
From the Google Cloud Platform console, navigate to Operations → Trace → Trace List.
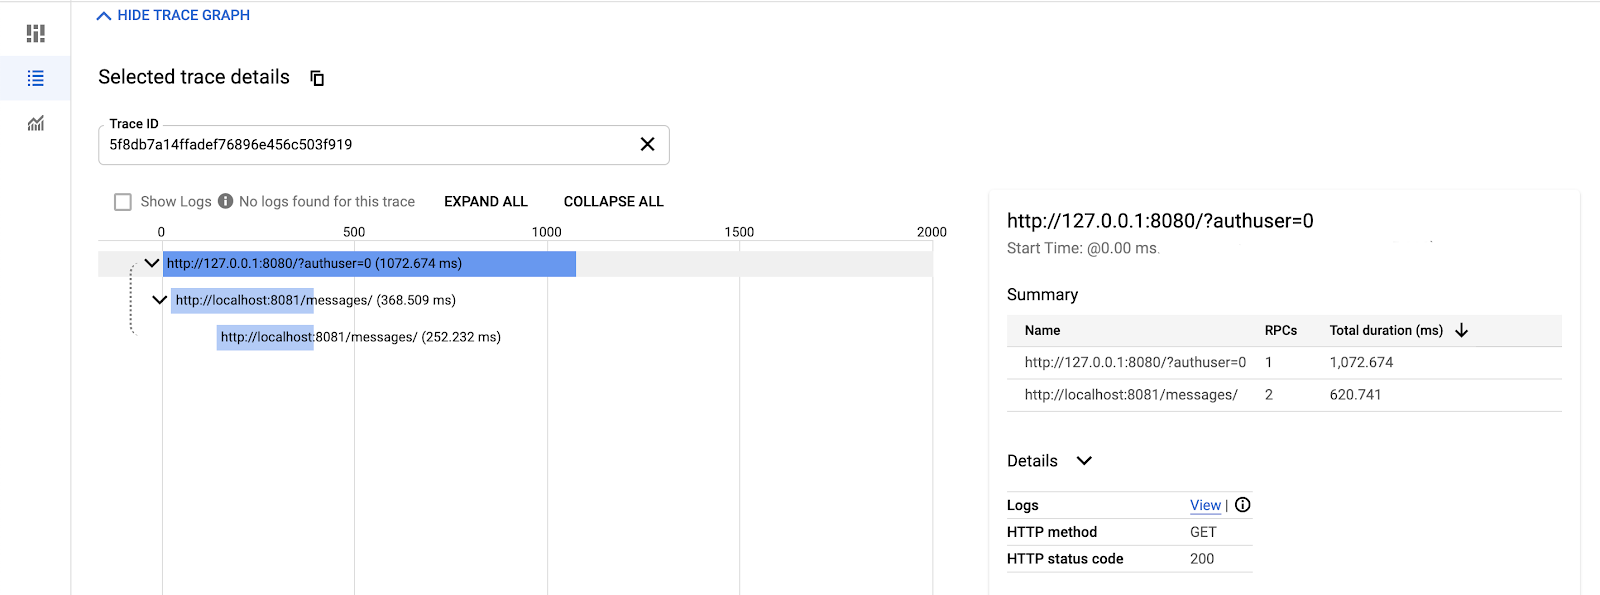
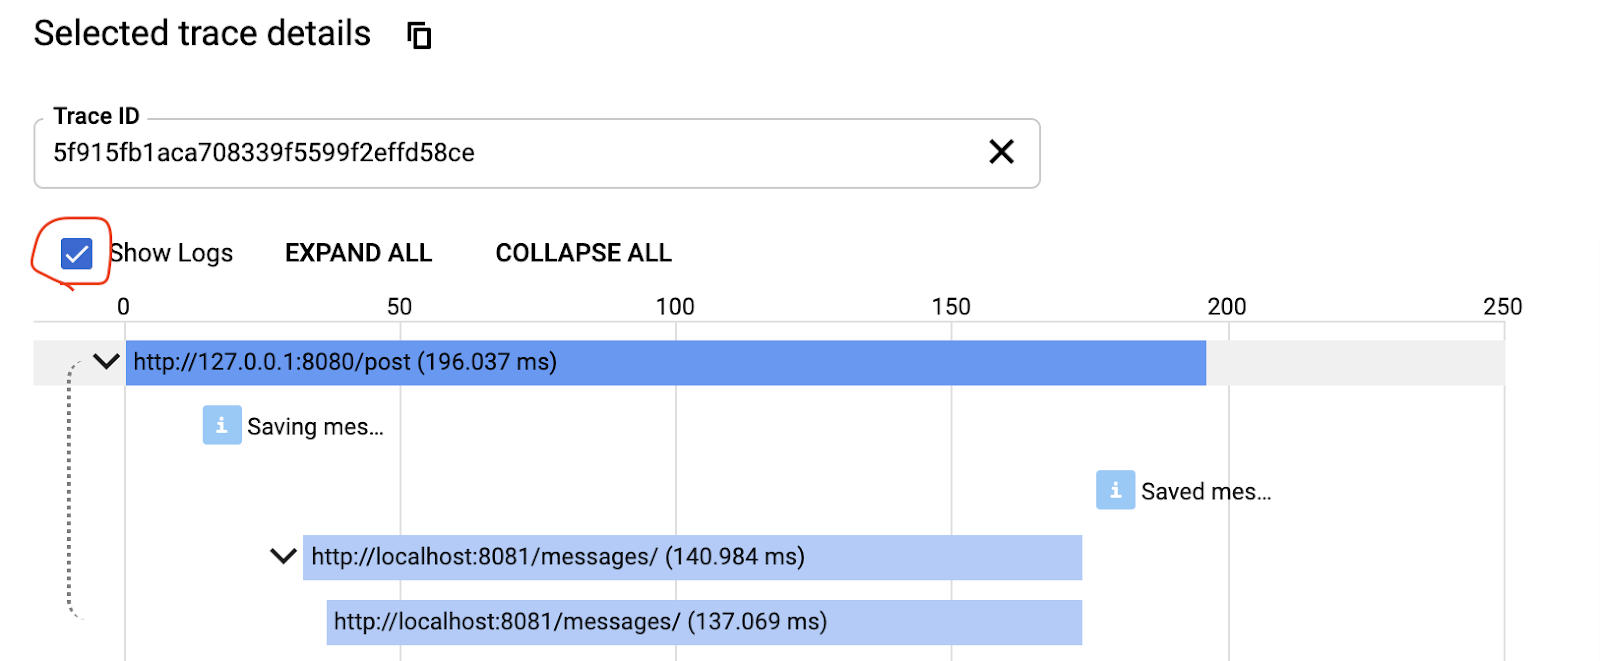
Find the latest trace that posts to the endpoint, and click the blue dot to see the trace detail.
Click on Show Logs to see the log messages correlated to the trace.
Let's enhance our application so that it can publish a message to a topic that can then be subscribed and processed by other services.
First, enable the Pub/Sub API.
$ gcloud services enable pubsub.googleapis.comConfigure Pub/Sub
Create a new topic to send the messages to.
$ gcloud pubsub topics create messagesAdd the Spring Cloud GCP Pub/Sub starter to guestbook-frontend/build.gradle.kts.
dependencies {
        implementation("org.springframework.cloud:spring-cloud-gcp-starter-pubsub")
        // other dependencies
}
The simplest way to publish a message to Pub/Sub using Spring Cloud GCP is to use the PubSubTemplate, which is automatically configured and made available by the starter.
Add PubSubTemplate to FrontendController and use it to publish a message.
Edit the guestbook-frontend/src/main/kotlin/com/example/demo/DemoApplication.kt.
First, at the top of the file at the end of the import statements add:
// Pubsub imports
import org.springframework.cloud.gcp.pubsub.core.*
Then, at the end of the file find the FrontendController class and add pubsubTemplate in constructor:
@Controller
@SessionAttributes("name")
class FrontendController @Autowired constructor(
                private val client: MessagesClient,
                private val pubSubTemplate: PubSubTemplate
) {
     // ... other code
}
Finally, find the post function and edit it to include publishing of messages:
        @PostMapping("/post")
        fun post(@RequestParam name: String, @RequestParam message: String?, model: Model): String {
                model.addAttribute("name", name)
                message?.let { msg ->
                        if (msg.trim().isNotEmpty()) {
                                // Add a log message at the beginning
                                logger.info("Saving message")
                                // Post the message to the backend service
                                val payload = Message(name = name, message = msg)
                                client.add(payload)
                                // Add a log message at the end.
                                logger.info("Saved message")
                                // At the very end, publish the message
                                pubSubTemplate.publish("messages", "$name: $message")
                        }
                }
                return "redirect:/"
        }
Stop the existing Guestbook Frontend and restart it (open a new Cloud Shell tab if needed).
$ cd ~/guestbook-frontend
$ export SPRING_CLOUD_GCP_CREDENTIALS_LOCATION=file:///$HOME/service-account.json
$ ./gradlew bootRun --args='--spring.profiles.active=cloud'
Use Web Preview to see the frontend application.
Post a message.
This will then publish a message to the Pub/Sub topic
Subscribe to messages
To subscribe to a topic, you need to create a subscription first. Pub/Sub supports pull subscription and push subscription. With a pull subscription, clients can actively pull messages from the topic. With a push subscription, Pub/Sub can actively publish messages to a target webhook endpoint.
A topic can have multiple subscriptions. A subscription can have many subscribers. If you want to distribute different messages around to different subscribers, then all the subscribers must be subscribing to the same subscription. If you want to publish the same messages to all the subscribers, then each subscriber needs to subscribe to its own subscription.
Pub/Sub delivery is at-least once. Hence, you must deal with idempotency and/or de-duplicate messages if you cannot process the same message more than once.
To create a subscription:
$ gcloud pubsub subscriptions create messages-subscription-1 \
  --topic=messages
Pull messages from the subscription.
$ gcloud pubsub subscriptions pull messages-subscription-1
Listed 0 items.
The message you posted earlier will not show up just yet. It's because the message was published prior to the creation of a subscription. Go back to the frontend application and post another message, and then pull the message again.
$ gcloud pubsub subscriptions pull messages-subscription-1You should see the message. However, the message will remain in the subscription until it's acknowledged.
To pull the message and remove it from subscription from the command line, use auto-acknowledgement.
$ gcloud pubsub subscriptions pull messages-subscription-1 --auto-ackWe can create an application to listen to subscriptions automatically.
Generate a new Spring Boot app with Spring Initializr.
$ cd ~
$ curl https://start.spring.io/starter.tgz \
    -d type=gradle-project \
    -d language=kotlin \
    -d dependencies=cloud-gcp-pubsub \
    -d baseDir=message-processor | tar -xzvf -
This will generate a new Spring Boot project with Cloud Pub/Sub starter pre-configured.
Open message-processor/build.gradle.kts to validate the starter dependency was automatically added.
dependencies {
...
        implementation("org.springframework.cloud:spring-cloud-gcp-starter-pubsub")
...
}
Replace everything in message-processor/src/main/kotlin/com/example/demo/DemoApplication.kt with following code to listen to new messages delivered to the topic.
package com.example.demo

import org.springframework.beans.factory.DisposableBean
import org.springframework.boot.ApplicationRunner
import org.springframework.boot.Banner
import org.springframework.boot.autoconfigure.SpringBootApplication
import org.springframework.boot.runApplication
import org.springframework.cloud.gcp.pubsub.core.PubSubTemplate
import org.springframework.context.ApplicationContext
import org.springframework.context.annotation.Bean
import java.util.concurrent.CountDownLatch


@SpringBootApplication
class DemoApplication {

    @Bean
    fun cli(pubSubTemplate: PubSubTemplate): ApplicationRunner {
        return ApplicationRunner {
            pubSubTemplate.subscribe("messages-subscription-1") { msg ->
                println(msg.pubsubMessage.data.toStringUtf8())
                msg.ack()
            }
        }
    }

    @Bean
    fun contextShutdownGate(context: ApplicationContext): DisposableBean {
        val latch = CountDownLatch(1)
        val await = Thread({
                        try {
                                latch.await()
                        } catch (e: InterruptedException) {
                                println("contextAwait interrupted: $e")
                        }
                }, "contextAwait-${context.id}-${context.startupDate}")
        await.isDaemon = false
        await.start()
        return DisposableBean { latch.countDown() }
    }
}

fun main(args: Array<String>) {
    runApplication<DemoApplication>(*args) {
        setBannerMode(Banner.Mode.OFF)
    }
}
Open a new Cloud Shell tab and start the message-processor to listen to the topic.
$ cd ~/message-processor
$ ./gradlew bootRun
Browse to the frontend again, and post a few messages.
Validate that the Pub/Sub messages are received in the Message Processor. Processed messages should show in the log like this:
...  INFO 27940 --- [           main] com.example.demo.DemoApplicationKt       : Started DemoApplicationKt in 1.729 seconds (JVM running for 2.044)
Test: Hello World
Vasya: Hi
Finally, stop the message processor.
Google Cloud Platform has a bucket-based blob storage called Cloud Storage (GCS). Cloud Storage is designed to store a large number and amount of binary data, so that you don't need to manage your own file systems and/or file sharing services. Cloud Storage is usable across many Google Cloud Platform products whenever you need to store files. E.g., you can store data files on GCS and process it in a managed Hadoop (Dataproc) cluster. You can also import structured data into BigQuery for ad hoc data analytics using standard SQL.
Let's add the ability to upload an image associated with the message, and the image will be stored in Google Cloud Storage.
Configure Cloud Storage
In the Guestbook Frontend add the Spring Cloud GCP Cloud Storage starter to guestbook-frontend/build.gradle.kts.
dependencies {
        implementation("org.springframework.cloud:spring-cloud-gcp-starter-storage")
        // other dependencies
}
Create a Cloud Storage bucket to store the uploaded file. Bucket names are globally unique. Create a new bucket based on the Project ID.
$ export PROJECT_ID=$(gcloud config list --format 'value(core.project)')
$ gsutil mb gs://${PROJECT_ID}-example
Update the FrontendContoller to accept the file in guestbook-frontend/src/main/kotlin/com/example/demo/DemoApplication.kt.
First, at the top of the file at the end of the import statements add:
// File related imports
import org.springframework.cloud.gcp.core.GcpProjectIdProvider
import org.springframework.web.multipart.MultipartFile
import org.springframework.context.ApplicationContext
import org.springframework.core.io.Resource
import org.springframework.core.io.WritableResource
import org.springframework.util.StreamUtils
import java.io.*
Then, at the end of the file find the FrontendController class and add few more arguments in constructor:
@Controller
@SessionAttributes("name")
class FrontendController @Autowired constructor(
                private val client: MessagesClient,
                private val pubSubTemplate: PubSubTemplate,
                private val context: ApplicationContext,
                // We need to know the Project ID, because it's in the Cloud Storage bucket name
                private val projectIdProvider: GcpProjectIdProvider
) {
     // ... other code
}
Next, find the post function and edit it to include file processing and additional arguments (you can replace it with the following code):
        @PostMapping("/post")
        fun post(
                        @RequestParam(name="file", required=false) file: MultipartFile?,
                        @RequestParam name: String,
                        @RequestParam message: String?,
                        model: Model
        ): String {
                model.addAttribute("name", name)

                val fileName = file?.let {
                        return@let if ((!it.isEmpty) and (it.contentType == "image/jpeg")) {
                                // Bucket ID is our Project ID
                                val bucket = "gs://${projectIdProvider.projectId}-example"
                                // Generate a random file name
                                val fn = "${UUID.randomUUID()}.jpg"
                                val resource = context.getResource("$bucket/$fn") as WritableResource
                                // Write the file to Cloud Storage using WritableResource
                                resource.outputStream.use { os ->
                                        os.write(it.bytes)
                                }
                                fn
                        } else {
                                null
                        }
                }

                message?.let { msg ->
                        if (msg.trim().isNotEmpty()) {
                                // Add a log message at the beginning
                                logger.info("Saving message")
                                // Post the message to the backend service
                                // and store the generated file name in the database
                                val payload = Message(name = name, message = msg, imageUri = fileName)
                                client.add(payload)
                                // Add a log message at the end.
                                logger.info("Saved message")
                                // At the very end, publish the message
                                pubSubTemplate.publish("messages", "$name: $message")
                        }
                }
                return "redirect:/"
        }
Update the homepage in guestbook-frontend/src/main/resources/templates/index.html to be able to accept a file in the form (you can replace the file content with the following code).
<html lang="en">

<head>
    <title>Demo Guestbook</title>
    <link rel="stylesheet" href="https://stackpath.bootstrapcdn.com/bootstrap/4.5.0/css/bootstrap.min.css"
        integrity="sha384-9aIt2nRpC12Uk9gS9baDl411NQApFmC26EwAOH8WgZl5MYYxFfc+NcPb1dKGj7Sk" crossorigin="anonymous">
    <meta charset="utf-8">
    </meta>
    <meta name="viewport" content="width=device-width, initial-scale=1">
    </meta>
    <style>
        body {
            padding-top: 80px;
        }

        form span {
            font-weight: bold;
            padding-right: 1em;
            display: block;
        }

        form input[type="submit"] {
            display: block;
            margin-top: 1em;
        }

        .greeting {
            padding-bottom: 0.5em;
        }

        .messages {
            border-top: 1px solid black
        }

        .message {
            display: block;
        }

        .message span {
            padding-top: 0.5em;
        }

        .message .username {
            font-weight: bold;
            width: 100px;
            float: left;
        }
    </style>
</head>

<body>
    <nav class="navbar navbar-inverse navbar-fixed-top">
        <div class="container">
            <div class="navbar-header">
                <a class="navbar-brand" href="#">Guestbook</a>
            </div>
        </div>
    </nav>

    <div class="main container">
        <div class="input">
            <!-- Set form encoding type to multipart form data -->
            <form action="/post" method="post" enctype="multipart/form-data">
                <span>Your name:</span><input type="text" name="name" th:value="${name}" />
                <span>Message:</span><input type="text" name="message" />
                <!-- Add a file input -->
                <span>File:</span>
                <input type="file" name="file" accept=".jpg, image/jpeg"/>
                <input type="submit" value="Post" />
            </form>
        </div>

        <div th:if="${greeting != null}" class="greeting">
            <span th:text="${greeting}">Greeting</span>
        </div>

        <div class="messages">
            <div th:each="message: ${messages}" class="message">
                <span th:text="${message.name}" class="username">Username</span>
                <span th:text="${message.message}" class="message">Message</span>
            </div>
        </div>

    </div>

    <script src="https://code.jquery.com/jquery-3.5.1.slim.min.js"
        integrity="sha384-DfXdz2htPH0lsSSs5nCTpuj/zy4C+OGpamoFVy38MVBnE+IbbVYUew+OrCXaRkfj"
        crossorigin="anonymous"></script>
    <script src="https://cdn.jsdelivr.net/npm/popper.js@1.16.0/dist/umd/popper.min.js"
        integrity="sha384-Q6E9RHvbIyZFJoft+2mJbHaEWldlvI9IOYy5n3zV9zzTtmI3UksdQRVvoxMfooAo"
        crossorigin="anonymous"></script>
    <script src="https://stackpath.bootstrapcdn.com/bootstrap/4.5.0/js/bootstrap.min.js"
        integrity="sha384-OgVRvuATP1z7JjHLkuOU7Xw704+h835Lr+6QL9UvYjZE3Ipu6Tp75j7Bh/kR0JKI"
        crossorigin="anonymous"></script>
</body>

</html>
Stop the existing Guestbook Frontend and restart it (open a new Cloud Shell tab if needed).
$ cd ~/guestbook-frontend
$ export SPRING_CLOUD_GCP_CREDENTIALS_LOCATION=file:///$HOME/service-account.json
$ ./gradlew bootRun --args='--spring.profiles.active=cloud'
Use Web Preview to post a message with a small JPEG image.
Validate that the image was uploaded. From the command line.
$ export PROJECT_ID=$(gcloud config list --format 'value(core.project)')
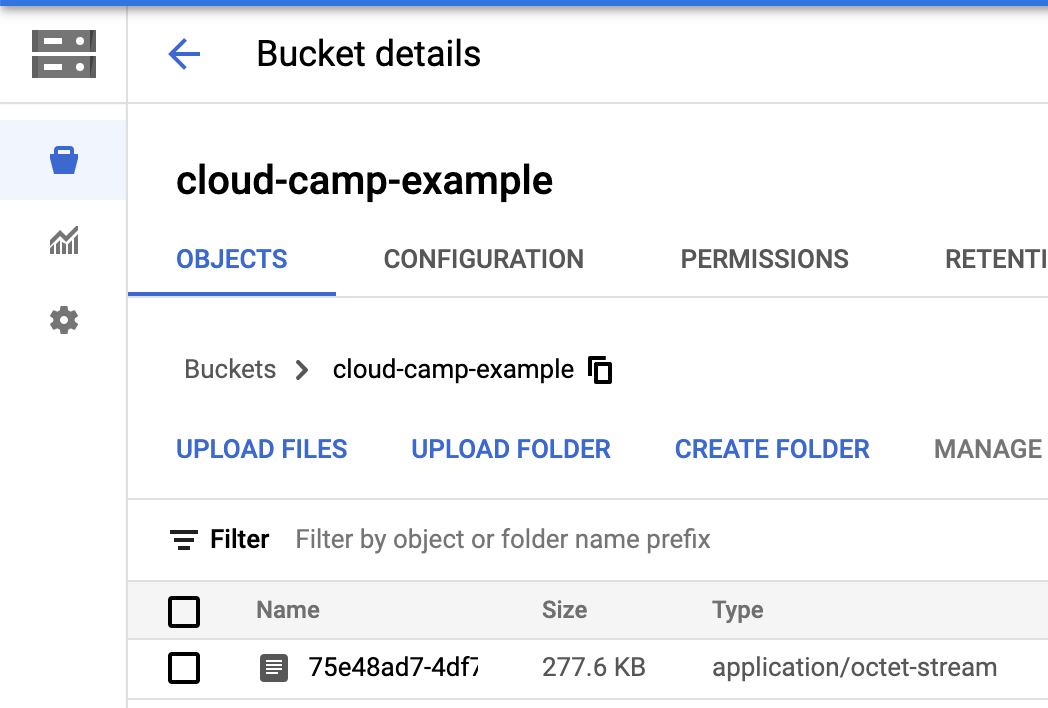
$ gsutil ls gs://${PROJECT_ID}-exampleIn a new browser tab, from the Google Cloud Platform Console, browse to Storage → Storage → Browser.
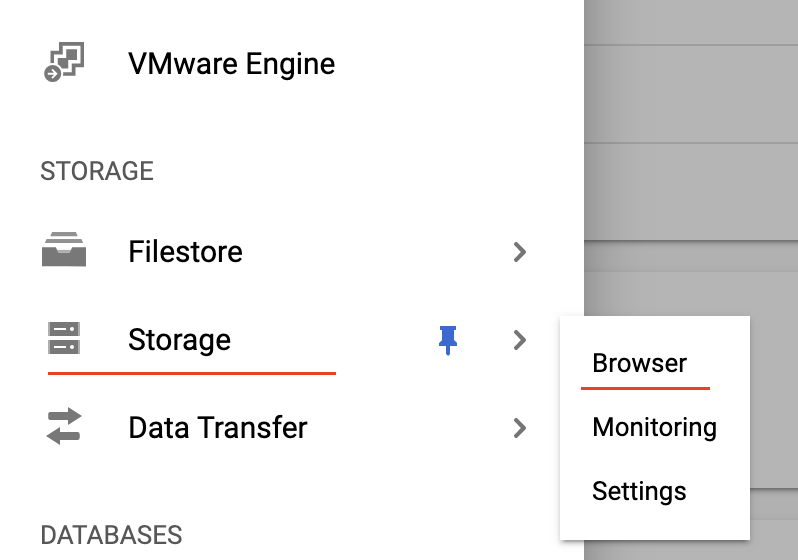
Navigate to your bucket.
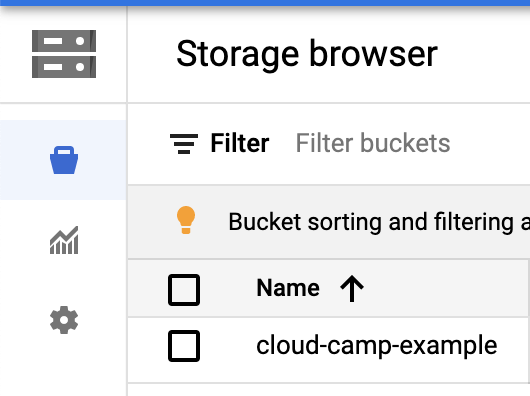
Where you should see the uploaded file.
Serving the image from Cloud Storage
Update the FrontendContoller to accept the file in guestbook-frontend/src/main/kotlin/com/example/demo/DemoApplication.kt.
First, at the top of the file at the end of the import statements add:
// File serving imports
import org.springframework.http.*
import org.springframework.core.io.Resource
Then, at the end of the file find the FrontendController class and add a new function to it:
        // ".+" is necessary to capture URI with filename extension
        @GetMapping("/image/{filename:.+}")
        fun file(@PathVariable filename: String): ResponseEntity<Resource> {
                val bucket = "gs://${projectIdProvider.projectId}-example"

                // Use "gs://" URI to construct a Spring Resource object
                val image = context.getResource("$bucket/$filename")

                // Send it back to the client
                val headers = HttpHeaders()
                headers.contentType = MediaType.IMAGE_JPEG
                return ResponseEntity(image, headers, HttpStatus.OK)
        }
Update the homepage in guestbook-frontend/src/main/resources/templates/index.html to be able to accept a file in the form (you can replace the file content with the following code).
<html lang="en">

<head>
    <title>Demo Guestbook</title>
    <link rel="stylesheet" href="https://stackpath.bootstrapcdn.com/bootstrap/4.5.0/css/bootstrap.min.css"
        integrity="sha384-9aIt2nRpC12Uk9gS9baDl411NQApFmC26EwAOH8WgZl5MYYxFfc+NcPb1dKGj7Sk" crossorigin="anonymous">
    <meta charset="utf-8">
    </meta>
    <meta name="viewport" content="width=device-width, initial-scale=1">
    </meta>
    <style>
        body {
            padding-top: 80px;
        }

        form span {
            font-weight: bold;
            padding-right: 1em;
            display: block;
        }

        form input[type="submit"] {
            display: block;
            margin-top: 1em;
        }

        .greeting {
            padding-bottom: 0.5em;
        }

        .messages {
            border-top: 1px solid black
        }

        .message {
            display: block;
        }

        .message span {
            padding-top: 0.5em;
        }

        .message .username {
            font-weight: bold;
            width: 100px;
            float: left;
        }
    </style>
</head>

<body>
    <nav class="navbar navbar-inverse navbar-fixed-top">
        <div class="container">
            <div class="navbar-header">
                <a class="navbar-brand" href="#">Guestbook</a>
            </div>
        </div>
    </nav>

    <div class="main container">
        <div class="input">
            <!-- Set form encoding type to multipart form data -->
            <form action="/post" method="post" enctype="multipart/form-data">
                <span>Your name:</span><input type="text" name="name" th:value="${name}" />
                <span>Message:</span><input type="text" name="message" />
                <!-- Add a file input -->
                <span>File:</span>
                <input type="file" name="file" accept=".jpg, image/jpeg"/>
                <input type="submit" value="Post" />
            </form>
        </div>

        <div th:if="${greeting != null}" class="greeting">
            <span th:text="${greeting}">Greeting</span>
        </div>

        <div class="messages">
            <div th:each="message: ${messages}" class="message">
                <span th:text="${message.name}" class="username">Username</span>
                <span th:text="${message.message}" class="message">Message</span>
                <img th:src="'/image/' + ${message.imageUri}"
                alt="image" height="40px"
                th:unless="${#strings.isEmpty(message.imageUri)}"/>
            </div>
        </div>

    </div>

    <script src="https://code.jquery.com/jquery-3.5.1.slim.min.js"
        integrity="sha384-DfXdz2htPH0lsSSs5nCTpuj/zy4C+OGpamoFVy38MVBnE+IbbVYUew+OrCXaRkfj"
        crossorigin="anonymous"></script>
    <script src="https://cdn.jsdelivr.net/npm/popper.js@1.16.0/dist/umd/popper.min.js"
        integrity="sha384-Q6E9RHvbIyZFJoft+2mJbHaEWldlvI9IOYy5n3zV9zzTtmI3UksdQRVvoxMfooAo"
        crossorigin="anonymous"></script>
    <script src="https://stackpath.bootstrapcdn.com/bootstrap/4.5.0/js/bootstrap.min.js"
        integrity="sha384-OgVRvuATP1z7JjHLkuOU7Xw704+h835Lr+6QL9UvYjZE3Ipu6Tp75j7Bh/kR0JKI"
        crossorigin="anonymous"></script>
</body>

</html>
Stop the existing Guestbook Frontend and restart it (open a new Cloud Shell tab if needed).
$ cd ~/guestbook-frontend
$ export SPRING_CLOUD_GCP_CREDENTIALS_LOCATION=file:///$HOME/service-account.json
$ ./gradlew bootRun --args='--spring.profiles.active=cloud'
Validate that the previous uploaded images are displaying properly.
In addition, Google Cloud Platform offers many other APIs that you can use from your application. For example, Google Cloud Platform has ready to use, idiomatic Java client libraries called google-cloud-java (and for many other languages). You can consume any of the client libraries even without a Spring Boot starter. Let's try the Vision API to analyze the image you uploaded (we will use a Spring Boot starter just to simplify :) ).
Configure Vision API
Enable the Vision API so we can use it to analyze the uploaded images
$ gcloud services enable vision.googleapis.comAdd the Google Cloud Vision client library to the Guestbook Frontend to guestbook-frontend/build.gradle.kts.
dependencies {
        implementation("org.springframework.cloud:spring-cloud-gcp-starter-vision")
        // other dependencies
}
Given an image, Google Cloud Vision API can identify objects, landmarks, location of faces and facial expressions, extract text, and whether the image is "safe". We'll analyze the uploaded image, label the objects in the image, and print out the response.
Update the FrontendContoller to accept the file in guestbook-frontend/src/main/kotlin/com/example/demo/DemoApplication.kt.
First, at the top of the file at the end of the import statements add:
// Vision API imports
import org.springframework.cloud.gcp.vision.CloudVisionTemplate
import com.google.cloud.vision.v1.Feature.Type
Then, at the end of the file find the FrontendController class and add CloudVisionTemplate argument in constructor:
@Controller
@SessionAttributes("name")
class FrontendController @Autowired constructor(
                private val client: MessagesClient,
                private val pubSubTemplate: PubSubTemplate,
                private val context: ApplicationContext,
                // We need to know the Project ID, because it's in the Cloud Storage bucket name
                private val projectIdProvider: GcpProjectIdProvider,
                private val visionTemplate: CloudVisionTemplate
) {
     // ... other code
}
Finally, find the post function and edit it to include the call method after the image was written to the Cloud Storage bucket (you can replace it with the following code):
        @PostMapping("/post")
        fun post(
                        @RequestParam(name = "file", required = false) file: MultipartFile?,
                        @RequestParam name: String,
                        @RequestParam message: String?,
                        model: Model
        ): String {
                model.addAttribute("name", name)

                val fileName = file?.let {
                        return@let if ((!it.isEmpty) and (it.contentType == "image/jpeg")) {
                                // Bucket ID is our Project ID
                                val bucket = "gs://${projectIdProvider.projectId}-example"
                                // Generate a random file name
                                val fn = "${UUID.randomUUID()}.jpg"
                                val resource = context.getResource("$bucket/$fn") as WritableResource
                                // Write the file to Cloud Storage using WritableResource
                                resource.outputStream.use { os ->
                                        os.write(it.bytes)
                                }
                                // After writing to GCS, analyze the image.
                                val response = visionTemplate.analyzeImage(resource, Type.LABEL_DETECTION)
                                logger.info(response.toString())
                                fn
                        } else {
                                null
                        }
                }

                message?.let { msg ->
                        if (msg.trim().isNotEmpty()) {
                                // Add a log message at the beginning
                                logger.info("Saving message")
                                // Post the message to the backend service
                                // and store the generated file name in the database
                                val payload = Message(name = name, message = msg, imageUri = fileName)
                                client.add(payload)
                                // Add a log message at the end.
                                logger.info("Saved message")
                                // At the very end, publish the message
                                pubSubTemplate.publish("messages", "$name: $message")
                        }
                }
                return "redirect:/"
        }
Stop the existing Guestbook Frontend and restart it (open a new Cloud Shell tab if needed).
$ cd ~/guestbook-frontend
$ export SPRING_CLOUD_GCP_CREDENTIALS_LOCATION=file:///$HOME/service-account.json
$ ./gradlew bootRun --args='--spring.profiles.active=cloud'
Use Web Preview to post a message with a small JPEG image, and you should see the image labels in the log output similar to the following.
label_annotations {
  mid: "/m/01yrx"
  description: "Cat"
  score: 0.99598557
  topicality: 0.99598557
}
label_annotations {
  mid: "/m/04rky"
  description: "Mammal"
  score: 0.9890478
  topicality: 0.9890478
}
label_annotations {
  mid: "/m/09686"
  description: "Vertebrate"
  score: 0.9851104
  topicality: 0.9851104
}
...You can stop both Backend and Frontend services now.
There are many options to deploy your application on Google Cloud Platform. For example, you can deploy the application in a virtual machine, or, containerize your application and deploy into a managed Kubernetes cluster. You can also run your favorite PaaS on Google Cloud Platform (e.g., Cloud Foundry, OpenShift, etc).
But, you can use Google App Engine, which is a platform as a service that scales to 0 when no one is using the service, and scales up automatically.
Configure App Engine
Enable App Engine in the project.
$ gcloud app create --region=europe-west3First, let's configure the Guestbook Frontend. Add the plugin management configuration to guestbook-frontend/settings.gradle.kts. It is required as the App Engine Gradle plugin is not listed in Gradle Plugin Portal.
rootProject.name = "demo"
pluginManagement {
    repositories {
        gradlePluginPortal()
        mavenCentral()
    }
    resolutionStrategy {
        eachPlugin {
            if (requested.id.id.startsWith("com.google.cloud.tools.appengine")) {
                useModule("com.google.cloud.tools:appengine-gradle-plugin:${requested.version}")
            }
        }
    }
}
Add the App Engine Plugin to guestbook-frontend/build.gradle.kts.
plugins {
        // other plugins
        id("com.google.cloud.tools.appengine") version "2.4.1"
}
Add the App Engine configuration block at the end of guestbook-frontend/build.gradle.kts.
appengine {  // App Engine tasks configuration
        tools {
                cloudSdkVersion = "315.0.0"
        }
        deploy {   // deploy configuration
                projectId = "GCLOUD_CONFIG" // gcloud config set project
                version = "GCLOUD_CONFIG"   // gcloud to generate a version
                stopPreviousVersion = true
                promote = true
        }
}
Create a appengine directory in Guestbook Frontend.
$ mkdir -p ~/guestbook-frontend/src/main/appengineAdd the app.yaml that is needed to deploy to App Engine in guestbook-frontend/src/main/appengine/app.yaml.
runtime: java11
instance_class: B4_1G
manual_scaling:
  instances: 1
env_variables:
  SPRING_PROFILES_ACTIVE: cloud
  # REPLACE PROJECT_ID with your project ID!
MESSAGES_ENDPOINT: https://guestbook-backend-dot-PROJECT_ID.appspot.com/messagesUse Gradle to deploy the application.
$ cd ~/guestbook-frontend
$ ./gradlew bootJar appengineDeploy
...
Deployed service [default] to [https://PROJECT_ID.appspot.com]

You can stream logs from the command line by running:
  $ gcloud app logs tail -s default

To view your application in the web browser run:
  $ gcloud app browse
Find the Frontend URL
$ gcloud app browse
Did not detect your browser. Go to this link to view your app:
https://....appspot.com ← This is your URL!
Browse to the frontend URL, but it will produce an error.

This is because the backend isn't deployed yet. We'll fix this in a second.
Add the plugin management configuration to guestbook-backend/settings.gradle.kts.
rootProject.name = "demo"
pluginManagement {
    repositories {
        gradlePluginPortal()
        mavenCentral()
    }
    resolutionStrategy {
        eachPlugin {
            if (requested.id.id.startsWith("com.google.cloud.tools.appengine")) {
                useModule("com.google.cloud.tools:appengine-gradle-plugin:${requested.version}")
            }
        }
    }
}
Add the App Engine Plugin to guestbook-backend/build.gradle.kts.
plugins {
        // other plugins
        id("com.google.cloud.tools.appengine") version "2.4.1"
}
Add the App Engine configuration block at the end of guestbook-backend/build.gradle.kts.
appengine {  // App Engine tasks configuration
        tools {
                cloudSdkVersion = "315.0.0"
        }
        deploy {   // deploy configuration
                projectId = "GCLOUD_CONFIG" // gcloud config set project
                version = "GCLOUD_CONFIG"   // gcloud to generate a version
                stopPreviousVersion = true
                promote = true
        }
}
Create a appengine directory in Guestbook Frontend.
$ mkdir -p ~/guestbook-backend/src/main/appengineAdd the app.yaml that is needed to deploy to App Engine in guestbook-backend/src/main/appengine/app.yaml.
runtime: java11
service: guestbook-backend
instance_class: B4_1G
manual_scaling:
  instances: 1
env_variables:
SPRING_PROFILES_ACTIVE: cloudUse Gradle to deploy the application.
$ cd ~/guestbook-backend
$ ./gradlew bootJar appengineDeploy
...
Deployed service [guestbook-backend] to [https://guestbook-backend-dot-PROJECT_ID.appspot.com]

You can stream logs from the command line by running:
  $ gcloud app logs tail -s guestbook-backend

To view your application in the web browser run:
  $ gcloud app browse -s guestbook-backend
Find the deployed backend URL.
$ gcloud app browse -s guestbook-service
Did not detect your browser. Go to this link to view your app:
https://guestbook-backend-dot-....appspot.com ← This is your URL!
Navigate to your Guestbook Service's URL, and see the following.
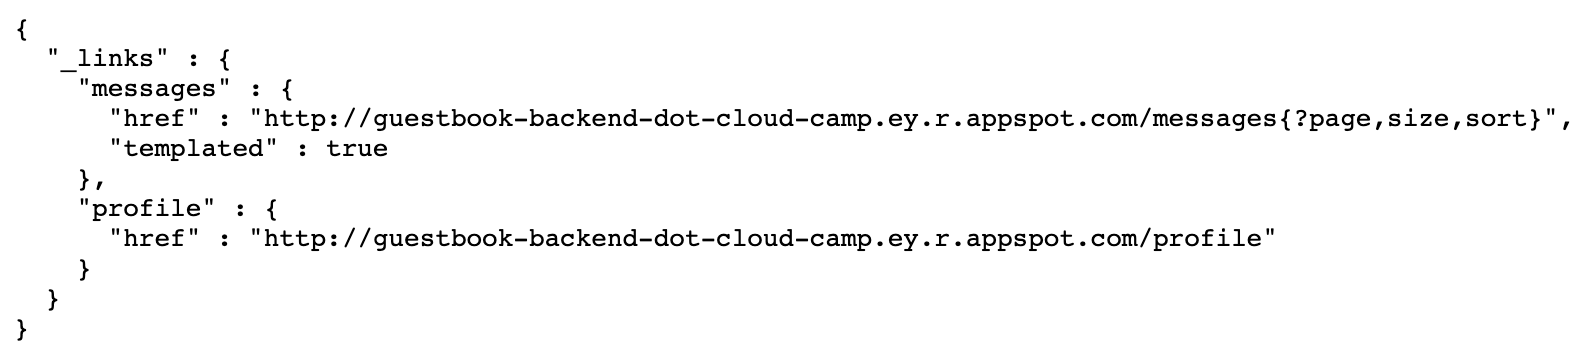
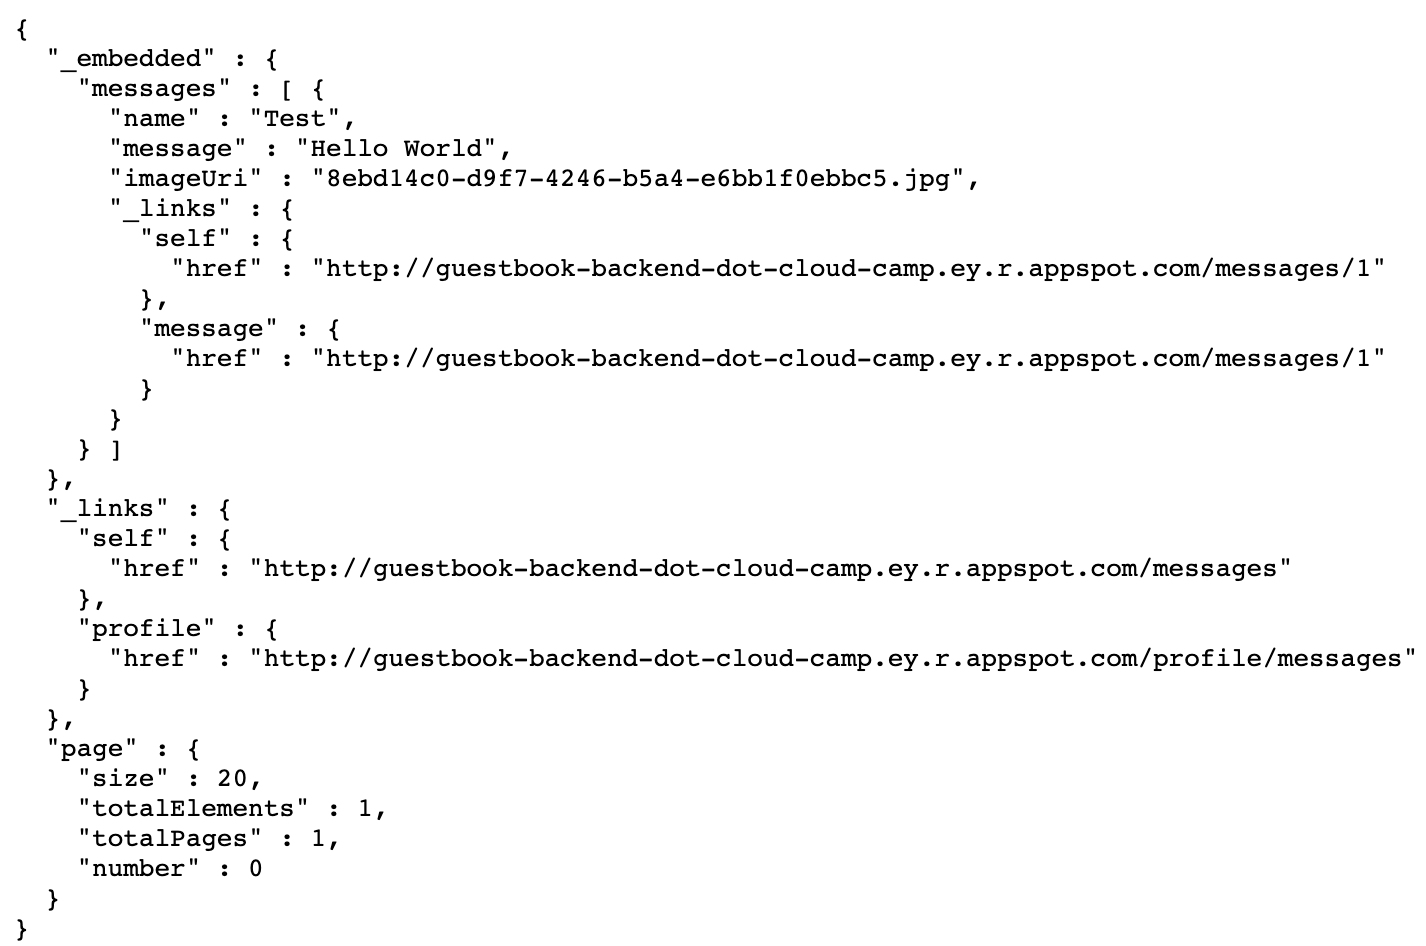
Follow the href links to see all of the messages, e.g.: https://guestbook-backend-dot-PROJECT_ID.appspot.com/messages, and see the past messages you created (since it's connecting to the same CloudSQL instance).
App Engine Logging
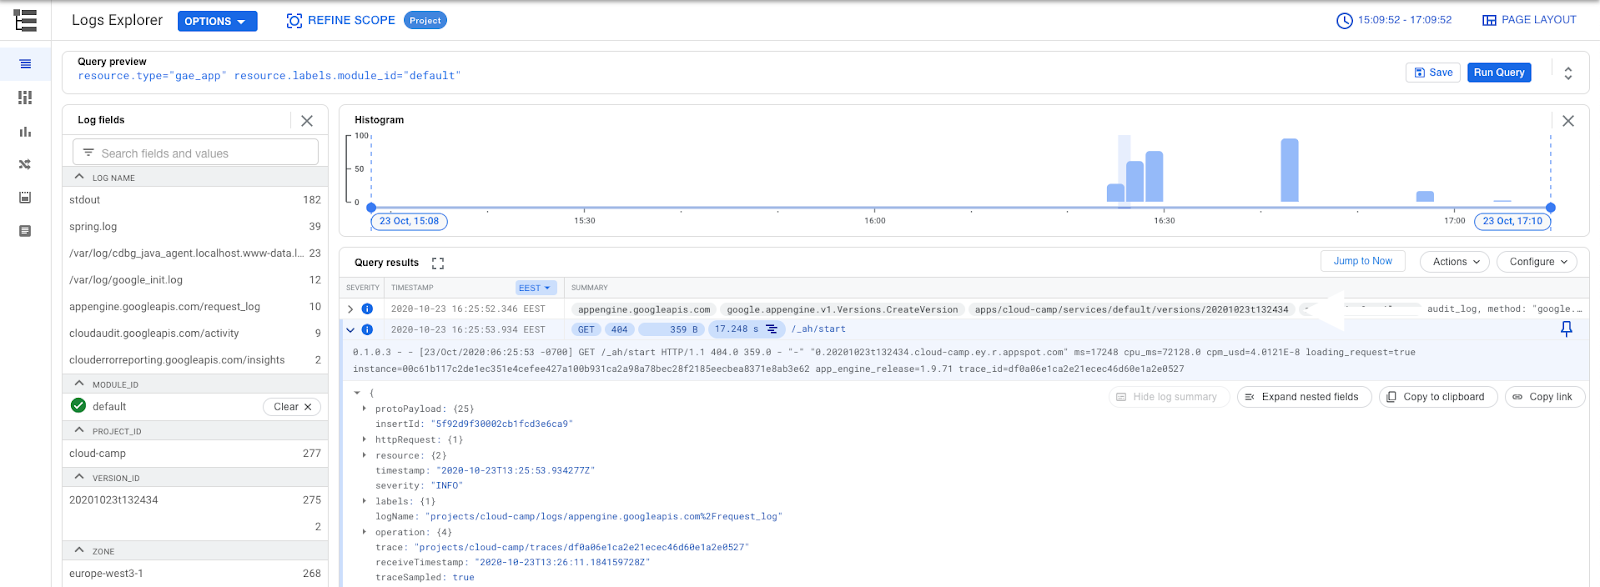
In a new browser tab, from the Google Cloud Platform console, navigate to Operations → Logging → Logs Viewer.
Click the Query preview and paste the following query:
resource.type="gae_app" resource.labels.module_id="default"Then click Run Query.
This is the log from the application. If you output a log message, it'll be grouped by the request. When the application first starts up, the log messages are grouped under /_ah/start request.
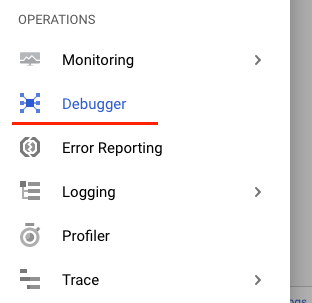
App Engine Debugging
Navigate to Operations → Debugger.
On the top, you can see the different App Engine deployments currently running. Select the default - 1 (100%) from the drop down.
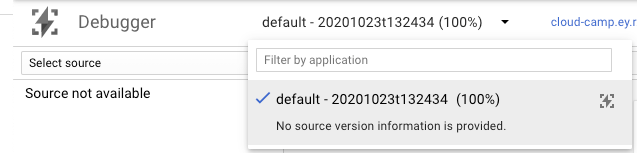
However, there is no source code that we can use for debugging.
Navigate to Select source → Add source code.
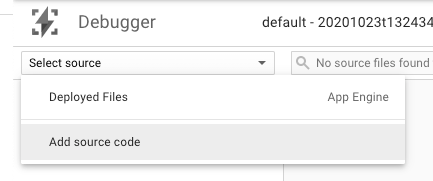
There are a number of different ways to provide the source code to the Stackdriver Debugger. We will use Cloud Source Repositories.
In Cloud Shell, enable Source Repository API.
$ gcloud services enable sourcerepo.googleapis.comCreate a Source Repository.
$ gcloud source repos create appengine-debugUse the command line to upload the guestbook-frontend source.
$ cd ~/guestbook-frontend
$ export PROJECT_ID=$(gcloud config list --format 'value(core.project)')
$ git init && git config --local credential.https://source.developers.google.com.helper gcloud.sh
$ git remote add google https://source.developers.google.com/p/${PROJECT_ID}/r/appengine-debug
$ git add . && git commit -m "initial commit"
$ git push --all google
Now back at the Debugger page, select Cloud Source Repository.

In the next dialog select your appengine-debug repo and master branch, then click select source:
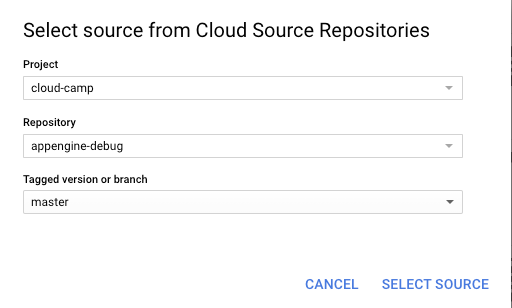
Navigate the source and open DemoApplication.kt:
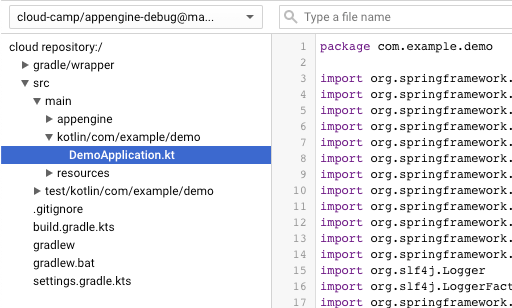
From here, we can do amazing things! For example, add a new log message!
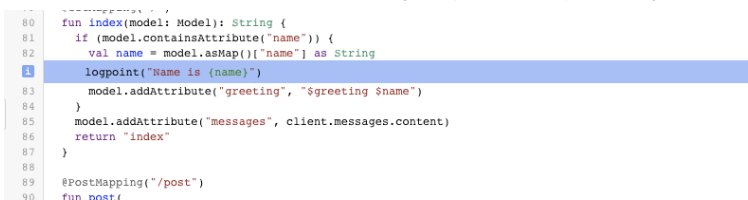
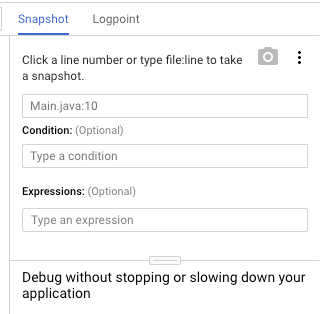
On the right hand side, click Logpoint.

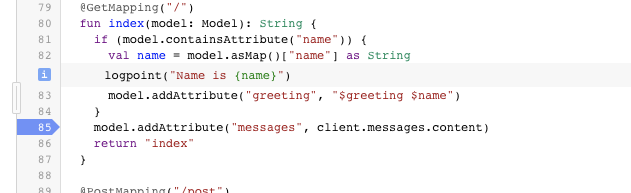
In the source, click on the line number that you want to add a log message, and add the message.

In this example, it'll print the value of the local variable called name.
Click Add. You can add as many log messages as you want.
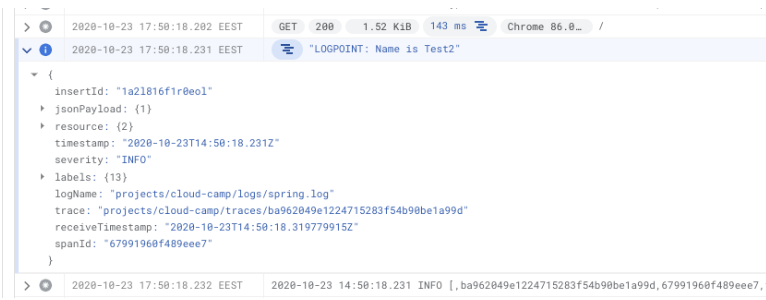
Browse to the site and enter the name/message to trigger the code.
Navigate to Operations → Logging, find the most recent HTTP request to expand it. You should see the new log message.
You can also capture the stack in a moment in time. It's almost like stepping through a real debugger, but it does not stop the world.
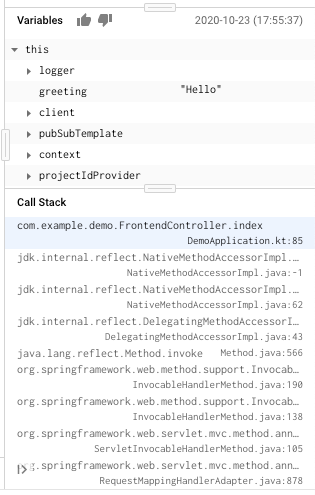
Go back to Operations → Debugger, and in the source view, switch to Snapshot.
In the source, simply click on the line number that you want to capture information.
Browse the application's page again. As soon as a request flows through the line, the call stack will be captured and you can explore what actually happened.
You can add both Logpoint and Snapshot with conditionals, so that you look at only certain requests based on variables that are in scope (e.g., session ID).
Monitoring
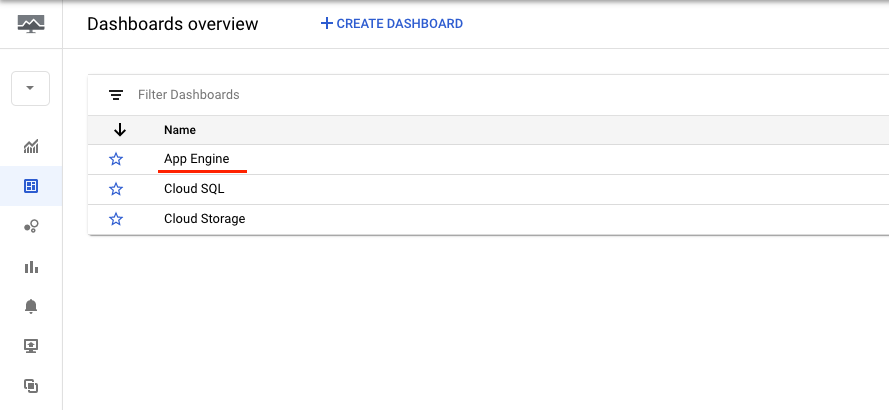
Navigate to Operations → Monitoring → Dashboards.
Out of the box, Stackdriver automatically discovers your managed services and ingests the metrics. From here you can customize dashboards, set up alerts, etc.
On the dashboards page, follow the App Engine link:
Then, select your project:
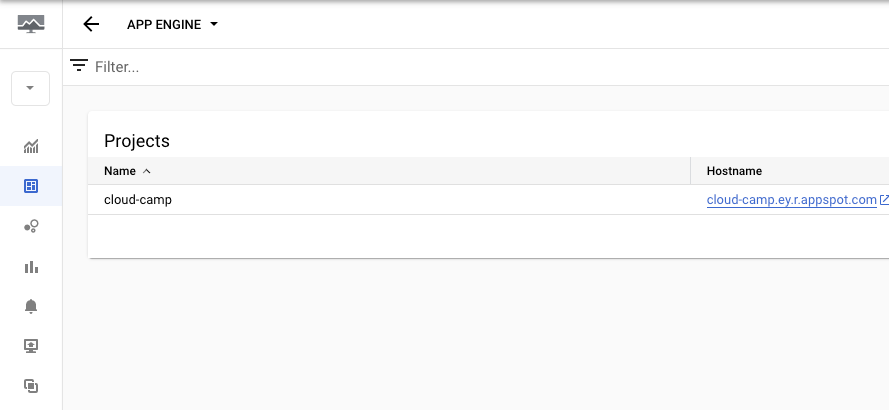
And explore the different metrics that are automatically collected.
Profiling
Cloud Profiler allows you to continuously profile CPU and Heap usages to help identify performance bottlenecks and critical paths in your application. It'll be able to produce a flame graph on which parts of your application uses the most CPU and/or Heap.
Profiler is free to use and supports Java, Go, Node.js and Python applications running on Kubernetes Engine, Compute Engine, App Engine, and containers/VMs running anywhere.
There is a dedicated agent library for supported languages. A Cloud Profiler agent can work both within Google Cloud environments using the Machine Credentials, and outside of Google Cloud environments (e.g., on-premises, and in another cloud) using a Service Account key file.
More info can be found in Profiler documentation.
Base profile types include:
- CPU Time: The CPU time for a function tells you how long the CPU was busy executing instructions. It doesn't include the time the CPU was waiting or processing instructions for something else.
- Wall Time: The wall-clock time for a function measures the time elapsed between entering and exiting a function. Wall-clock time includes all wait time, including that for locks and thread synchronization. If the wall-clock time is significantly longer than the CPU time, then that is an indication the code spends a lot of time waiting. This might be an indication of a resource bottleneck.
- Heap: The heap consumption is the amount of memory allocated in the application's heap - this can help you find potential inefficiencies and memory leaks in your application.
In Cloud Shell, enable Profiler API.
$ gcloud services enable cloudprofiler.googleapis.comFor Java applications in App Engine the profiler agent is already included in the runtime. To use it, you need to modify the Frontend app.yaml in guestbook-frontend/src/main/appengine/app.yaml to include an environment variable with JVM configuration, so that it adds the agent during application execution.
runtime: java11
instance_class: B4_1G
manual_scaling:
  instances: 1
env_variables:
  SPRING_PROFILES_ACTIVE: cloud
  # REPLACE PROJECT_ID with your project ID!
  MESSAGES_ENDPOINT: https://guestbook-backend-dot-PROJECT_ID.appspot.com/messages
  JAVA_TOOL_OPTIONS: "-agentpath:/opt/cprof/profiler_java_agent.so=-logtostderr,-cprof_enable_heap_sampling=true"
Use Gradle to deploy the application.
$ cd ~/guestbook-frontend
$ ./gradlew bootJar appengineDeploy
...
Deployed service [default] to [https://PROJECT_ID.appspot.com]

You can stream logs from the command line by running:
  $ gcloud app logs tail -s default

To view your application in the web browser run:
  $ gcloud app browse
Find the Frontend URL
$ gcloud app browse
Did not detect your browser. Go to this link to view your app:
https://....appspot.com ← This is your URL!
Browse to the frontend URL and add a few posts.
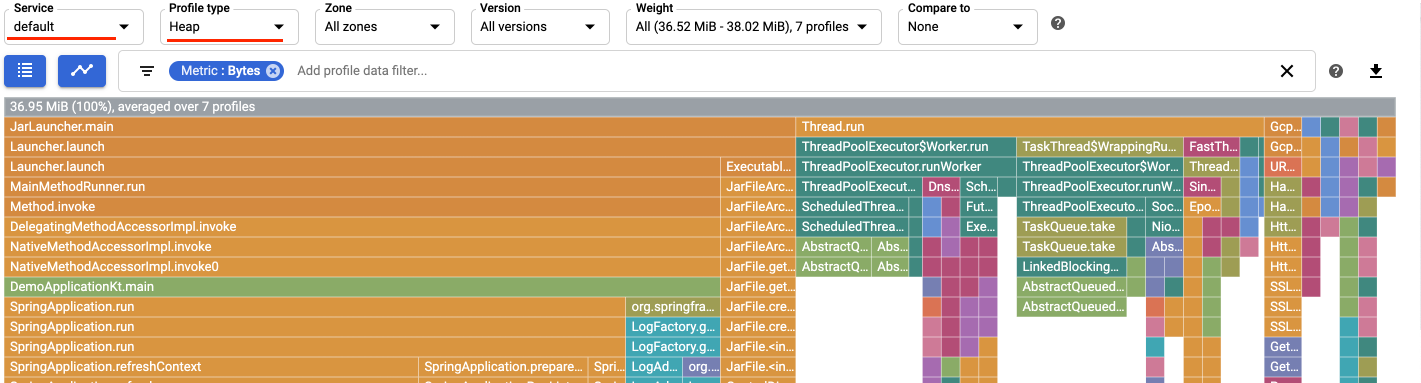
Navigate to Operations → Profiler. It could take a few minutes for profiles to load. If you don't see any profiling information wait 2-3 minutes and press the Now button.

When the profiles show up, select default service and any of the 3 profile types (CPU Time, Wall Time, Heap). Explore the data shown.
Delete the CloudSQL instance:
$ gcloud sql instances delete guestbookDelete the Service Account for StackDriver:
$ export PROJECT_ID=$(gcloud config list --format 'value(core.project)')
$ gcloud iam service-accounts delete guestbook@${PROJECT_ID}.iam.gserviceaccount.com
Delete the Pub/Sub Subscription & Topic:
$ gcloud pubsub topics delete messages
$ gcloud pubsub subscriptions delete "messages-subscription-1"
Delete the GCS Bucket:
$ export PROJECT_ID=$(gcloud config list --format 'value(core.project)')
$ gsutil rm -r gs://${PROJECT_ID}-example
Check any other buckets in Google Cloud Console UI that were created automatically and delete them.
Delete the App Engine backend service:
$ gcloud app services delete guestbook-backendYou cannot delete a default app engine service, but you can delete old versions (if you deployed more than one version):
$ gcloud app versions delete `gcloud app versions list --sort-by '~version' --format 'value(version.id)' | sort -r | tail -n +2 | paste -sd " " -`And stop the one versions that remains:
$ gcloud app versions stop `gcloud app versions list | awk {'print $2'} | tail -n +2`Delete Cloud Source Repo:
$ gcloud source repos delete appengine-debugRemove the services source code and gradle cache:
$ rm -rf ~/guestbook-frontend
$ rm -rf ~/guestbook-backend
$ rm -rf ~/message-processor
$ rm -rf ~/.gradle