
Last Updated: 2020-09-23
Overview
Google Cloud Platform (GCP) is a suite of cloud computing services that runs on the same infrastructure that Google uses internally for its end-user products, such as Google Search, Gmail, Drive and YouTube. Alongside a set of management tools, it provides a series of modular cloud services including computing, data storage, data analytics and machine learning.
Google Cloud Platform provides infrastructure as a service, platform as a service, and serverless computing environments.
What you'll build
In this codelab, you will create a basic serverless application. The flow of data in the application involves several steps:
- An image is uploaded to a Cloud Storage bucket.
- The Cloud Function uses ImageMagick to modify the image.
- The modified image is uploaded over the original image in the Cloud Storage bucket.
What you'll learn
- How to create Cloud Functions
- How to trigger Cloud Functions using events
- How to configure Cloud Storage buckets using command line
What you'll need
- A recent version of your favourite Web Browser
- Basics of BASH
- GCP Trial account
Create an Account
In this step, you register for the Google Cloud Platform free trial and create a project. The free trial provides you:
- $300 Credit for Free
- Access to Google Cloud Platform Products
- You Won't be Billed (though you need to enter your credit card)
- Build with the Power, Speed, Security, Reliability, and Scalability of Google
To register for the free trial open the free trial Registration page.
If you do not have a Gmail account, follow the steps to create one. Otherwise, login and complete the registration form.
Read and agree to the terms of service. Click Accept and start a free trial.
Create a Project
Next, create your first project using the Google Cloud Platform Console. The project is used to complete the rest of the lab.
To create a project in the Google Cloud Platform Console, click Select a project > Create a project.
In the New Project dialog: for Project name, type whatever you like. Make a note of the Project ID in the text below the project name box; you need it later. Then click Create.
Upgrade Account (Optional)
In the upper-right corner of the console, a button will appear asking you to upgrade your account. Click Create a Project when you see it. If the Upgrade button does not appear, you may skip this step. If the button appears later, click it when it does.
When you upgrade your account, you immediately have access to standard service quotas, which are higher than those available on the free trial.
Finalize
On the GCP Console, use the left-hand side menu to navigate to Compute Engine and ensure that there are no errors.
At the end of this lab, you may delete this project and close your billing account if desired.
Create a bucket
Log onto the Google Cloud Platform web console.
Switch to your project, if you are not already there. If you don't have a project, create one now.
From the Products and Services menu, choose Storage. Click the Create Bucket button.
Provide a unique bucket name and choose a Default storage class of Multi-Regional.
Click Create.
Find pictures of cute cats
Go to Google and download a few pictures of Cute Cats :)
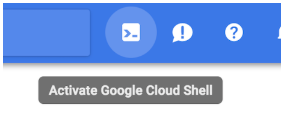
Next, open the cloud shell by clicking the following button in the top right of the console:
Click the three dots to the right of the console screen and select Upload File.
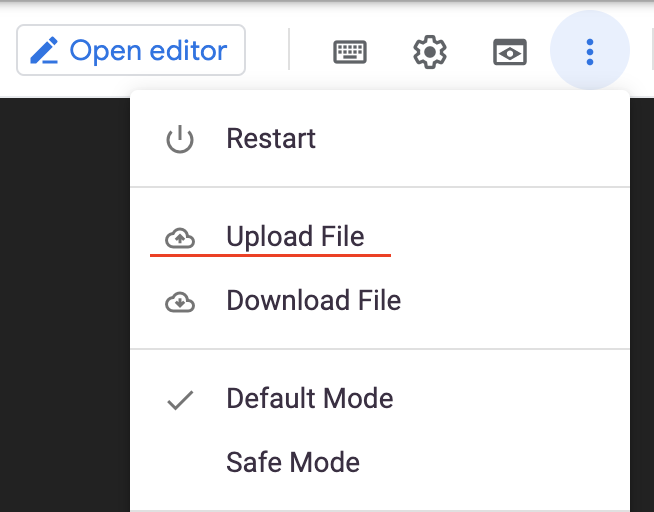
Choose the pictures you've just downloaded and upload them to the cloud shell.
In cloud shell type:
$ ls -lhto confirm the files are uploaded.
Setup Dev Environment
Enable APIs for Cloud Storage and Cloud Functions: click the Link.
Check if your cloud shell has NodeJs installed:
$ nvm lsThe output of the command should be similar to this:
->     v10.14.2
default -> 10.14.2 (-> v10.14.2)
node -> stable (-> v10.14.2) (default)
stable -> 10.14 (-> v10.14.2) (default)
If it is not, follow the instructions to install NodeJs.
Create Cloud Function
Create the working directory for the application and change to it:
$ mkdir serverless
$ cd serverless
Then, initialize a NodeJs project by running:
$ npm initWhen prompted - enter your favourite project name or leave it as default.
Modify any parameter if you want, or just click Enter till the project is set up.
Install dependencies for the project (GraphicsMagick and Cloud Storage Client):
$ npm install --save gm @google-cloud/storageCheck your package.json file. It should look similar to this:
$ cat package.json

{
  "name": "serverless",
  "version": "1.0.0",
  "description": "",
  "main": "index.js",
  "scripts": {
    "test": "echo \"Error: no test specified\" && exit 1"
  },
  "author": "Dmytro",
  "license": "ISC",
  "dependencies": {
    "@google-cloud/storage": "^5.4.0",
    "gm": "^1.23.1"
  }
}
Now, create the index.js file that will host our function:
$ touch index.jsCreate the Cloud ignore file so that unnecessary resources will not be uploaded to Google Cloud Platform when you use the gcloud command.
$ cat << EOF > .gcloudignore
.gcloudignore

node_modules
EOF
The next steps will require you to write or copy & paste the code. Open the Cloud Editor.

The application must import several dependencies in order to interact with Google Cloud Storage service, ImageMagick, and the file system:
'use strict';

const gm = require('gm').subClass({imageMagick: true});
const fs = require('fs');
const path = require('path');
const {Storage} = require('@google-cloud/storage');
const storage = new Storage();
The following function is invoked when an image is uploaded to the Cloud Storage bucket you created for storing images. It checks if the image is new, and if it is - processes it.
exports.colorizeImages = event => {
  const object = event.data || event; // Node 6: event.data === Node 8+: event

  // Exit if this is a deletion or a deploy event.
  if (object.resourceState === 'not_exists') {
    console.log('This is a deletion event.');
    return;
  } else if (!object.name) {
    console.log('This is a deploy event.');
    return;
  }

  const file = storage.bucket(object.bucket).file(object.name);
  const filePath = `gs://${object.bucket}/${object.name}`;

  // Ignore already processed files (to prevent re-invoking this function)
  if (file.name.startsWith('awesome-')) {
    console.log(`The image ${file.name} is already processed.`);
    return;
  }

  console.log(`Processing ${file.name}.`);

  return processImage(file);
};
The following function is called to colorize an uploaded image. The function downloads the image, uses ImageMagick to colorize the image, and then uploads the colorized image over the original image.
function processImage(file) {
  const tempLocalPath = `/tmp/${path.parse(file.name).base}`;

  // Download file from bucket.
  return file
    .download({destination: tempLocalPath})
    .catch(err => {
      console.error('Failed to download file.', err);
      return Promise.reject(err);
    })
    .then(() => {
      console.log(
        `Image ${file.name} has been downloaded to ${tempLocalPath}.`
      );

      // Colorize the image using ImageMagick.
      return new Promise((resolve, reject) => {
        gm(tempLocalPath)
          .colorize(200, 200, 256)
          .autoOrient()
          .write(tempLocalPath, (err, stdout) => {
            if (err) {
              console.error('Failed to process image.', err);
              reject(err);
            } else {
              resolve(stdout);
            }
          });
      });
    })
    .then(() => {
      console.log(`Image ${file.name} has been Colorized.`);

      // Mark the result as awesomely colorized, to avoid re-triggering this function.
      const newName = `awesome-${file.name}`;

      // Upload the colorized image back into the bucket.
      return file.bucket
        .upload(tempLocalPath, {destination: newName})
        .catch(err => {
          console.error('Failed to upload processed image.', err);
          return Promise.reject(err);
        });
    })
    .then(() => {
      console.log(`Processed image has been uploaded to ${file.name}.`);

      // Delete the temporary file.
      return new Promise((resolve, reject) => {
        fs.unlink(tempLocalPath, err => {
          if (err) {
            reject(err);
          } else {
            resolve();
          }
        });
      });
    });
}
The final index.js file should look like the following:
const gm = require('gm').subClass({imageMagick: true});
const fs = require('fs');
const path = require('path');
const {Storage} = require('@google-cloud/storage');
const storage = new Storage();

exports.colorizeImages = event => {
  const object = event.data || event; // Node 6: event.data === Node 8+: event

  // Exit if this is a deletion or a deploy event.
  if (object.resourceState === 'not_exists') {
    console.log('This is a deletion event.');
    return;
  } else if (!object.name) {
    console.log('This is a deploy event.');
    return;
  }

  const file = storage.bucket(object.bucket).file(object.name);
  const filePath = `gs://${object.bucket}/${object.name}`;

  // Ignore already processed files (to prevent re-invoking this function)
  if (file.name.startsWith('awesome-')) {
    console.log(`The image ${file.name} is already processed.`);
    return;
  }

  console.log(`Processing ${file.name}.`);

  return processImage(file);
};

// Colorize the given file using ImageMagick.
function processImage(file) {
  const tempLocalPath = `/tmp/${path.parse(file.name).base}`;

  // Download file from bucket.
  return file
    .download({destination: tempLocalPath})
    .catch(err => {
      console.error('Failed to download file.', err);
      return Promise.reject(err);
    })
    .then(() => {
      console.log(
        `Image ${file.name} has been downloaded to ${tempLocalPath}.`
      );

      // Colorize the image using ImageMagick.
      return new Promise((resolve, reject) => {
        gm(tempLocalPath)
          .colorize(200, 200, 256)
          .autoOrient()
          .write(tempLocalPath, (err, stdout) => {
            if (err) {
              console.error('Failed to process image.', err);
              reject(err);
            } else {
              resolve(stdout);
            }
          });
      });
    })
    .then(() => {
      console.log(`Image ${file.name} has been Colorized.`);

      // Mark the result as awesomely olorized, to avoid re-triggering this function.
      const newName = `awesome-${file.name}`;

      // Upload the colorized image back into the bucket.
      return file.bucket
        .upload(tempLocalPath, {destination: newName})
        .catch(err => {
          console.error('Failed to upload processed image.', err);
          return Promise.reject(err);
        });
    })
    .then(() => {
      console.log(`Processed image has been uploaded to ${file.name}.`);

      // Delete the temporary file.
      return new Promise((resolve, reject) => {
        fs.unlink(tempLocalPath, err => {
          if (err) {
            reject(err);
          } else {
            resolve();
          }
        });
      });
    });
}
Deploy the Cloud Function
To deploy the function execute:
$ gcloud functions deploy colorizeImages \
        --runtime nodejs10 \
        --trigger-bucket YOUR_IMAGE_BUCKET_NAME
This will trigger the function on any event from the bucket.
Alternatively, you can specify to trigger the function only on Upload event:
$ gcloud functions deploy colorizeImages --runtime nodejs8 \
--trigger-resource YOUR_IMAGE_BUCKET_NAME --trigger-event google.storage.object.finalize
After the deployment is successful, go to the Products and Services menu and choose Cloud Functions.
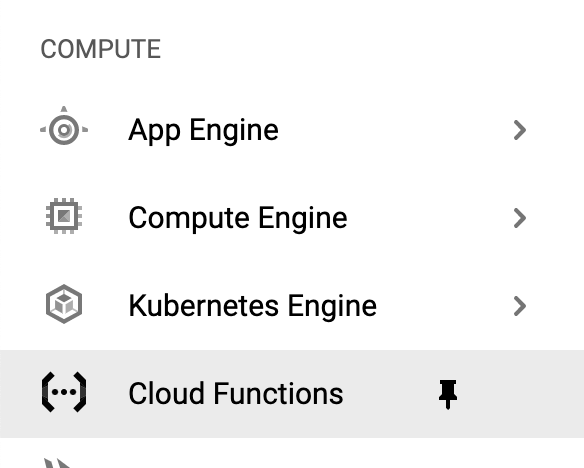
You should see your function ready.

Upload images
Go to the home directory, where your images are stored.
$ cd ~Use the gsutil to copy the files:
$ gsutil -m cp *.jpg gs://YOUR_IMAGE_BUCKET_NAME/You can view execution logs of your Cloud Functions using the following command:
$ gcloud functions logs read --limit 100Check processed images and make them public
Go to the Products and Services menu and choose Storage. Select your bucket, and check that there are files there, both original and modified (with awesome- prefix).
Let's make the bucket public, so everyone can see the cute cats. The following command will allow anyone to read/download content from your bucket.
$ gsutil iam ch allUsers:objectViewer gs://YOUR_IMAGE_BUCKET_NAMEAlternatively, if you created the bucket with per-object access policy, you can use the following command.
$ gsutil -m acl set -R -a public-read gs://YOUR_IMAGE_BUCKET_NAMERefresh the bucket in the browser and click any of the public links for your modified images.
Delete all images and project folder in your home directory:
$ rm ~/*.jpg
$ rm -r ~/serverless
Delete the bucket:
$ gsutil rm -r gs://YOUR_IMAGE_BUCKET_NAMEDelete the Cloud Function:
$ gcloud functions delete colorizeImagesExit the cloud shell :)