Last Updated: 2023-08-13
Kubernetes Engine
Kubernetes is an open source project (available on kubernetes.io) which can run on many different environments, from laptops to high-availability multi-node clusters, from public clouds to on-premise deployments, from virtual machines to bare metal.
The easiest way to run a Kubernetes cluster in GCP is using Google Kubernetes Engine, a managed version of Kubernetes hosted on Google Cloud Platform. Kubernetes Engine, also known as GKE, is a managed environment for deploying containerized applications. It brings our latest innovations in developer productivity, resource efficiency, automated operations, and open source flexibility to accelerate your time to market.
What you'll build
In this codelab, you're going to deploy a Kubernetes cluster using Google Kubernetes Engine. Your will:
- Manage node pools.
- Configure autoscaling.
- Add preemptible nodes
- Configure secure access to GCP Services
What you'll need
- A recent version of your favorite Web Browser
- Basics of BASH
- GCP Account
Support
If you want to support me, feel free to
Create an Account
In this step, you register for the Google Cloud Platform free trial and create a project. The free trial provides you:
- $300 Credit for Free
- Access to Google Cloud Platform Products
- You Won't be Billed (though you need to enter your credit card)
- Build with the Power, Speed, Security, Reliability, and Scalability of Google
To register for the free trial open the free trial Registration page.
If you do not have a Gmail account, follow the steps to create one. Otherwise, login and complete the registration form.
Read and agree to the terms of service. Click Accept and start a free trial.
Create a Project
Next, create your first project using the Google Cloud Platform Console. The project is used to complete the rest of the lab.
To create a project in the Google Cloud Platform Console, click Select a project → Create a project.
In the New Project dialog: for Project name, type whatever you like. Make a note of the Project ID in the text below the project name box; you need it later. Then click Create.
Upgrade Account (Optional)
In the upper-right corner of the console, a button will appear asking you to upgrade your account. Click Create a Project when you see it. If the Upgrade button does not appear, you may skip this step. If the button appears later, click it when it does.
When you upgrade your account, you immediately have access to standard service quotas, which are higher than those available on the free trial.
Finalize
On the GCP Console, use the left-hand side menu to navigate to Compute Engine and ensure that there are no errors.
At the end of this lab, you may delete this project and close your billing account if desired.
Before you can use Kubernetes to deploy your application, you need a cluster of machines to deploy them to. The cluster abstracts the details of the underlying machines you deploy to the cluster.
Machines can later be added, removed, or rebooted and containers are automatically distributed or re-distributed across whatever machines are available in the cluster. Machines within a cluster can be set to autoscale up or down to meet demand. Machines can be located in different zones for high availability.
Open CloudShell
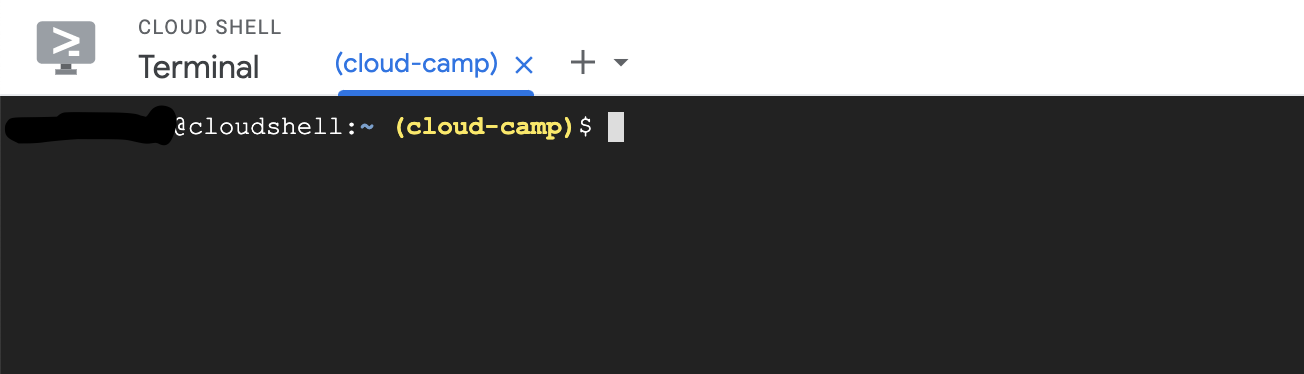
You will do most of the work from the Google Cloud Shell, a command line environment running in the Cloud. This virtual machine is loaded with all the development tools you'll need (docker, gcloud, kubectl and others) and offers a persistent 5GB home directory and runs in Google Cloud, greatly enhancing network performance and authentication. Open the Google Cloud Shell by clicking on the icon on the top right of the screen:

You should see the shell prompt at the bottom of the window:
Once connected to Cloud Shell, you should see that you are already authenticated and that the project is already set to your project ID.
Run the following command in Cloud Shell to confirm that you are authenticated
$ gcloud auth list
If it's the first time you are running Cloud Shell - authorize it.
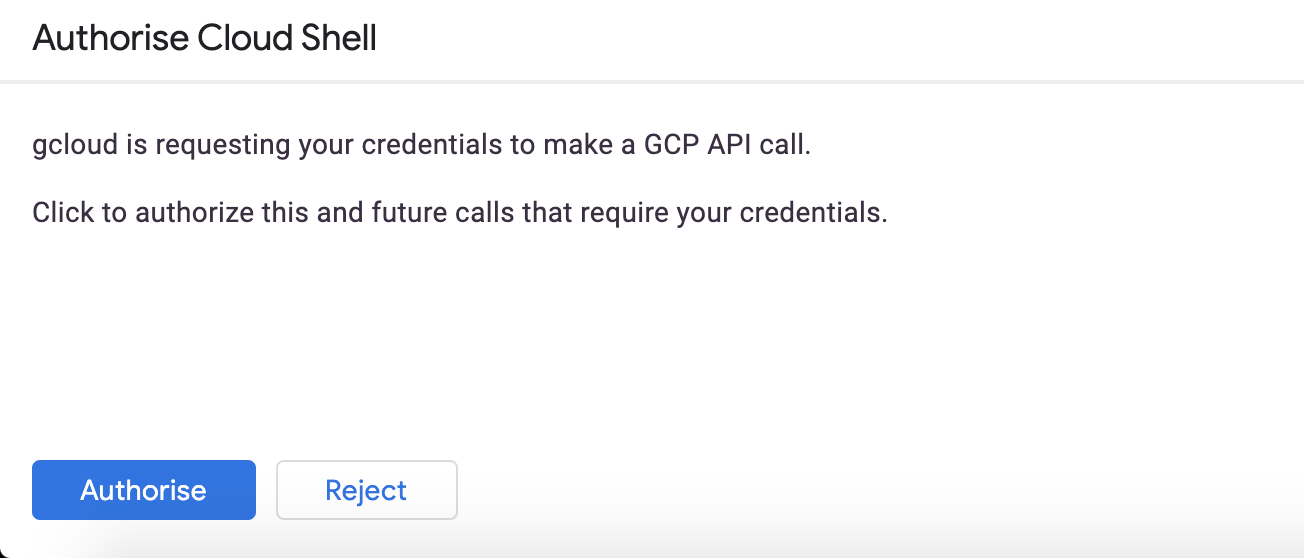
You might need to run the command again after authorization. Command output:
 Credentialed Accounts
ACTIVE  ACCOUNT
*       <my_account>@<my_domain.com>

To set the active account, run:
$ gcloud config set account `ACCOUNT`Check if your project is set correctly.
$ gcloud config list project
Command output
[core]
project = <PROJECT_ID>
If it is not, you can set it with this command:
$ gcloud config set project <PROJECT_ID>
Create a Cluster
Enter the following command to create a cluster of machines.
$ export PROJECT_ID=$(gcloud config get-value project)

$ gcloud container clusters create devops-cluster --zone "europe-west1-b" \
--project=${PROJECT_ID} --enable-network-policy
When you create a cluster, gcloud adds a context to your kubectl configuration file (~/.kube/config). It then sets it as the current context, to let you operate on this cluster immediately.
$ kubectl config current-context
To test it, try a kubectl command line:
$ kubectl get nodes
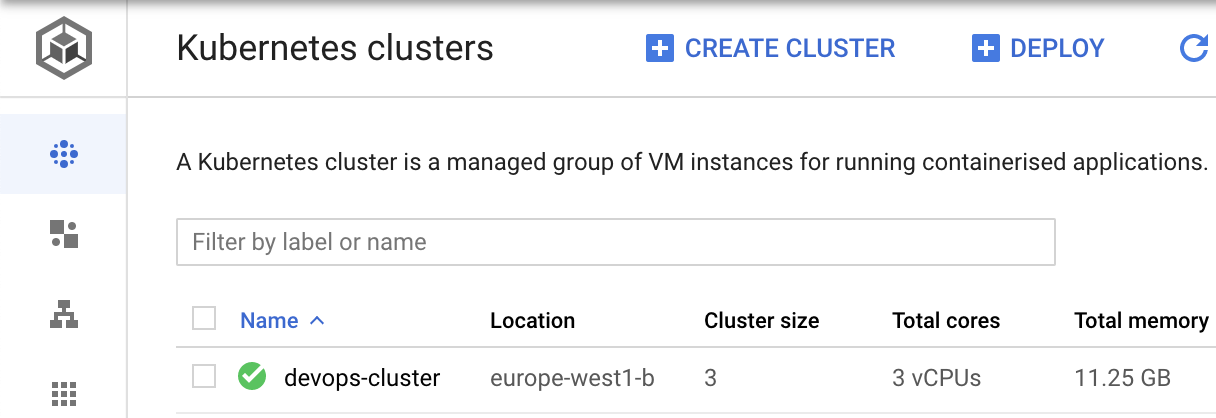
If you navigate to "Kubernetes Engine" in the Google Cloud Platform console
You will see the cluster listed:
Run a Deployment
Most Kubernetes labs start by having you run a handful of containers, and this one won't be different :).
$ cat <<EOF | kubectl apply -f -
apiVersion: apps/v1
kind: Deployment
metadata:
  labels:
    run: hello-k8s
  name: hello-k8s
spec:
  replicas: 3
  selector:
    matchLabels:
      run: hello-k8s
  template:
    metadata:
      labels:
        run: hello-k8s
    spec:
      containers:
      - image: kennethreitz/httpbin
        name: hello-k8s
        ports:
        - containerPort: 80
          protocol: TCP
        resources:
          requests:
            cpu: "50m"
EOF
In this example, there are three replicas, all running on different nodes. You may have slightly different results.
$ kubectl get pods -o wide
Check the Dashboard
Workloads that are deployed to your Kubernetes Engine cluster are displayed in the Google Cloud Console. Navigate to Kubernetes Engine and then Workloads.
You can see the hello-k8s deployment we just created.
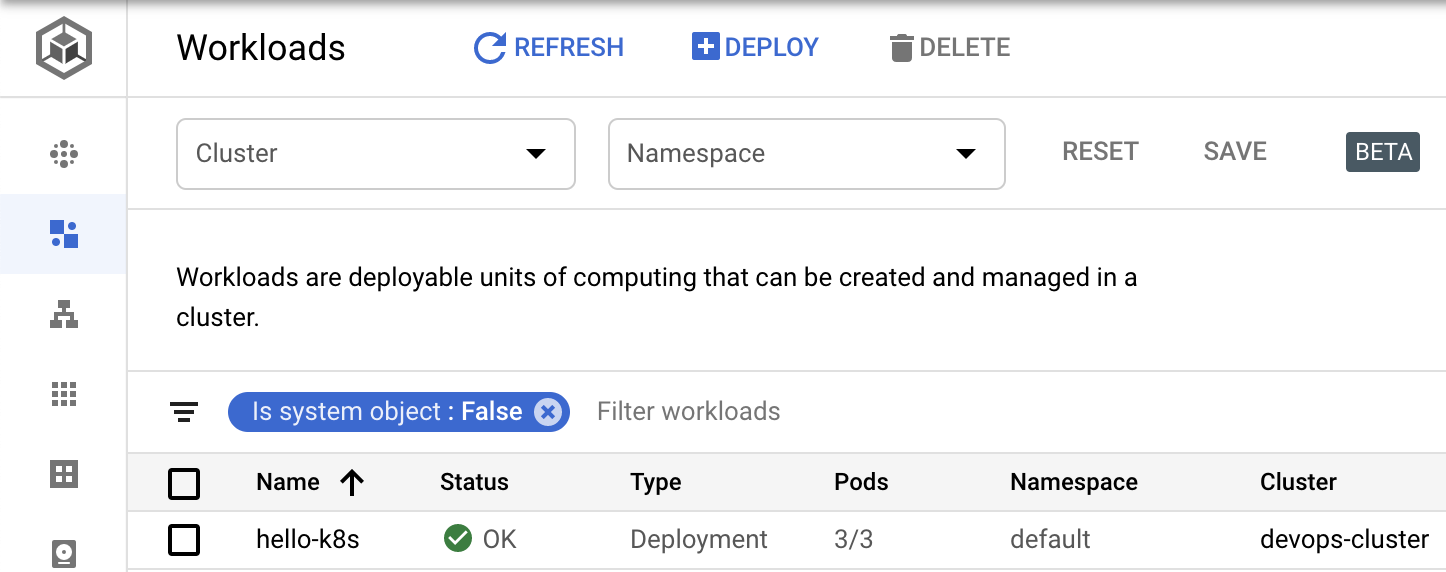
Click on it, and explore the user interface.
A Kubernetes Engine cluster consists of a master and nodes. A node pool is a subset of node instances within a cluster that all have the same configuration. By default a Kubernetes Engine cluster has a single node pool, but you can add or remove them as you wish to change the shape of your cluster.
In the previous example, you created a cluster with auto scaling enabled, this gave us three nodes (3x e2-medium VMs, 100 GB of disk each). This created a single node pool (called default-pool), which we can inspect:
$ gcloud container node-pools list --cluster devops-cluster \
  --zone europe-west1-b
If you want to add more nodes of this type, you can grow this node pool. If you want to add more nodes of a different type, you can add other node pools.
A common method of moving a cluster to larger nodes is to add a new node pool, move the work from the old nodes to the new, and delete the old node pool.
Let's add a second node pool, and migrate our workload over to it.
$ gcloud container node-pools create new-pool --cluster devops-cluster \
  --machine-type e2-medium --num-nodes 1 \
  --zone europe-west1-b
Verify that you have two node pools:
$ gcloud container node-pools list --cluster devops-cluster \
  --zone europe-west1-b
Check the nodes:
$ kubectl get nodes
Kubernetes does not reschedule Pods as long as they are running and available, so your workload remains running on the nodes in the default pool.
Look at one of your nodes using kubectl describe. Just like you can attach labels to pods, nodes are automatically labeled with useful information which lets the scheduler make decisions and the administrator perform action on groups of nodes.
Replace NODE_NAME with the name of one of your nodes from the previous step.
$ kubectl describe node NODE_NAME
Name:               gke-devops-cluster-default-pool-...
Roles:              <none>
Labels:             beta.kubernetes.io/arch=amd64
                    beta.kubernetes.io/instance-type=e2-medium
                    beta.kubernetes.io/os=linux
                    cloud.google.com/gke-nodepool=default-pool
                    cloud.google.com/gke-os-distribution=cos
                    failure-domain.beta.kubernetes.io/region=europe-west1
                    failure-domain.beta.kubernetes.io/zone=europe-west1-b
                    kubernetes.io/arch=amd64
                    kubernetes.io/hostname=gke-devops-cluster-default-pool-6fe272a3-8pjt
                    kubernetes.io/os=linux
                    node.kubernetes.io/masq-agent-ds-ready=true
                    projectcalico.org/ds-ready=true
You can also select nodes by node pool using the cloud.google.com/gke-nodepool label. Let's use this powerful construct
$ kubectl get nodes -l cloud.google.com/gke-nodepool=default-pool
Migrating pods to the new Node Pool
To migrate your pods to the new node pool, you must perform the following steps:
- Cordon the existing node pool: This operation marks the nodes in the existing node pool (
default-pool) as unschedulable. Kubernetes stops scheduling new Pods to these nodes once you mark them as unschedulable. - Drain the existing node pool: This operation evicts the workloads running on the nodes of the existing node pool (
default-pool) gracefully.
You could cordon an individual node using the kubectl cordon command, but running this command on each node individually would be tedious. To speed up the process, we can embed the command in a loop.
$ for node in $(kubectl get nodes -l cloud.google.com/gke-nodepool=default-pool -o=name); do kubectl cordon "$node"; done
After running the loop, you should see that the default-pool nodes have SchedulingDisabled status in the node list:
$ kubectl get nodes
Next, we want to evict the Pods already scheduled on each node. To do this, we will construct another loop, this time using the kubectl drain command:
$ for node in $(kubectl get nodes -l cloud.google.com/gke-nodepool=default-pool -o=name); do kubectl drain --force --ignore-daemonsets "$node"; done
As each node is drained, the pods running on it are evicted. Because the default node pool is unschedulable, the pods are now running on the new node pool:
$ kubectl get pods -o wide
You can now delete the original node pool:
$ gcloud container node-pools delete default-pool --cluster devops-cluster \
  --zone europe-west1-b
Deleting node pool default-pool...done.Google Kubernetes Engine includes the ability to scale the cluster based on scheduled workloads. Kubernetes Engine's cluster autoscaler automatically resizes clusters based on the demands of the workloads you want to run.
Let us simulate some additional load to our web application by increasing the number of replicas:
$ kubectl scale deployment hello-k8s --replicas=10
Even with our larger machine, this is more work than we have space in our cluster to handle:
$ kubectl get pods
We can see that there are many pods that are stuck with the status of "Pending". This means that Kubernetes has not yet been able to schedule that pod to a node.
Copy the name of one of the pods marked Pending, and look at its events with kubectl describe. You should see a message like the following:
$ kubectl describe pod hello-k8s-xxxxx-xxx
Events:
  Type     Reason            Age                  From               Message
  ----     ------            ----                 ----               -------
  Warning  FailedScheduling  67s (x7 over 6m48s)  default-scheduler  0/1 nodes are available: 1 Insufficient cpu.
The scheduler was unable to assign this pod to a node because there is not sufficient CPU space left in the cluster. We can add nodes to the cluster in order to have enough resources for all of the pods in our Deployment.
Cluster Autoscaler can be enabled when creating a cluster, or you can enable it by updating an existing node pool. We will enable cluster autoscaler on our new node pool.
$ gcloud container clusters update devops-cluster --enable-autoscaling \
  --min-nodes=1 --max-nodes=3 --node-pool=new-pool \
  --zone europe-west1-b
Once auto scaling is enabled, Kubernetes Engine will automatically add new nodes to your cluster if you have created new Pods that don't have enough capacity to run; conversely, if a node in your cluster is underutilized, Kubernetes Engine can scale down the cluster by deleting the node.
After the command above completes, we can see that the autoscaler has noticed that there are pods in Pending, and creates new nodes to give them somewhere to go. After a few more minutes, you will see a new node has been created, and all the pods are now Running:
$ kubectl get nodes
Cluster Autoscaler will scale down as well as up. When you enable the autoscaler, you set a minimum of one node. If you were to resize to one Pod, or delete the Deployment and wait about 10 minutes, you would see that all but one of your nodes are considered unnecessary, and removed.
$ kubectl delete deployment hello-k8s
Preemptible VMs are Google Compute Engine VM instances that last a maximum of 24 hours and provide no availability guarantees. Preemptible VMs are priced substantially lower than standard Compute Engine VMs and offer the same machine types and options.
If your workload can handle nodes disappearing, using Preemptible VMs with the Cluster Autoscaler lets you run work at a lower cost. To specify that you want to use Preemptible VMs you simply use the --preemptible flag when you create the node pool. But if you're using Preemptible VMs to cut costs, then you don't need them sitting around idle. So let's create a node pool of Preemptible VMs that starts with zero nodes, and auto scales as needed.
Before we create it, how do we schedule work on the preemptible VMs? These would be a special set of nodes for a special set of work - probably low priority or batch work. For that we'll use a combination of a NodeSelector and taints/tolerations. The full command we'll run is:
$ gcloud container node-pools create preemptible-pool \
  --cluster devops-cluster --preemptible --num-nodes 0 \
  --enable-autoscaling --min-nodes 0 --max-nodes 2 \
  --node-taints=pod=preemptible:PreferNoSchedule \
  --zone europe-west1-b
We now have two node pools, but the new "preemptible" pool is autoscaled and is sized to zero initially so we only see the 1-3 nodes from the autoscaled node pool that we created in the previous section.
Usually as far as Kubernetes is concerned, all nodes are valid places to schedule pods. We may prefer to reserve the preemptible pool for workloads that are explicitly marked as suiting preemption — workloads which can be replaced if they die, versus those that generally expect their nodes to be long-lived.
To direct the scheduler to schedule pods onto the nodes in the preemptible pool we first label the new nodes.
We can mark the preemptible nodes with a taint, which makes the scheduler avoid using it for certain Pods.
We can then mark pods that we want to run on the preemptible nodes with a matching toleration, which says they are OK to be assigned to nodes with that taint.
Let's create a new workload that's designed to run on preemptible nodes and nowhere else.
$ cat <<EOF | kubectl apply -f -
apiVersion: apps/v1
kind: Deployment
metadata:
  labels:
    run: hello-preempt
  name: hello-preempt
spec:
  replicas: 20
  selector:
    matchLabels:
      run: hello-preempt
  template:
    metadata:
      labels:
        run: hello-preempt
    spec:
      containers:
      - image: kennethreitz/httpbin
        name: hello-preempt
        ports:
        - containerPort: 80
          protocol: TCP
        resources:
          requests:
            cpu: "50m"
      tolerations:
      - key: pod
        operator: Equal
        value: preemptible
        effect: PreferNoSchedule
      nodeSelector:
        cloud.google.com/gke-preemptible: "true"
EOF
Wait a few minutes and run:
$ kubectl get nodes
And check the pods. You should see all pods running on preemptible nodes:
$ kubectl get pods -o wide
Because of the NodeSelector initially there were no nodes on which we could schedule the work. The scheduler works in tandem with the Cluster Autoscaler to provision new nodes in the pool with the node labels that match the NodeSelector. We haven't demonstrated it here but the taint would mean preferring to prevent workloads with pods that don't tolerate the taint from being scheduled on these nodes.
As we do the cleanup for this section, let's delete the preemptible node pool and see what happens to the pods that we just created. This isn't something you would want to do in production :).
$ gcloud container node-pools delete preemptible-pool --cluster devops-cluster \
  --zone europe-west1-b
Deleting node pool preemptible-pool...done.If we check our pods afterwards - they should be in pending state:
$ kubectl get pods
As you can see, because of the NodeSelector, none of the pods are running. Now delete the deployment.
$ kubectl delete deployment hello-preempt
A best practice for running applications in Google Cloud Platform is to distribute your resources across multiple zones, to tolerate outages. Google designs zones to be independent from each other: a zone usually has power, cooling, networking, and control planes that are isolated from other zones, and most single failure events will affect only a single zone.
A cluster can be created or reconfigured to have additional zones, separate from the primary zone (where the master runs). When you enable additional zones, all a cluster's node pools will be expanded to run across those zones.
$ gcloud container clusters delete devops-cluster \
  --zone europe-west1-b

$ gcloud container clusters create devops-cluster \
    --region europe-west1 \
    --num-nodes 1 \
    --enable-network-policy \
    --machine-type e2-medium
When you create a multi-zone (regional) cluster, Kubernetes Engine makes the resource footprint the same in all zones:
$ kubectl get nodes
We created a cluster with only one node but asked for it to be spread across a region. In this case, you will see we got a total of 3 nodes, with one node in each zone of the selected region.
Resources are spread evenly across zones to ensure that Pods can be scheduled evenly across zones. Doing so improves availability and failure recovery. The nodes have labels applied in Kubernetes that indicate their failure domain, so that they can be taken into account by the Kubernetes scheduler.
Verify that the VMs are indeed in different zones using gcloud compute:
$ gcloud compute instances list --format="csv[separator="\\t"](name,zone.basename())" | grep devops-cluster
Scheduling a distributed workload
You may recall when we first scheduled a workload, our pods were scheduled randomly (and can end up on the same node). Now our nodes are in different zones, so we can use the "failure-domain" labels that are attached to them as an indication to the Kubernetes scheduler that pods should be spread evenly among our nodes.
$ cat <<EOF | kubectl create -f -
apiVersion: apps/v1
kind: Deployment
metadata:
  labels:
    run: hello-regional
  name: hello-regional
spec:
  replicas: 9
  selector:
    matchLabels:
      run: hello-regional
  template:
    metadata:
      labels:
        run: hello-regional
    spec:
      containers:
      - image: kennethreitz/httpbin
        name: hello-regional
        ports:
        - containerPort: 80
          protocol: TCP
        resources:
          requests:
            cpu: "50m"
      affinity:
        podAntiAffinity:
          requiredDuringSchedulingIgnoredDuringExecution:
             - topologyKey: failure-domain.beta.kubernetes.io/zone
EOF
Once again, check the pods. You should see 9 pods, evenly spread across 3 nodes (that are in 3 different zones):
$ kubectl get pods -owide
Node auto-repair
Kubernetes Engine's node auto-repair feature helps you keep the nodes in your cluster in a healthy, running state. When enabled, Kubernetes Engine makes periodic checks on the health state of each node in your cluster. If a node fails consecutive health checks over an extended time period (approximately 10 minutes), Kubernetes Engine initiates a repair process for that node. This feature is enabled by default.
Let's break a VM!
This gcloud command will find the VM in your regional node pool which is in the europe-west1-b zone, and SSH into it.
$ gcloud compute ssh $(gcloud compute instances list \
                       --zones="europe-west1-b" \
                       --format="value(name)") --zone europe-west1-b
You can simulate a node failure by removing the kubelet binary, which is responsible for running Pods on every Kubernetes node:
$ sudo rm /home/kubernetes/bin/kubelet && sudo systemctl restart kubelet
$ exit
Now when we check the node status we see the node is NotReady (you might need to wait for about 1 minute).
$ kubectl get nodes
The Kubernetes Engine node repair agent will wait a few minutes in case the problem is intermittent. We'll come back to this in a few.
Define a maintenance window
You can configure a maintenance window to have more control over when automatic upgrades are applied to Kubernetes on your cluster.
Creating a maintenance window instructs Kubernetes Engine to automatically trigger any automated tasks in your clusters, such as master upgrades, node pool upgrades, and maintenance of internal components, during a specific timeframe.
The times are specified in UTC, so select an appropriate time and set up a maintenance window for your cluster.
$ gcloud container clusters update devops-cluster --maintenance-window=00:00 \
  --region europe-west1
Node auto-upgrades
Whenever a new version of Kubernetes is released, Google upgrades your master to that version. You can then choose to upgrade your nodes to that version, bringing functionality and security updates to both the OS and the Kubernetes components.
Node Auto-Upgrades use the same update mechanism as manual node upgrades, but do the scheduled upgrades during your maintenance window.
Auto-upgrades are enabled per node pool (and are enabled by default). Additionally, GKE by default has a "surge upgrade" feature, that creates additional nodes for short periods of time to reduce disruption caused by upgrades.
Check your node repair
How is that node repair coming?
After about 20 minutes, you will see that the master drained the node, then removed it, and a new node should be turned on in its place.
Because our Deployments are managed by Kubernetes controllers, we should be able to survive the downtime with no problems.
Finally, delete the deployment.
$ kubectl delete deployment hello-regional
Along with defining the applications you run in your Kubernetes environment, you can define policies about which pods are able to talk to which others.
Deploy a sample application
Start some pods to act as tiers of a hypothetical application:
$ kubectl run frontend \
  --image=kennethreitz/httpbin \
  --labels=app=frontend \
  --port=80

$ kubectl expose pod frontend

$ kubectl run backend \
  --image=kennethreitz/httpbin \
  --labels=app=backend \
  --port=80

$ kubectl expose pod backend

$ kubectl run untrusted \
  --image=kennethreitz/httpbin \
  --labels=app=untrusted \
  --port=80

$ kubectl expose pod untrusted
In this example, pods with the label app=frontend should be able to connect to pods with the label app=backend. We also run some untrusted code, and that pod should not be able to connect to our backend pods. (This simulates a situation where a malicious actor gets access to a container on your network through a vulnerability in its code.)
Verify connectivity
Using kubectl exec we can run a command on our untrusted pod:
$ UNTRUSTED_POD=$(kubectl get pods -l app=untrusted -o jsonpath='{.items[0].metadata.name}')

$ kubectl exec -it $UNTRUSTED_POD -- bash -c "apt-get update && apt-get install wget -y"

$ kubectl exec -it $UNTRUSTED_POD -- wget -qO- backend:80/headers

{
  "headers": {
    "Accept": "*/*",
    "Accept-Encoding": "identity",
    "Connection": "Keep-Alive",
    "Host": "frontend",
    "User-Agent": "Wget/1.19.4 (linux-gnu)"
  }
}
Create a network policy
We can now create a NetworkPolicy which defines that only traffic from "frontend" is allowed to access "backend"
$ cat <<EOF | kubectl create -f -
kind: NetworkPolicy
apiVersion: networking.k8s.io/v1
metadata:
  name: frontend-to-backend
spec:
  podSelector:
    matchLabels:
      app: backend
  ingress:
  - from:
      - podSelector:
          matchLabels:
            app: frontend
EOF
Verify your network policy
Now, test again:
$ kubectl exec -it $UNTRUSTED_POD -- wget -qO- frontend:80/headers

{
  "headers": {
    "Accept": "*/*",
    "Accept-Encoding": "identity",
    "Connection": "Keep-Alive",
    "Host": "frontend",
    "User-Agent": "Wget/1.19.4 (linux-gnu)"
  }
}
You can connect to the frontend service — but not the backend service, as our policy prohibits it.
$ kubectl exec -it $UNTRUSTED_POD -- wget -qO- backend:80/headers

wget: download timed out
command terminated with exit code 1
Can we connect from the frontend to the backend?
$ FRONTEND_POD=$(kubectl get pods -l app=frontend -o jsonpath='{.items[0].metadata.name}')

$ kubectl exec -it $FRONTEND_POD -- bash -c "apt-get update && apt-get install wget -y"

$ kubectl exec -it $FRONTEND_POD -- wget -qO- backend:80/headers

{
  "headers": {
    "Accept": "*/*",
    "Accept-Encoding": "identity",
    "Connection": "Keep-Alive",
    "Host": "frontend",
    "User-Agent": "Wget/1.19.4 (linux-gnu)"
  }
}
You see our policy does exactly what was asked: the frontend pod can connect to the backend pod, but nothing else can.
Delete the policy. You can now connect to backend from untrusted pod:
$ kubectl delete networkpolicy frontend-to-backend

$ kubectl exec -it $UNTRUSTED_POD -- wget -qO- backend:80/headers

{
  "headers": {
    "Accept": "*/*",
    "Accept-Encoding": "identity",
    "Connection": "Keep-Alive",
    "Host": "backend",
    "User-Agent": "Wget/1.19.4 (linux-gnu)"
  }
}
To connect to services in Google Cloud Platform, you need to provide an identity. While you might use a user's identity if operating interactively, services running on Compute Engine instances normally use a service account.
Applications running on Compute Engine can access and use the service account associated with the instance, and as Kubernetes Engine nodes are Compute Engine instances, containers can access the identities provided by the node.
However, if you grant that identity access to a service, then any container that runs on the node will have access to it.
A better practice is to create a service account for your own application, and provide that to your application using Kubernetes secrets.
We will use a sample application which reads messages posted to a Google Cloud Pub/Sub queue.
Create a Pub/Sub topic
The Pub/Sub subscriber application you will deploy uses a subscription named echo-read on a Pub/Sub topic called echo.
$ gcloud pubsub topics create echo
$ gcloud pubsub subscriptions create echo-read --topic=echo
Deploy an application
Our sample application reads messages that are published to a Pub/Sub topic.
$ cat <<EOF | kubectl create -f -
apiVersion: apps/v1
kind: Deployment
metadata:
  name: pubsub
spec:
  selector:
    matchLabels:
      app: pubsub
  template:
    metadata:
      labels:
        app: pubsub
    spec:
      containers:
      - name: subscriber
        image: gcr.io/google-samples/pubsub-sample:v1
EOF
Wait a few seconds and look at the pod:
$ kubectl get pods -l app=pubsub
You can see that the container is failing to start and went into a CrashLoopBackOff state. Inspect the logs from the Pod by running:
$ kubectl logs -l app=pubsub
...
google.gax.errors.RetryError: RetryError(Exception occurred in retry
method that was not classified as transient, caused by <_Rendezvous
of RPC that terminated with (StatusCode.PERMISSION_DENIED, Request
had insufficient authentication scopes.)>)
The stack trace and the error message indicates that the application does not have permissions to query the Cloud Pub/Sub service. This is because the "Compute Engine default service account" is not assigned any roles giving it permission to Cloud Pub/Sub.
Let's create a service account for our application:
$ PROJECT=$(gcloud config get-value project)

$ gcloud iam service-accounts create pubsub-sa --display-name "Pub/Sub demo service account"

$ gcloud projects add-iam-policy-binding $PROJECT \
    --member serviceAccount:pubsub-sa@$PROJECT.iam.gserviceaccount.com \
    --role roles/pubsub.subscriber

$ gcloud iam service-accounts keys create key.json \
    --iam-account pubsub-sa@$PROJECT.iam.gserviceaccount.com
Import secret into Kubernetes
Load in the Secret:
$ kubectl create secret generic pubsub-key \
    --from-file=key.json=key.json
We now have a secret called pubsub-key which contains a file called key.json. You can update your Deployment to mount this Secret, you can override the application to use this service account instead of the default identity of the node.
Configure the application with the Secret
The updated manifest file defines the following to make the credentials available to the application:
- a volume named
google-cloud-keywhich uses the Secret namedpubsub-key. - a volume-mount, making the
google-cloud-keyavailable at/var/secrets/googledirectory inside the container GOOGLE_APPLICATION_CREDENTIALSenvironment variable set as/var/secrets/google/key.json, which will contain the credentials file when the secret is mounted to the container as a volume
        volumeMounts:
        - name: google-cloud-key
          mountPath: /var/secrets/google
        env:
        - name: GOOGLE_APPLICATION_CREDENTIALS
          value: /var/secrets/google/key.json
Apply new configuration:
$ cat <<EOF | kubectl apply -f -
apiVersion: apps/v1
kind: Deployment
metadata:
  name: pubsub
spec:
  selector:
    matchLabels:
      app: pubsub
  template:
    metadata:
      labels:
        app: pubsub
    spec:
      volumes:
      - name: google-cloud-key
        secret:
          secretName: pubsub-key
      containers:
      - name: subscriber
        image: gcr.io/google-samples/pubsub-sample:v1
        volumeMounts:
        - name: google-cloud-key
          mountPath: /var/secrets/google
        env:
        - name: GOOGLE_APPLICATION_CREDENTIALS
          value: /var/secrets/google/key.json
EOF
Your pod will now start:
$ kubectl get pods -l app=pubsub
NAME                      READY   STATUS    RESTARTS   AGE
pubsub-767df67f46-rs9xs   1/1     Running   0          50s
Test receiving Pub/Sub messages
Validate that your application is now able to read from Google Cloud Pub/Sub:
$ gcloud pubsub topics publish echo --message="Hello world"

$ kubectl logs -l app=pubsub
Pulling messages from Pub/Sub subscription...
[2023-07-23 18:29:48.328388] Received message: ID=1851594963238409 Data=b'Hello world'
You have successfully configured an application on Kubernetes Engine to authenticate to Pub/Sub API using service account credentials.
Delete your your deployment:
$ kubectl delete deployment pubsub
To publish a service to the world via HTTP, Kubernetes has an object called an Ingress. The Ingress object and its associated controller configure a load balancer, like the Google Cloud Platform HTTP(S) Load Balancer.
Deploy an application
Let's redeploy our faithful hello-k8s app:
$ kubectl create deployment hello-k8s --image=kennethreitz/httpbin \
       --port=80 --replicas=3
Reserve a static IP address
When you create an Ingress, you will be allocated a random IP address. It's sensible to instead reserve an IP address, and then allocate that to your Ingress, so that you don't need to change DNS if you ever need to delete and recreate your load balancer.
Google Cloud Platform has two types of IP addresses - regional (for Network Load Balancers, as used by Services) and global (for HTTP Load Balancers).
Reserve a static external IP address named my-static-ip by running:
$ gcloud compute addresses create my-static-ip --global

$ gcloud compute addresses list --filter="name=my-static-ip"
This is the value you would program into DNS.
Create a Service
We now need to tell Kubernetes that these pods comprise a Service, which can be used as a target for our traffic.
In many other examples you might have used --type=LoadBalancer. That creates a Network Load Balancer, which exists in one region. By default, a GKE cluster has an Ingress controller closely integrated with HTTP(S) Load Balancing, that is able to function in classic and container native mode. When using classic Ingress - we need to configure our services with NodePort.
By using NodePorts, we are instead just exposing the service to the VM IPs, and we can then have our Ingress address those VMs.
$ kubectl expose deployment hello-k8s --target-port=80 --type=NodePort

$ kubectl get service hello-k8s
Any traffic from the Internet to the exposed port on any node will be routed to a healthy container on port 80. You can also see that there is currently no way to contact it from outside the cluster without knowing the Nodes IPs.
Create an Ingress
To fix that, we will create an Ingress object using our static IP and our service:
$ cat <<EOF | kubectl create -f -
apiVersion: networking.k8s.io/v1
kind: Ingress
metadata:
  name: my-ingress
  annotations:
    kubernetes.io/ingress.global-static-ip-name: my-static-ip
spec:
  defaultBackend:
    service:
      name: hello-k8s
      port:
        number: 80
EOF
After ~5 minutes, the load balancer will be created, and mapped to your IP address:
$ kubectl get ingress
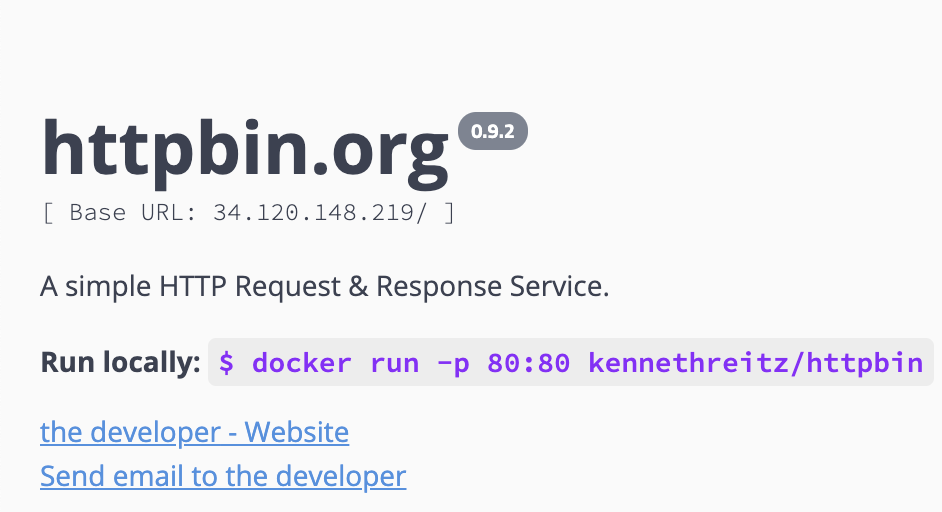
NAME         HOSTS   ADDRESS          PORTS   AGE
my-ingress   *       xx.xxx.xxx.xxx   80      52s
If you navigate to it in your browser, you should see the HTTPBIN application:
Finally, delete your Ingress:
$ kubectl delete ingress my-ingress
Delete the IP address:
$ gcloud compute addresses delete my-static-ip --global
Delete the Pub/Sub topic and subscription:
$ gcloud pubsub subscriptions delete echo-read
$ gcloud pubsub topics delete echo
Delete the service account:
$ export PROJECT_ID=$(gcloud config list --format 'value(core.project)')

$ gcloud iam service-accounts delete pubsub-sa@${PROJECT_ID}.iam.gserviceaccount.com

$ rm key.json
Next, delete the cluster
$ gcloud container clusters delete devops-cluster --region europe-west1
Finally, check if there are any persistent disks left and delete them:
$ gcloud compute disks list --format="json" | jq .[].name | \
  grep "devops-cluster" | xargs gcloud compute disks delete --zone europe-west1-b
Thank you! :)