Last Updated: 2020-09-20
Overview
Google Cloud Platform (GCP) is a suite of cloud computing services that runs on the same infrastructure that Google uses internally for its end-user products, such as Google Search, Gmail, Drive and YouTube. Alongside a set of management tools, it provides a series of modular cloud services including computing, data storage, data analytics and machine learning.
Google Cloud Platform provides infrastructure as a service, platform as a service, and serverless computing environments.
What you'll build
In this codelab, you'll get to know the basics of GCP:
- Create a GCP Account.
- Use Cloud Shell & Cloud Editor.
- Create a Virtual Machine
What you'll learn
- How to do basic operations in Cloud Console & Cloud Shell
What you'll need
- A recent version of your favourite Web Browser
- Basics of BASH
Create an Account
In this step, you register for the Google Cloud Platform free trial and create a project. The free trial provides you:
- $300 Credit for Free
- Access to Google Cloud Platform Products
- You Won't be Billed (though you need to enter your credit card)
- Build with the Power, Speed, Security, Reliability, and Scalability of Google
To register for the free trial open the free trial registration page.
If you do not have a Gmail account, follow the steps to create one. Otherwise, login and complete the registration form.
Read and agree to the terms of service. Click Accept and start a free trial.
Create a Project
Next, create your first project using the Google Cloud Platform Console. The project is used to complete the rest of the lab.
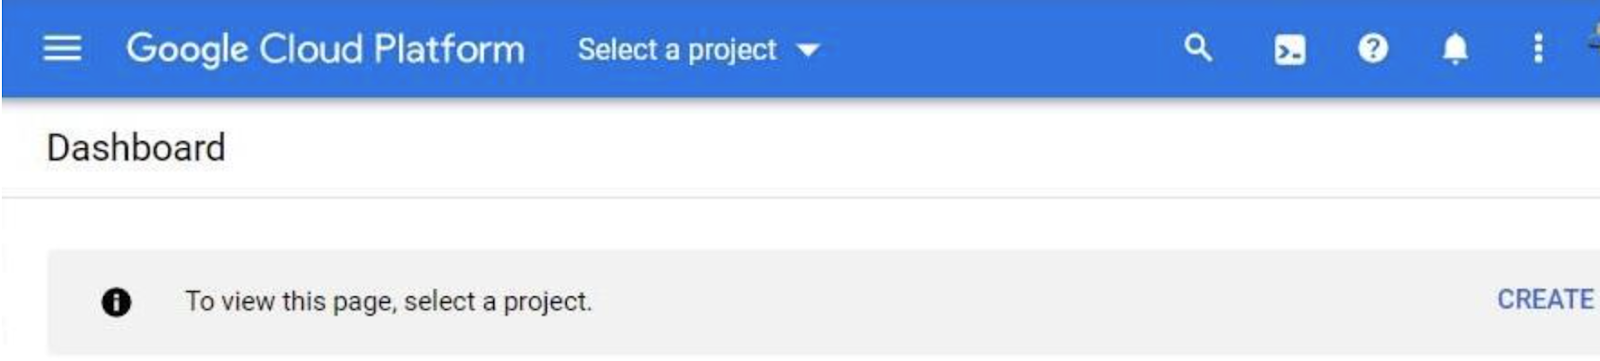
To create a project in the Google Cloud Platform Console, click Select a project → New Project.

In the New Project dialog: for Project name, type whatever you like. Think of a cool Project ID in the text below the project name box and make a note of it; you need it later. Then click Create.
Upgrade Account (Optional)
In the upper-right corner of the console, a button will appear asking you to upgrade your account. Click it when you see it. If the Upgrade button does not appear, you may go to the Free Trial status window:

There you should see an "Activate" button. For more info you can check the upgrade documentation.
When you upgrade your account, you immediately have access to standard service quotas, which are higher than those available on the free trial.
Finalize
On the GCP Console, use the left-hand side menu to navigate to Compute Engine and ensure that there are no errors.
Open CloudShell
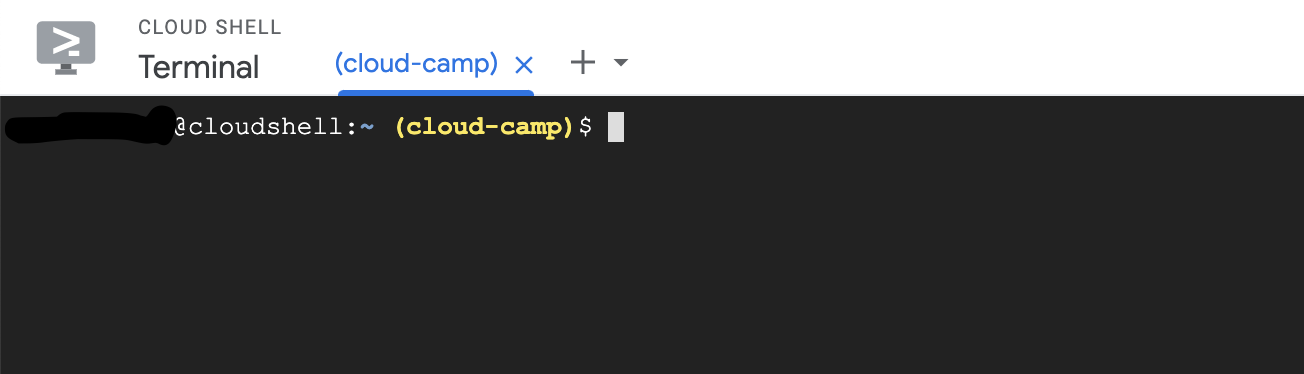
You will do most of the work in other labs from the Google Cloud Shell, a command line environment running in the Cloud. This virtual machine is loaded with all the development tools you'll need (docker, gcloud, kubectl and others) and offers a persistent 5GB home directory and runs in Google Cloud, greatly enhancing network performance and authentication. Open the Google Cloud Shell by clicking on the icon on the top right of the screen:

You should see the shell prompt at the bottom of the window:
Once connected to Cloud Shell, you should see that you are already authenticated and that the project is already set to your project ID.
Run the following command in Cloud Shell to confirm that you are authenticated
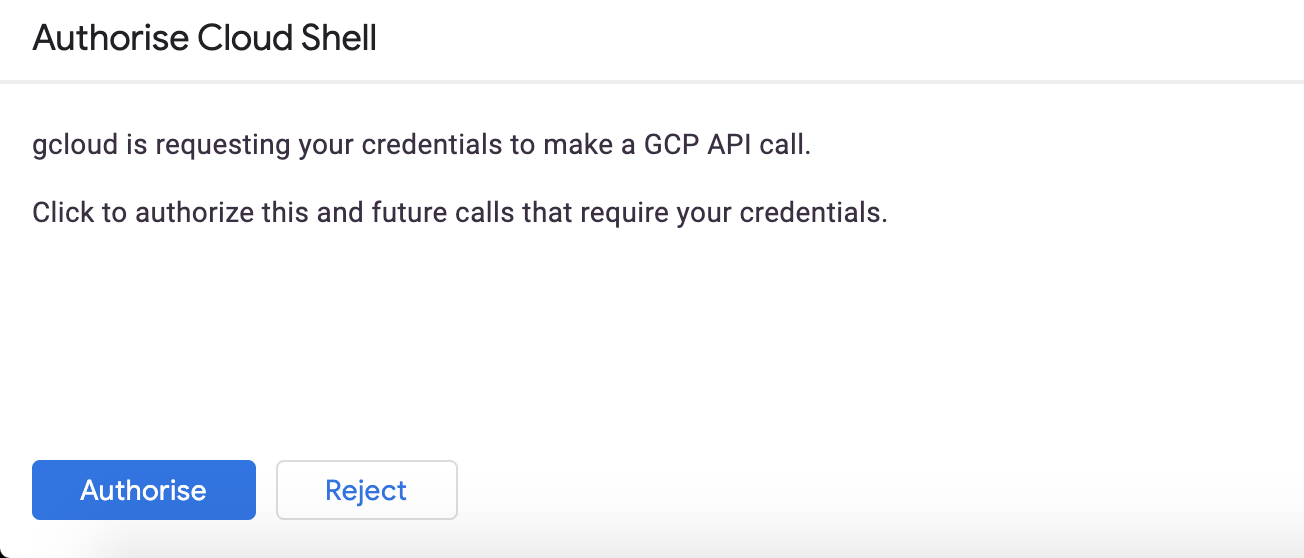
gcloud auth listIf it's the first time you are running Cloud Shell - authorize it.
You might need to run the command again after authorization. Command output:
 Credentialed Accounts
ACTIVE  ACCOUNT
*       <my_account>@<my_domain.com>

To set the active account, run:
$ gcloud config set account `ACCOUNT`Check if your project is set correctly.
gcloud config list projectCommand output
[core]
project = <PROJECT_ID>
If it is not, you can set it with this command:
gcloud config set project <PROJECT_ID>Cloud Editor
Cloud Shell comes with a text editor you can use in your browser. To get started, first create a new file for this codelab.

In the Cloud Shell command line, run the following commands:
$ touch hello-google-cloud.js
$ cloudshell edit hello-google-cloud.js
This should automatically load the Cloud Shell editor. To open the editor without running the edit command, you can click the Open Editor button from the Cloud Shell command line.

Maximize the editor and terminal by clicking the "Open in new window" button.

Your browser window with the Cloud Shell text editor and command line terminal should now look like this:
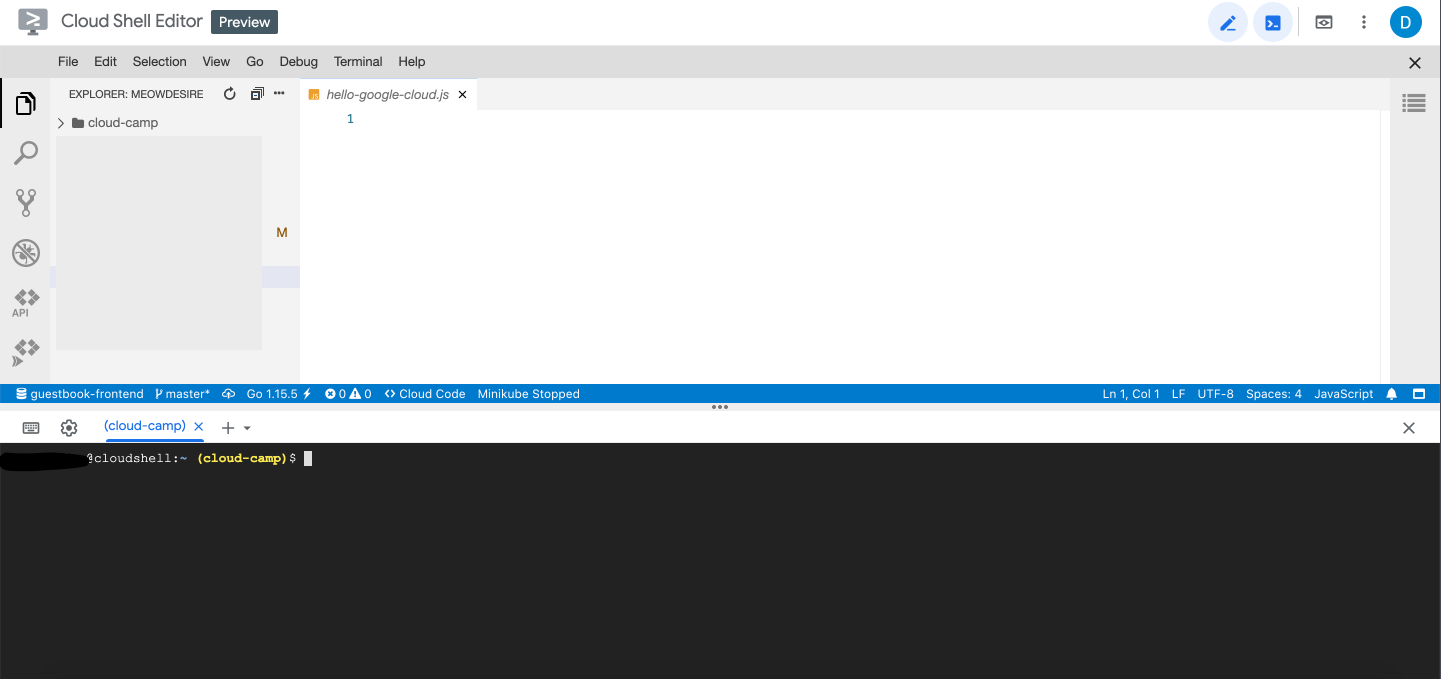
Paste the following code snippet into the editor:
function hello(name) {
  console.log(`Hello, ${name}!`);
}

hello('Google Cloud');
In the Cloud Shell command line terminal, run:
$ node hello-google-cloud.jsYou should see the following output: Hello, Google Cloud!
You can close the Editor window and go back to the Cloud Console.
Google Compute Engine (GCE) offers virtual machines running in Google's data centers connected to its worldwide fiber network. The tooling and workflow offered enables scaling from single instances to global, load-balanced cloud computing.
These VMs boot quickly, come with persistent disk storage, and deliver consistent performance. The machines are available in many configurations including predefined sizes and can also be created with Custom Machine Types optimized for your specific needs.
Finally, GCE virtual machines are also the technology used by several other GCP products (Kubernetes Engine, Cloud Dataproc, Cloud Dataflow, etc...).
Examine the Networks
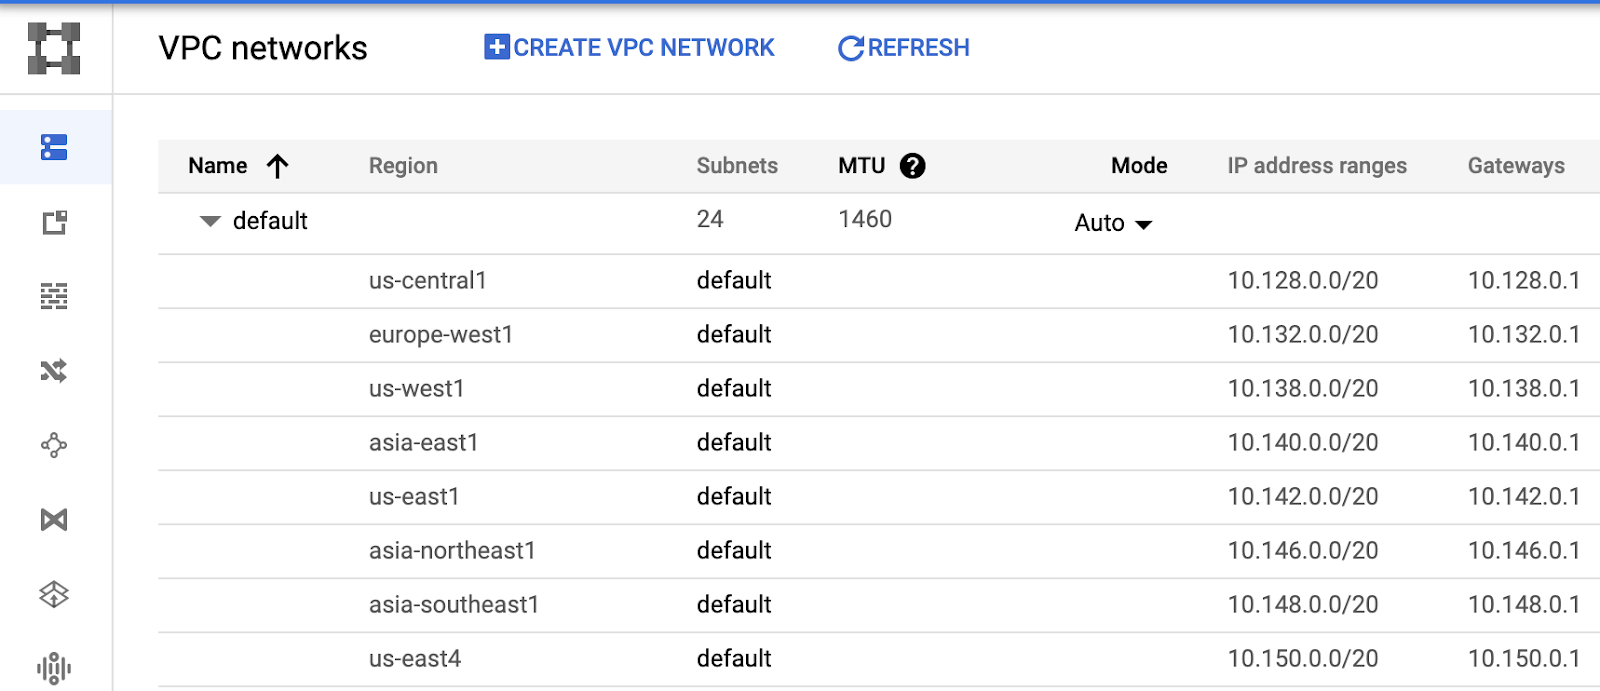
From the Products and Services menu, choose VPC Network from the Networking section.
Notice that the first time you enter this service in a new project, a message will appear saying that Compute Engine is getting ready. At this point, the default network is being created. It will take a minute or so for this to complete.
Once the initial network is set up, notice there are a number of subnets created, one for each region that supports Compute Engine.
Notice each subnet has an internal IP address range beginning with 10.
Click on Firewall rules from the navigation pane on the left.
Notice that a number of rules have been created for you. The rule default-allow-icmp allows machines to ping each other. The rule default-allow-internal allows machines internal to this network to communicate via any port. There are also rules for ssh and rdp. These allow us to remotely connect to Linux and Windows machines respectively.
Create a Virtual Machine
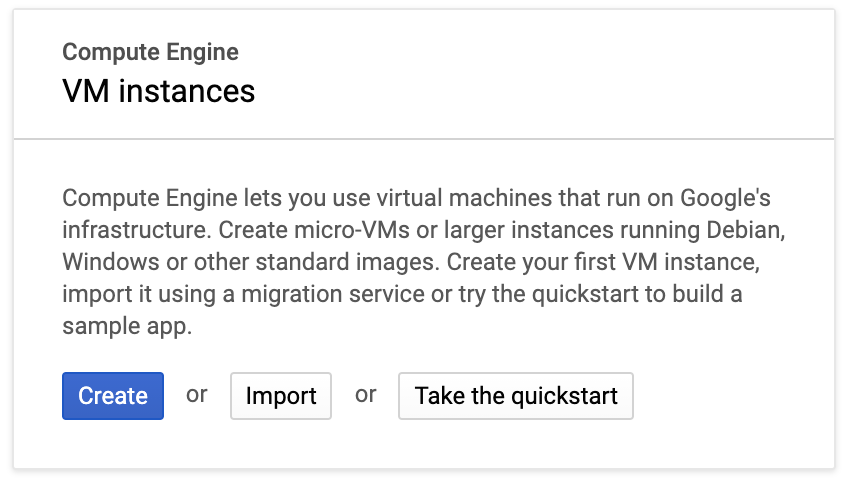
From the Products and Services menu, choose Compute Engine.
You'll have an empty screen saying you don't have any VMs.
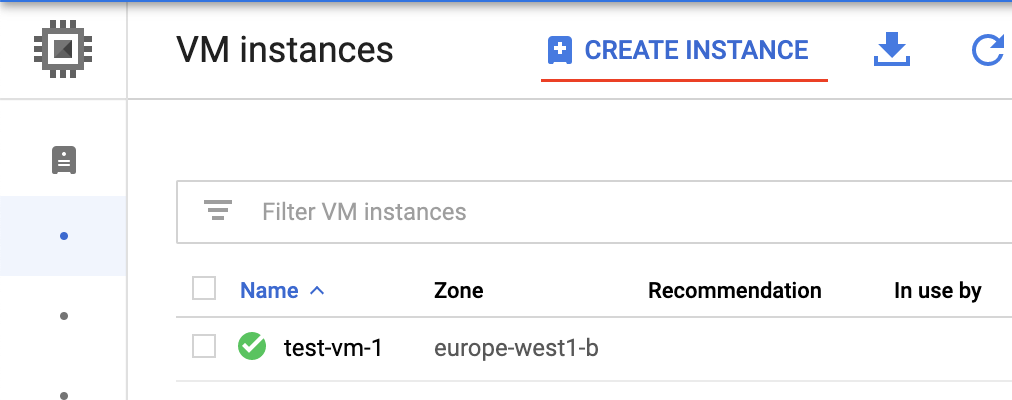
Click the Create button. On the Create an instance form, name the instance test-vm-1. From the regions drop down select europe-west1, in the zones dropdown, select any zone in europe-west1.
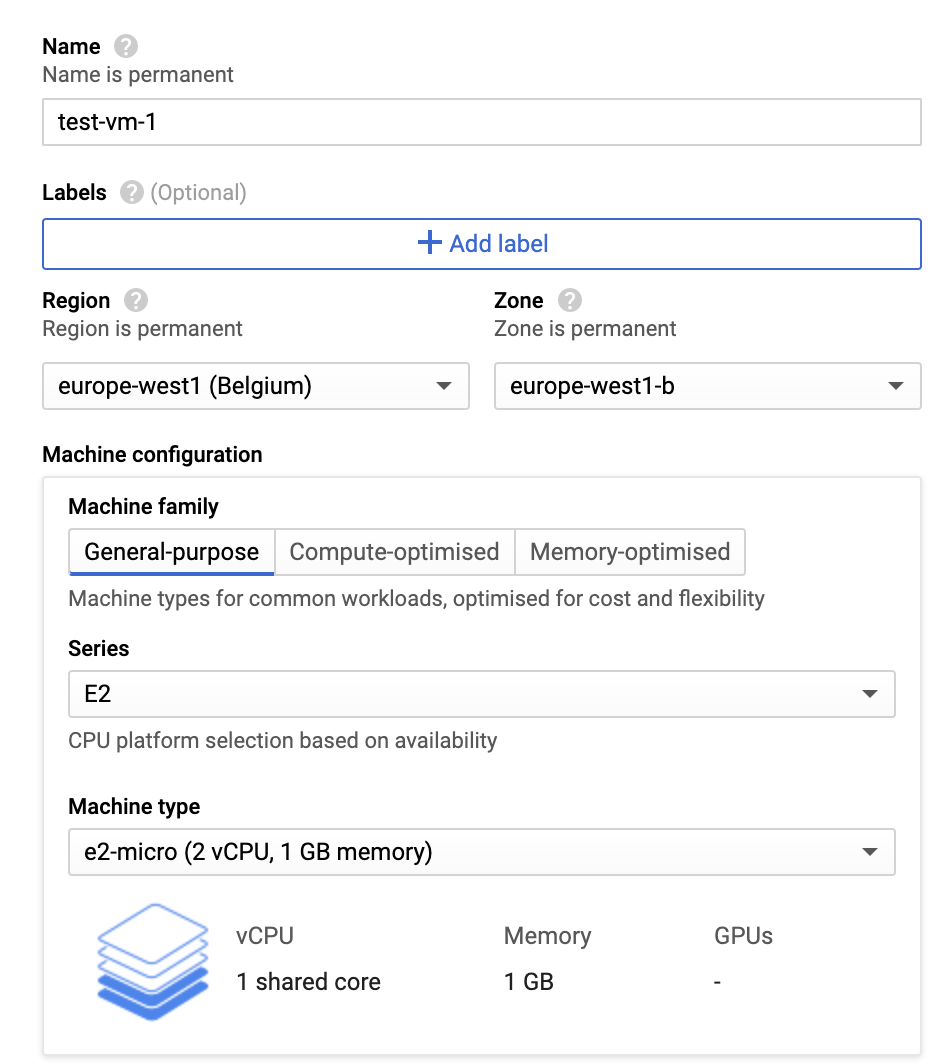
Leave everything else as the default and click the Create button.
When a green check appears next to the instance, click the SSH button to connect to it.

Once the connection is made, a Linux shell will appear. Type the command below:
$ ip addr showIt should display the network adapters and the IP addresses assigned. You should see a loopback adapter with a 127.0.0.1 IP and an ethernet adapter with an IP that starts with 10.
Leave the SSH window open and go back to the Cloud Console.
Create another instance.
This time name it web-server. Select any zone in europe-north1.

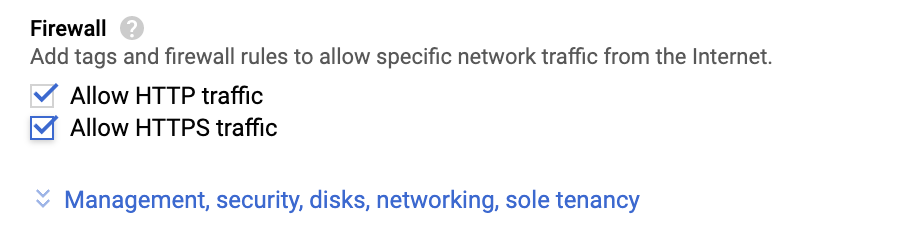
Scroll down to the Firewall section and check both allow HTTP and HTTPS traffic.
Leave everything else as the default and click the Create button.
SSH into this machine like you did the first, and then enter the following command to install Apache Web Server.
$ sudo apt-get install -y apache2When the command completes, return to the web console and click on the web-server machine's External IP address. Notice it fails. This is because you enabled HTTPS on the firewall rule and that link is automatically set up with HTTPS, but Apache is configured to listen to HTTP port, so change the request to HTTP instead. This time it will show the Apache default home page.
Go to the Cloud Console. Make note of both machines' internal and external IP addresses. Go to the SSH window of the test-vm-1 server. Try to ping the web server on the Internal IP. Just type the following:
$ ping <WEB_SERVER_IP>It should work. You are communicating between two machines in different data centers via their internal address!
Enter Ctrl+C on your keyboard to stop the ping command. Now ping the web server machine's external IP address.
It should work as well. Again, press Ctrl+C to stop the command.
Go back to the Cloud Console and return to the VPC Network → Firewall rules as you did earlier.
Notice two additional rules were created for HTTP and HTTPS. These were created automatically when you created the web server earlier.
Click the rule default-allow-http to see its details. Notice the target tag value of http-server.
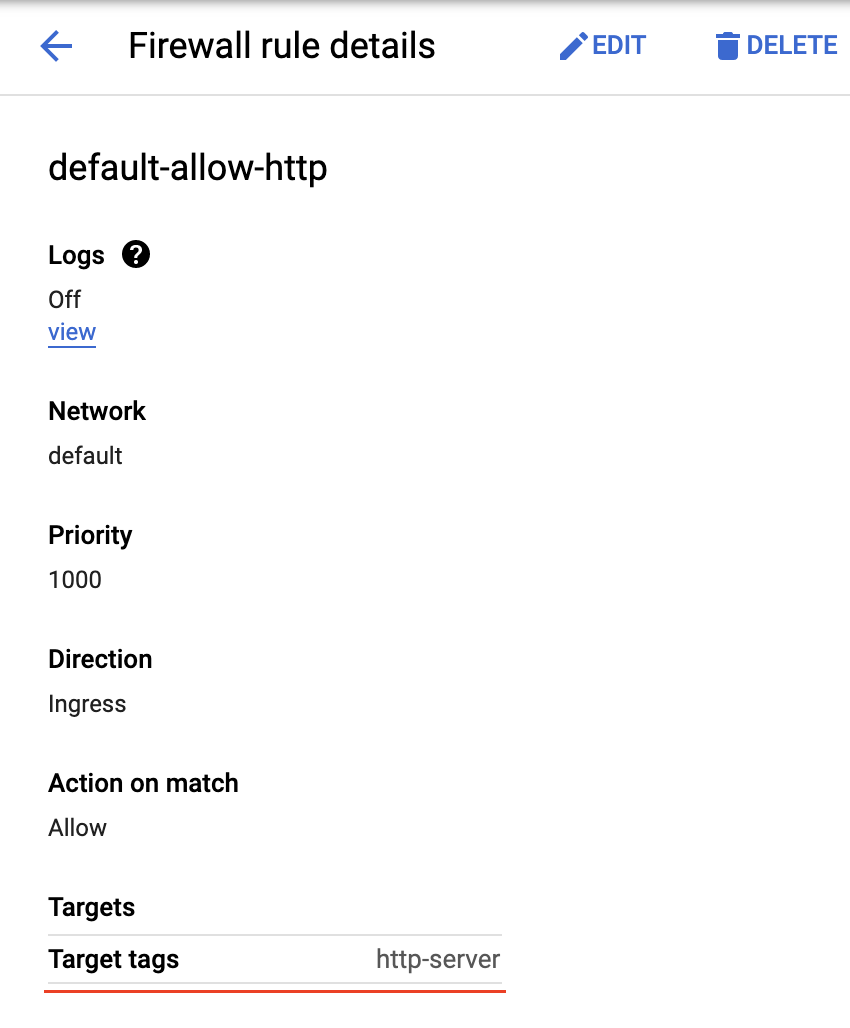
Recall when you checked the two checkboxes when creating the web server. It added these tags to that server. This firewall rule only applies to machines that have that tag.
In the Cloud Console activate the Google Cloud Shell.

In Cloud Shell, enter the following command.
$ gcloud compute instances create linux-server --zone=europe-west1-bGive it a couple seconds and then go to the Compute Engine, if you're not on that page.
If you're already there - in the main browser click the Refresh button on the VM Instances page (not the browser's refresh button).

A machine called linux-server should appear in your list of virtual machines.
Type the following command into Cloud Shell.
$ gcloud compute instances listYou should see your machines.
Next, click the Create Instance button. Set the name to linux-server-2.
Choose the zone europe-west1-b.
Check the boxes to allow HTTP and HTTPS traffic.
DO NOT click the Create button.
Instead, click the command line link at the bottom.
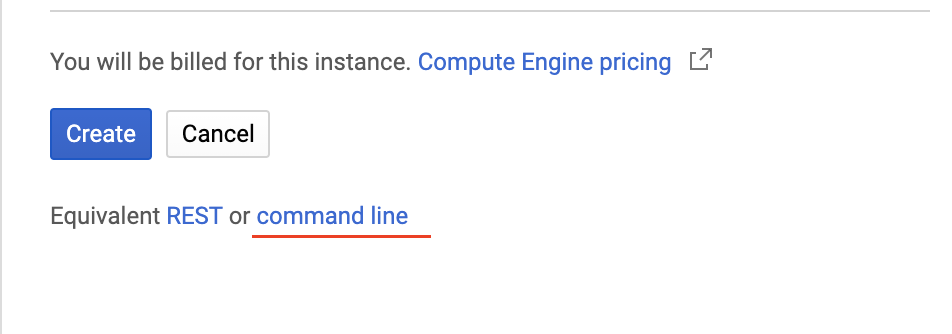
Click Run in Cloud Shell button or copy and paste the command manually.
In the main browser window, click the Cancel button to return to the VM Instances screen. Click the Refresh button to see your new server.
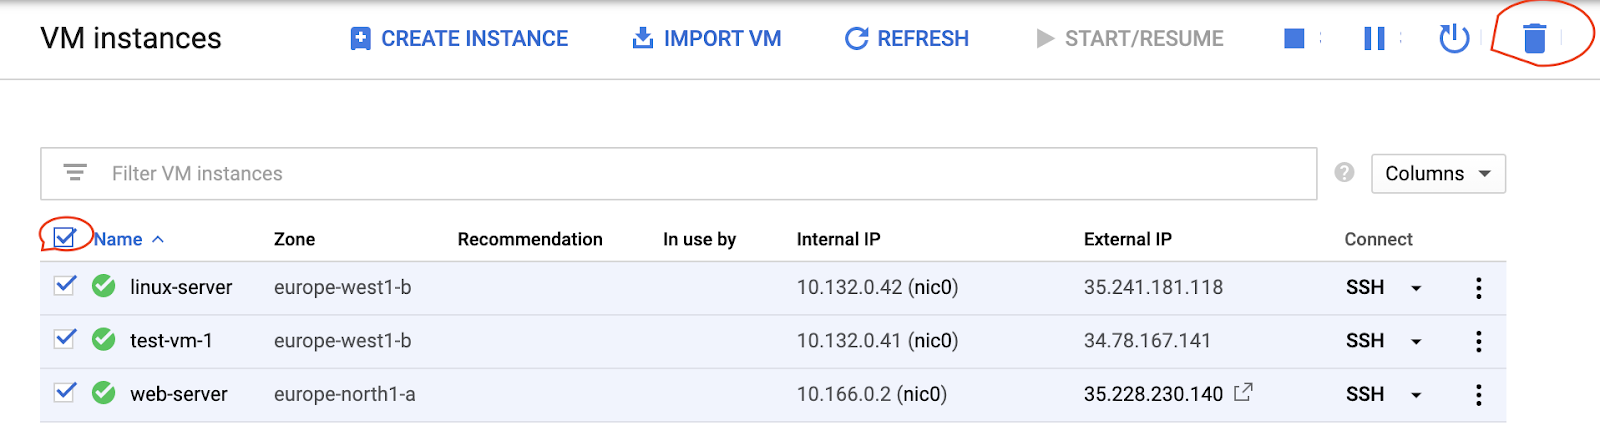
Enter the following command to delete the instance you just created. When prompted, say Yes.
$ gcloud compute instances delete linux-server-2 --zone=europe-west1-bDelete other remaining instances.