
Last Updated: 2020-06-06
Jenkins
Jenkins is a free and open source automation server. It helps automate the parts of software development related to building, testing, and deploying, facilitating continuous integration and continuous delivery. It is a server-based system that runs in servlet containers such as Apache Tomcat.
It supports version control tools, including AccuRev, CVS, Subversion, Git, Mercurial, Perforce, ClearCase and RTC, and can execute Apache Ant, Apache Maven and sbt based projects as well as arbitrary shell scripts and Windows batch commands.
What you'll build
In this codelab, you're going to deploy a Jenkins instance to Kubernetes. Then you will configure Jenkins to build and deploy a small application to Kubernetes using Helm.
What you'll need
- A recent version of your favourite Web Browser
- Basics of BASH
- GCP Trial account
Create an Account
In this step, you register for the Google Cloud Platform free trial and create a project. The free trial provides you:
- $300 Credit for Free
- Access to Google Cloud Platform Products
- You Won't be Billed (though you need to enter your credit card)
- Build with the Power, Speed, Security, Reliability, and Scalability of Google
To register for the free trial open the free trial Registration page.
If you do not have a Gmail account, follow the steps to create one. Otherwise, login and complete the registration form.
Read and agree to the terms of service. Click Accept and start a free trial.
Create a Project
Next, create your first project using the Google Cloud Platform Console. The project is used to complete the rest of the lab.
To create a project in the Google Cloud Platform Console, click Select a project > Create a project.
In the New Project dialog: for Project name, type whatever you like. Make a note of the Project ID in the text below the project name box; you need it later. Then click Create.
Upgrade Account (Optional)
In the upper-right corner of the console, a button will appear asking you to upgrade your account. Click Create a Project when you see it. If the Upgrade button does not appear, you may skip this step. If the button appears later, click it when it does.
When you upgrade your account, you immediately have access to standard service quotas, which are higher than those available on the free trial.
Finalize
On the GCP Console, use the left-hand side menu to navigate to Compute Engine and ensure that there are no errors.
At the end of this lab, you may delete this project and close your billing account if desired.
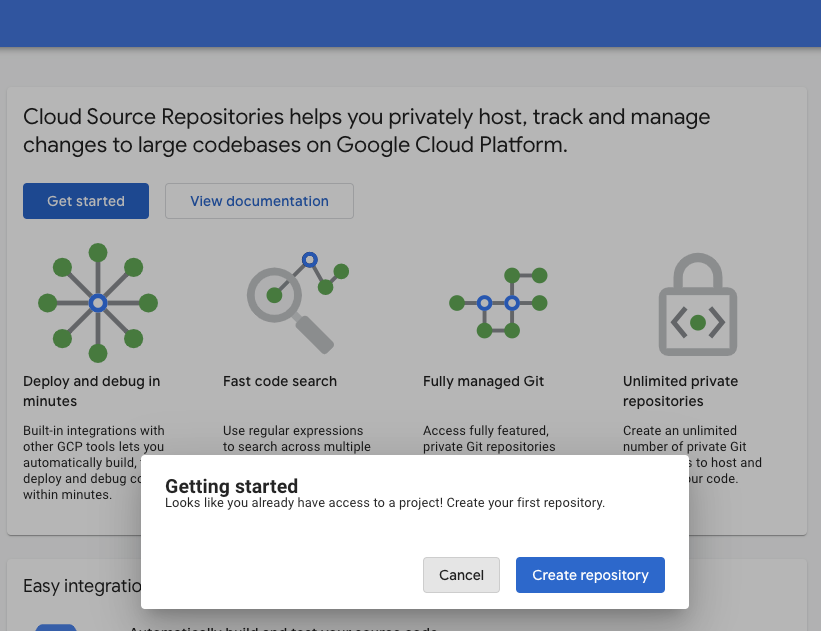
From the Products and services menu, in the Tools section, choose Source Repositories.
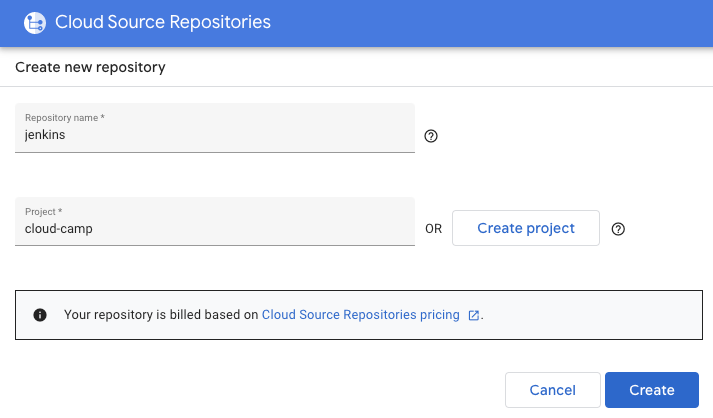
Click the Get started and then Create Repository link and provide a Repository Name of jenkins.
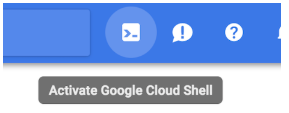
Open Google Cloud Shell by clicking its icon in the toolbar.
Once Cloud Shell starts, enter the following to create a folder called devops. Then change to the folder you just created.
$ mkdir devops
$ cd devops
Now clone the empty repository you just created.
$ gcloud source repos clone jenkins --project=${GOOGLE_CLOUD_PROJECT}The previous command created an empty folder called default. Change to that folder.
$ cd jenkinsCreate the application
You need some source code to manage. So, you will create a simple Go web application.
In Cloud Shell, type the following to create a Golang starting point.
$ touch main.go
$ cloudshell edit main.go
In the Cloud Editor paste the following:
package main

import (
        "fmt"
        "log"
        "net/http"
        "os"
)

type Server struct{}

func (s *Server) ServeHTTP(w http.ResponseWriter, r *http.Request) {
        environment := "production"
        if en := os.Getenv("DEVOPS_ENV"); en != "" {
            environment = en
        }
        w.WriteHeader(http.StatusOK)
        w.Header().Set("Content-Type", "application/json")
        w.Write([]byte(fmt.Sprintf(`{"message": "hello from %s"}`, environment)))
}

func main() {
        s := &Server{}
        http.Handle("/", s)
        log.Fatal(http.ListenAndServe(":8080", nil))
}
Add a new file called gitignore.
$ touch .gitignore
$ cloudshell edit .gitignore
In the Cloud Editor add the following code and save the file.
# Binaries for programs and plugins
*.exe
*.exe~
*.dll
*.so
*.dylib

# Test binary, built with `go test -c`
*.test

# Output of the go coverage tool, specifically when used with LiteIDE
*.out

# Dependency directories (remove the comment below to include it)
vendor/

.DS_Store
You have some files now, let's save them to the repository. First, you need to add all the files you created to your local Git repo. In Cloud Shell execute:
$ cd ~/devops/jenkins
$ git add --all
Now, let's commit the changes locally.
$ git commit -a -m "Initial Commit"$ git config user.email "you@example.com"
$ git config user.name "Your Name"You committed the changes locally, but have not updated the Git repository you created in Google Cloud. Enter the following command to push your changes to the cloud.
$ git push origin masterClick the Source code link in the Source Repositories web page to refresh your source code. You should see the files you just created.
Test the application locally (Optional)
Back in Cloud Shell, make sure you are in your application's root folder. To run the program, type:
$ cd ~/devops/jenkins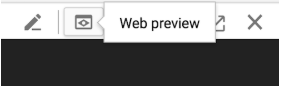
$ go run main.goTo see the program running, click the Web Preview button in the toolbar of Google Cloud Shell. Then, select Preview on port 8080.

The program should be displayed in a new browser tab.
To stop the program, switch back to the browser tab with the Google Cloud Shell and press Ctrl+C in the cloud shell.
Creating the Dockerfile for your application
The first step to using Docker is to create a file called Dockerfile.
$ touch Dockerfile
$ cloudshell edit Dockerfile
Enter the following and Save it.
FROM scratch
WORKDIR /app
COPY ./app .
ENTRYPOINT [ "./app" ]
Next, add a dockerignore file, so that our git repository won't end up in the container:
$ touch .dockerignore
$ cloudshell edit .dockerignore
And paste the following:
**/.gitIn Cloud Shell, enter the following to make sure you are in the right folder and add your new Dockerfile to Git.
$ cd ~/devops/jenkins
$ git add --all
$ git commit -a -m "Added Docker Support"
Push your changes to the master repository using the following command.
$ git push origin masterGo back to Source Repositories in the GCP Management Console (it will be in another browser tab) and refresh the repository and verify your changes were uploaded. To refresh the page, just click the Repository root link in the navigation pane on the left.
Create a unit test
First, create a simple test to test the application. Create the file main_test.go:
$ cd ~/devops/jenkins/
$ touch main_test.go
$ cloudshell edit main_test.go
And paste the following content using Cloud Editor:
package main

import (
        "io/ioutil"
        "net/http"
        "net/http/httptest"
        "testing"
)

func TestMyHandler(t *testing.T) {
        handler := &Server{}
        server := httptest.NewServer(handler)
        defer server.Close()

        resp, err := http.Get(server.URL)
        if err != nil {
                t.Fatal(err)
        }
        if resp.StatusCode != 200 {
                t.Fatalf("Received non-200 response: %d\n", resp.StatusCode)
        }
        expected := `{"message": "hello from production"}`
        actual, err := ioutil.ReadAll(resp.Body)
        if err != nil {
                t.Fatal(err)
        }
        if expected != string(actual) {
                t.Errorf("Expected the message '%s'\n", expected)
        }
}
Verify the test is working by running the following in Cloud Shell:
$ go test ./ -v -shortFinally, push the application code to Cloud Source Repositories.
$ cd ~/devops/jenkins
$ git add --all
$ git commit -a -m "Added Unit Test"
$ git push origin master
Now we are ready to deploy Jenkins.
Create a GKE Cluster
Go back to Google Cloud Shell.
Type the following to find a suitable instance type in europe-west1-b zone (as we will need 2 CPUs and 4+ GB memory later):
$ gcloud compute machine-types list --filter="zone:( europe-west1-b )" | awk '$4 ~ /^4.00/ || FNR == 1 { print }'It should be e2-medium.
Now, enter the following command to create a cluster of machines.
$ gcloud container clusters create devops-cluster --zone "europe-west1-b" \
--num-nodes 4 --machine-type=e2-medium \
--project=${GOOGLE_CLOUD_PROJECT} --enable-ip-alias \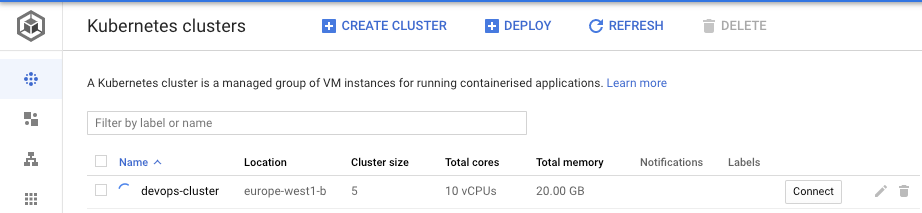
--scopes=gke-defaultWhen the cluster is ready, go to the Kubernetes Engine page in the management console and you should see it.
Create a GCP Service Account
To avoid granting extra permissions to Jenkins and the cluster nodes we will use a dedicated Service Account.
$ gcloud iam service-accounts create jenkins-sa \
    --display-name "jenkins-sa"
Add required permissions to the service account, using predefined roles.
Most of these permissions are related to Jenkins storing/retrieving build artifacts in Cloud Storage / Container Registry. Also, the service account needs permissions to enable the Jenkins agent to read from Cloud Source Repositories (CSR).
$ gcloud projects add-iam-policy-binding ${GOOGLE_CLOUD_PROJECT} \
    --member "serviceAccount:jenkins-sa@${GOOGLE_CLOUD_PROJECT}.iam.gserviceaccount.com" \
    --role "roles/viewer"

$ gcloud projects add-iam-policy-binding ${GOOGLE_CLOUD_PROJECT} \
    --member "serviceAccount:jenkins-sa@${GOOGLE_CLOUD_PROJECT}.iam.gserviceaccount.com" \
    --role "roles/source.reader"

$ gcloud projects add-iam-policy-binding ${GOOGLE_CLOUD_PROJECT} \
    --member "serviceAccount:jenkins-sa@${GOOGLE_CLOUD_PROJECT}.iam.gserviceaccount.com" \
    --role "roles/storage.admin"

$ gcloud projects add-iam-policy-binding ${GOOGLE_CLOUD_PROJECT} \
    --member "serviceAccount:jenkins-sa@${GOOGLE_CLOUD_PROJECT}.iam.gserviceaccount.com" \
    --role "roles/storage.objectAdmin"
Export the service account credentials to a JSON key file in Cloud Shell:
$ cd ~/devops/
$ gcloud iam service-accounts keys create ~/devops/jenkins-sa-key.json \
    --iam-account "jenkins-sa@${GOOGLE_CLOUD_PROJECT}.iam.gserviceaccount.com"
Create a Kubernetes Secret from the Service Account key file to be able to access it in Jenkins.
$ cd ~/devops
$ kubectl create secret generic jenkins-sa \
    --from-file=./jenkins-sa-key.json
Create values.yaml
Change to devops directory and create a values.yaml file with basic Jenkins Chart overrides:
$ cd ~/devops/
$ touch values.yaml
$ cloudshell edit values.yaml
And paste the following:
controller:
  additionalPlugins:
    - google-oauth-plugin:latest
    - google-source-plugin:latest
    - google-storage-plugin:latest
  resources:
    requests:
      cpu: "50m"
      memory: "1024Mi"
    limits:
      cpu: "1000m"
      memory: "2048Mi"
  javaOpts: "-Xms2048m -Xmx2048m"
  serviceType: LoadBalancer
  JCasC:
    configScripts:
      secrets: |
        credentials:
          system:
            domainCredentials:
            - credentials:
              - googleRobotPrivateKey:
                  projectId: 'GOOGLE_CLOUD_PROJECT'
                  serviceAccountConfig:
                    json:
                      secretJsonKey: '${readFileBase64:/run/secrets/jenkins-sa-key.json}'
persistence:
  enabled: true
  volumes:
    - name: jenkins-sa
      secret:
        secretName: jenkins-sa
  mounts:
    - name: jenkins-sa
      mountPath: /run/secrets/jenkins-sa-key.json
      subPath: jenkins-sa-key.json
      readOnly: true
agent:
  resources:
    requests:
      cpu: "500m"
      memory: "256Mi"
    limits:
      cpu: "1000m"
      memory: "512Mi"
serviceAccountAgent:
  create: true
Here we configure resources for Jenkins Controller and Agent as well as mount our Kubernetes Secret so we can create a Jenkins Credential that can be used inside the pipeline. We do that using Jenkins Configuration as Code. Finally, we install additional plugins to help us work with Cloud Source Repositories and Cloud Storage.
Substitute the project id variable:
$ sed -i "s/GOOGLE_CLOUD_PROJECT/${GOOGLE_CLOUD_PROJECT}/g" values.yamlNow we can install Jenkins by adding the Stable Helm Chart Repository and executing install:
$ helm repo add stable https://charts.helm.sh/stable
$ helm repo add jenkinsci https://charts.jenkins.io
$ helm repo update
$ helm install my-release jenkinsci/jenkins --values values.yaml
For agents to be able to deploy applications to our cluster we need to have RBAC roles set up. To create and bind the role to the agent service account - copy the following into the console (provided your jenkins chart release name is my-release). Our role will be scoped to entire cluster as we want to deploy our application in different namespaces for testing:
cat <<EOF | kubectl apply -f -
apiVersion: rbac.authorization.k8s.io/v1
kind: ClusterRole
metadata:
  name: jenkins-deploy
rules:
- apiGroups:
  - extensions
  - apps
  - v1
  - ""
  resources:
  - containers
  - endpoints
  - services
  - pods
  - replicasets
  - secrets
  - namespaces
  - deployments
  verbs:
  - create
  - get
  - list
  - patch
  - update
  - watch
  - delete
- apiGroups:
  - v1
  - ""
  resources:
  - nodes
  verbs:
  - get
  - list
  - watch
---
apiVersion: rbac.authorization.k8s.io/v1
kind: ClusterRoleBinding
metadata:
  name: jenkins-edit
  namespace: default
roleRef:
  apiGroup: rbac.authorization.k8s.io
  kind: ClusterRole
  name: jenkins-deploy
subjects:
- kind: ServiceAccount
  name: my-release-jenkins-agent
  namespace: default
EOFNow you are ready to connect to Jenkins. Enter the following to get Admin password:
$ printf $(kubectl get secret --namespace default my-release-jenkins -o jsonpath="{.data.jenkins-admin-password}" | base64 --decode);echoAnd login URL:
$ export SERVICE_IP=$(kubectl get svc --namespace default my-release-jenkins --template "{{ range (index .status.loadBalancer.ingress 0) }}{{ . }}{{ end }}")
$ echo http://$SERVICE_IP:8080/login
Enter the URL into the browser.
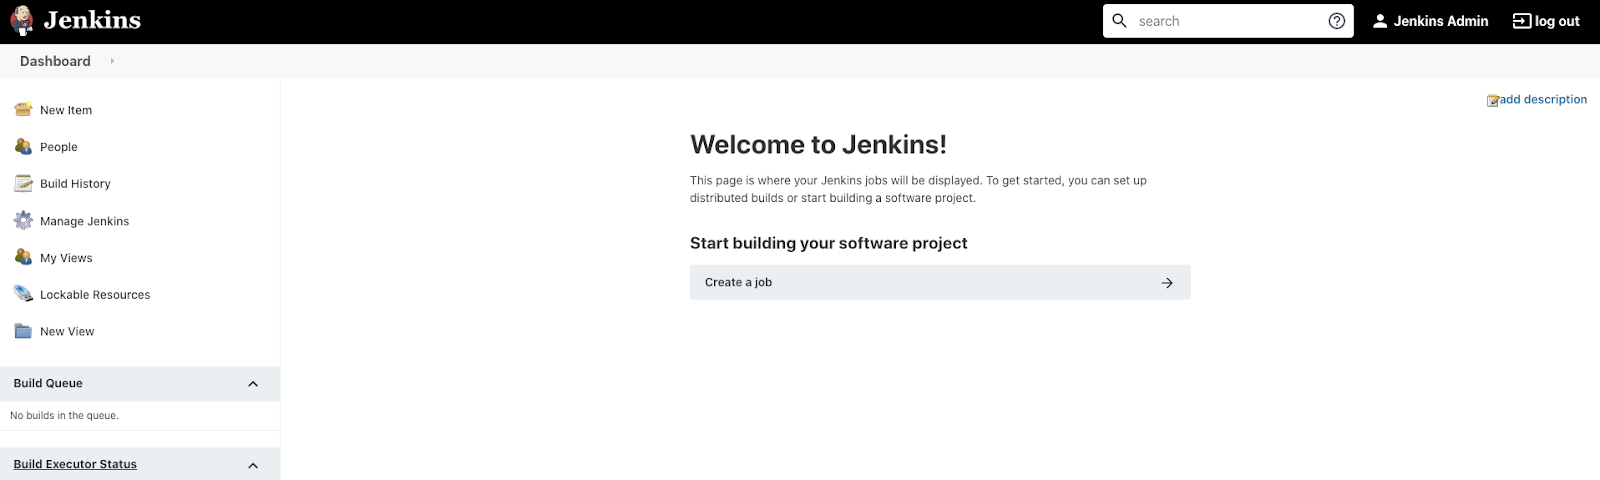
You should see the Jenkins Login screen.

Enter username admin and the password you got earlier.
If login is successful - you will see the Jenkins main page:
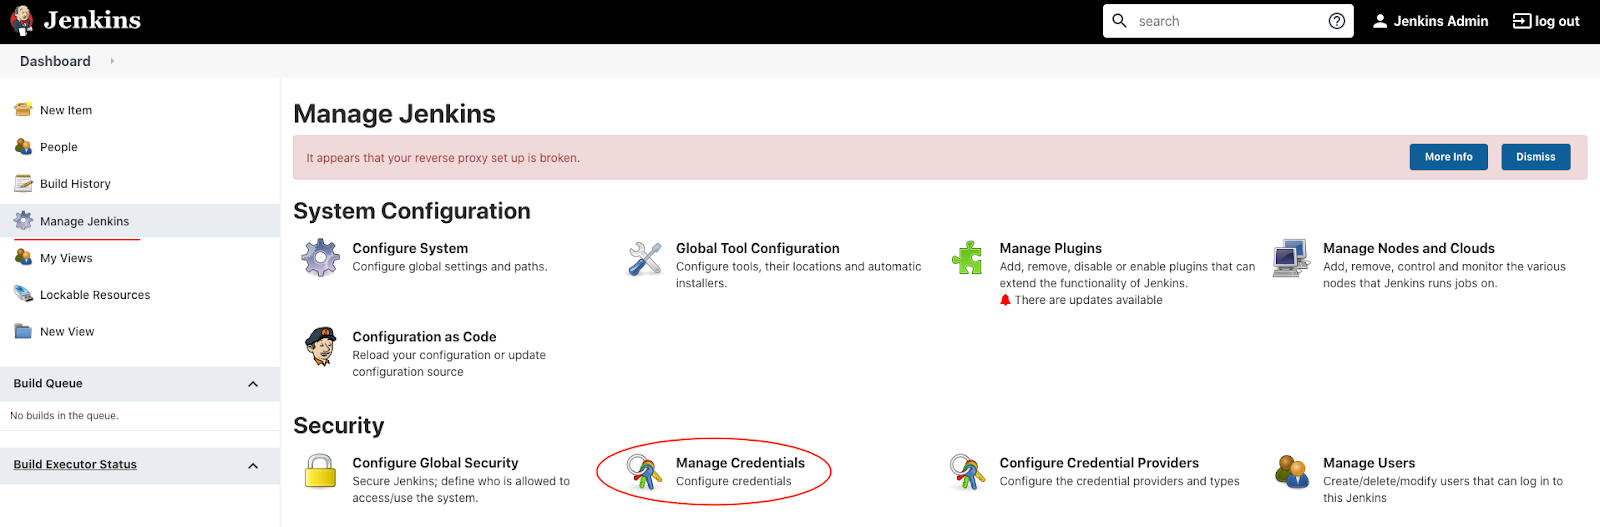
Verify the Service Account Key
Back on the Jenkins page, on the left side pane, click Manage Jenkins, then Manage Credentials.
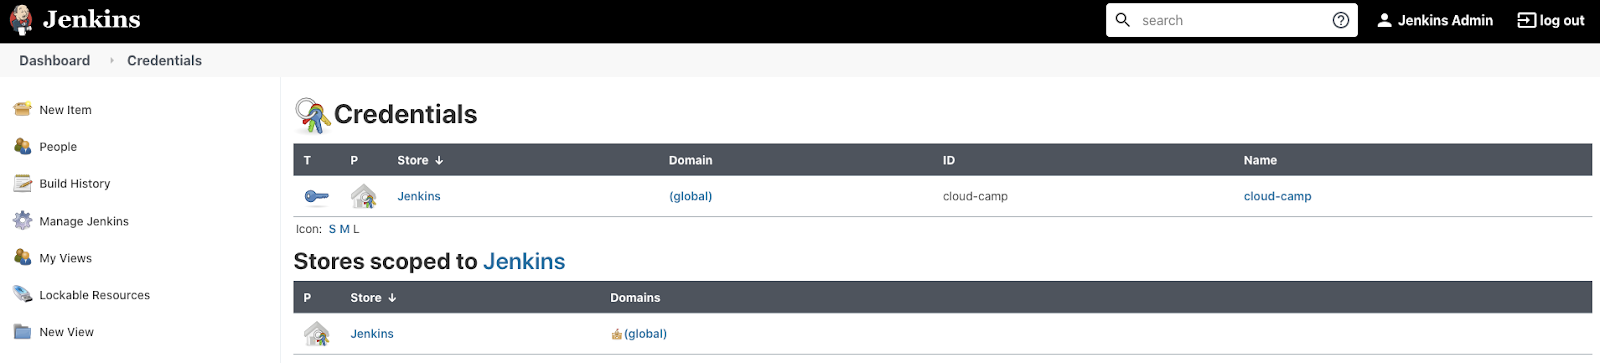
You should see that the credentials are stored successfully.
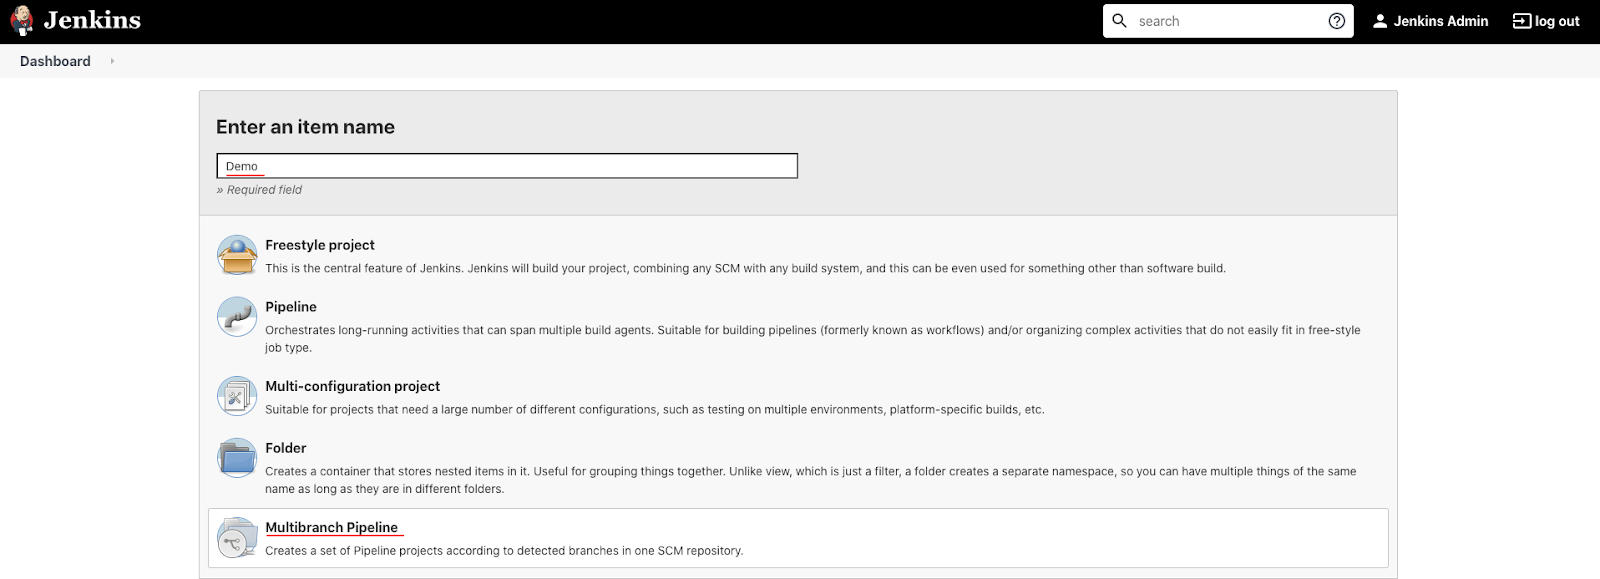
Back on the main Jenkins page, click the "Create a job" button:
Then enter the project name and select Multibranch Pipeline project type, then click OK.
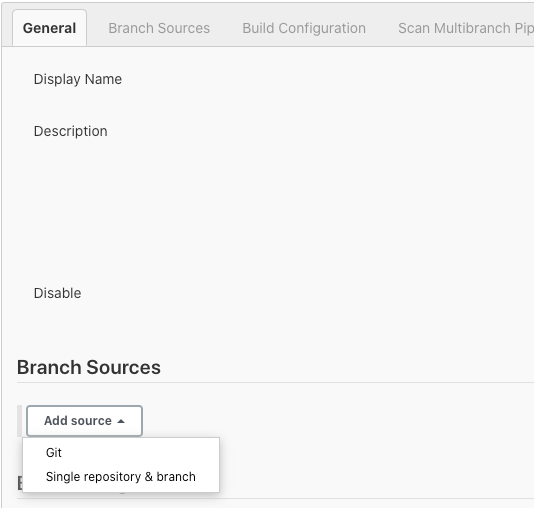
Click Add source and choose git.
Paste the HTTPS clone URL of your jenkins repo on Cloud Source Repositories into the Project Repository field. It will look like:
https://source.developers.google.com/p/REPLACE_WITH_YOUR_PROJECT_ID/r/jenkins
For example (do not copy):
https://source.developers.google.com/p/cloud-camp/r/jenkins
From the Credentials dropdown, select the name of the credential that was created with Service Account secret. It should have the format PROJECT_ID service account.

Under the Scan Multibranch Pipeline Triggers section, check the Periodically if not otherwise run box, then set the Interval value to 1 minute.

Click Save, leaving all other options with default values.
A Branch indexing job was kicked off to identify any branches in your repository.
Click Dashboard > Demo, in the top menu.
You should see there are no branches found that contain buildable projects. It means we need to configure a Jenkins file for our project.
Create Jenkinsfile
Let's run unit tests every time we push new commits, and if the tests are OK - create and push a new Docker image to GCR.
In Cloud Shell, change to devops/jenkins directory and create a Jenkinsfile with basic configuration:
$ cd ~/devops/jenkins
$ touch Jenkinsfile
$ cloudshell edit Jenkinsfile
Paste the following:
pipeline {
    agent none
    environment {
        PROJECT_ID = "GOOGLE_CLOUD_PROJECT"
        BUILD_CONTEXT_BUCKET = "${PROJECT_ID}-artifacts-jenkins"
        BUILD_CONTEXT = "build-context-${BRANCH_NAME}.${BUILD_NUMBER}.tar.gz"
        GCR_IMAGE = "gcr.io/${PROJECT_ID}/example:${BRANCH_NAME}.${BUILD_NUMBER}"
    }
    stages {
        stage('Test and Build the App') {
            agent {
                kubernetes {
                    yaml """
apiVersion: v1
kind: Pod
metadata:
  name: coolappbuilder
  labels:
    robot: builder
spec:
  serviceAccount: my-release-jenkins-agent
  containers:
  - name: jnlp
  - name: golang
    image: golang
    command:
    - cat
    tty: true
"""
                }
            }
            steps {
                container(name: 'golang', shell: '/bin/bash') {
                    // run tests
                    sh 'go test ./ -v -short'

                    // generate artifact
                    sh 'CGO_ENABLED=0 GOOS=linux GOARCH=amd64 go build -a -ldflags \'-w -s -extldflags "-static"\' -o app .'

                    // archive the build context for kaniko.
                    // It's unnecessary to archive everything, but for the lab it's ok :)
                    sh "tar --exclude='./.git' -zcvf /tmp/$BUILD_CONTEXT ."
                    sh "mv /tmp/$BUILD_CONTEXT ."
                    step([$class: 'ClassicUploadStep', credentialsId: env.PROJECT_ID, bucket: "gs://${BUILD_CONTEXT_BUCKET}", pattern: env.BUILD_CONTEXT])
                }
            }
        }
        stage('Build image with Kaniko') {
            agent {
                kubernetes {
                    yaml """
apiVersion: v1
kind: Pod
metadata:
  name: coolapppusher
  labels:
    robot: pusher
spec:
  serviceAccount: my-release-jenkins-agent
  containers:
  - name: jnlp
  - name: kaniko
    image: gcr.io/kaniko-project/executor:debug
    imagePullPolicy: Always
    command:
    - /busybox/cat
    tty: true
    volumeMounts:
      - name: kaniko-secret
        mountPath: /secret
    env:
      - name: GOOGLE_APPLICATION_CREDENTIALS
        value: /secret/jenkins-sa-key.json
  volumes:
  - name: kaniko-secret
    secret:
      secretName: jenkins-sa
"""
                }
            }
            environment {
                PATH = "/busybox:/kaniko:$PATH"
            }
            steps {
                container(name: 'kaniko', shell: '/busybox/sh') {
                    sh '''#!/busybox/sh
            /kaniko/executor -f `pwd`/Dockerfile -c `pwd` --context="gs://${BUILD_CONTEXT_BUCKET}/${BUILD_CONTEXT}" --verbosity debug --destination ${GCR_IMAGE}
          '''
                }
            }
        }
    }
}
Substitute the project id variable:
$ sed -i "s/GOOGLE_CLOUD_PROJECT/${GOOGLE_CLOUD_PROJECT}/g" JenkinsfileNext, create a bucket that is going to be used to store artifacts:
$ gsutil mb -c standard -l europe-west1 gs://${GOOGLE_CLOUD_PROJECT}-artifacts-jenkinsFinally, push the application code to Cloud Source Repositories.
$ cd ~/devops/jenkins
$ git add --all
$ git commit -a -m "Added Jenkinsfile"
$ git push origin master
Go to the Jenkins Web Interface and click the Demo project.

You should see a build executing for the master branch:

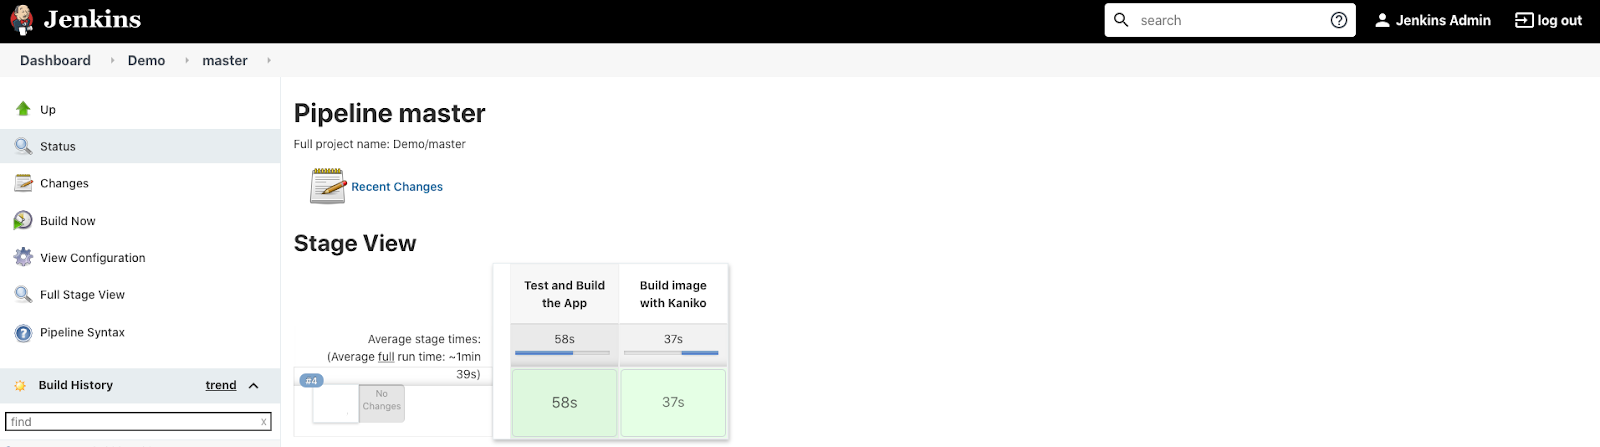
Click the master branch to see the execution details. You should see the stages executing one by one:
When the pipeline completes, in Google Cloud Console, from the Products and Services menu, go to the Container Registry service. You should see your image in the list.
Before we move on to the next step let's review the Jenkinsfile configuration.
Pipeline keyword means that this is a declarative pipeline
pipeline {
...
}
Next, we have disabled agent configuration for the job by specifying agent none, as we will have each stage define its own agent config.
Next, the environment section configures the environment variables for the entire pipeline.
environment {
...
}
Next, the stages section describes our pipeline. Each stage can have a name so developers can understand what parts of the pipeline are currently executing.
Stage consists of steps - multiple commands to execute.
The first stage, Test and Build the App, has it's agent configuration specified as a Pod manifest for Kubernetes plugin (the Pod Template used for executing the build). We specify the service account to use with this agent Pod.
We have 2 containers needed for the job:
- Default Jenkins agent - jnlp
- golang - to compile the application
stage('Test and Build the App') {
        agent {
          kubernetes {
            yaml """
apiVersion: v1
kind: Pod
metadata:
  name: coolappbuilder
  labels:
    robot: builder
spec:
  serviceAccount: my-release-jenkins-agent
  containers:
  - name: jnlp
  - name: golang
    image: golang
    command:
    - cat
    tty: true
"""
          }
        }
        steps {
        ...
        }
      }
    }
The first stage's steps test our application, compile it and then archive it and upload to Cloud Storage for later use. We specify which container we should use in the pod to execute the steps. (as we have 2 defined). To upload to Google Cloud Storage we use Google's Jenkins plugin that relies on the credentials we provided during Jenkins setup.
steps {
          container(name: 'golang', shell: '/bin/bash') {
            // run tests
            sh 'go test ./ -v -short'

            // generate artifact
            sh 'CGO_ENABLED=0 GOOS=linux GOARCH=amd64 go build -a -ldflags \'-w -s -extldflags "-static"\' -o app .'

            // archive the build context for kaniko
            // It's unnecessary to archive everything, but for the lab it's ok :)
            sh "tar --exclude='./.git' -zcvf /tmp/$BUILD_CONTEXT ."
            sh "mv /tmp/$BUILD_CONTEXT ."
            step([$class: 'ClassicUploadStep', credentialsId: env.PROJECT_ID, bucket: "gs://${BUILD_CONTEXT_BUCKET}", pattern: env.BUILD_CONTEXT])
        }
The second stage, Build image with Kaniko, also has it's agent configuration specified as a Pod manifest. We specify the service account to use with this agent Pod as well.
We have 2 containers needed for the job:
- Default Jenkins agent - jnlp
- kaniko - to build the image (will be discussed later)
Here, we additionally mount our GCP Service Account Secret to the Kaniko container so it has access to the credentials required to push to GCR.
    stage('Build image with Kaniko') {
        agent {
    kubernetes {
      yaml """
apiVersion: v1
kind: Pod
metadata:
  name: coolapppusher
  labels:
    robot: pusher
spec:
  serviceAccount: my-release-jenkins-agent
  containers:
  - name: jnlp
  - name: kaniko
    image: gcr.io/kaniko-project/executor:debug
    imagePullPolicy: Always
    command:
    - /busybox/cat
    tty: true
    volumeMounts:
      - name: kaniko-secret
        mountPath: /secret
    env:
      - name: GOOGLE_APPLICATION_CREDENTIALS
        value: /secret/jenkins-sa-key.json
  volumes:
  - name: kaniko-secret
    secret:
      secretName: jenkins-sa
"""
          }
        }
        steps {
        ...
        }
      }
    }
When we have a compiled app ready - we can build the Docker image. But to build it in our cluster using Docker we need to give our agents root access to underlying Docker daemon, and therefore, the system. To solve this problem we can use any other build agent that does not require high privileges and can build images in userspace without actual Docker daemon. Kaniko is one of the most popular such executors (used in Google Cloud Build CI/CD). This is the minimum viable image and application that has a simplified file system so the configuration is a bit odd. To run the Kaniko executor we need to minimally pass docker context (with Dockerfile and files to copy if any) and destination - docker repository where Kaniko will push the image.
...
      environment {
        PATH = "/busybox:/kaniko:$PATH"
      }
      steps {
        container(name: 'kaniko', shell: '/busybox/sh') {
          sh '''#!/busybox/sh
            /kaniko/executor -f `pwd`/Dockerfile -c `pwd` --context="gs://${BUILD_CONTEXT_BUCKET}/${BUILD_CONTEXT}" --verbosity debug --destination ${GCR_IMAGE}
          '''
        }
      }
...
The Docker file used in the project is pretty simplified too. As we have a statically linked binary of our simple application - we don't actually need any OS or extra libraries on the container and can use the scratch base image.
FROM scratch
WORKDIR /app
COPY ./app .
ENTRYPOINT [ "./app" ]
We know that the application should be working based on passed unit tests, but is it possible to deploy it to production? Let's create a Helm chart to deploy it and test if the chart is working.
Create a Helm Chart
Create a new branch and create a new chart named coolapp in our demo directory:
$ cd ~/devops/jenkins
$ git checkout -b add_helm
$ helm create coolapp
Edit Chart.yaml:
$ cloudshell edit coolapp/Chart.yamlAnd change it so that it looks like this:
apiVersion: v2
name: coolapp
description: Example application deployment

type: application
version: 0.1.0
appVersion: 1.0
Edit values.yaml:
$ cloudshell edit coolapp/values.yamlAnd change it so that it looks like this:
replicaCount: 1

service:
  type: ClusterIP
  port: 80
Remove the unused *.yaml and NOTES.txt.
$ rm ./coolapp/templates/*.yaml
$ rm ./coolapp/templates/NOTES.txt
Create new Deployment template:
$ cat <<EOF >./coolapp/templates/deployment.yaml
apiVersion: apps/v1
kind: Deployment
metadata:
  name: {{ include "coolapp.fullname" . }}
  namespace: {{ .Release.Namespace }}
  labels:
    {{- include "coolapp.labels" . | nindent 4 }}
spec:
  replicas: {{ .Values.replicaCount }}
  selector:
    matchLabels:
      {{- include "coolapp.selectorLabels" . | nindent 6 }}
  template:
    metadata:
      labels:
        {{- include "coolapp.selectorLabels" . | nindent 8 }}
    spec:
      containers:
        - name: {{ .Chart.Name }}
          image: "gcr.io/{{ .Values.projectId }}/example:{{ .Values.tag }}"
          ports:
            - name: http
              containerPort: 8080
              protocol: TCP
          livenessProbe:
            httpGet:
              path: /
              port: http
          readinessProbe:
            httpGet:
              path: /
              port: http
EOF
Create new Service template:
$ cat <<EOF >./coolapp/templates/service.yaml
apiVersion: v1
kind: Service
metadata:
  name: {{ include "coolapp.fullname" . }}
  namespace: {{ .Release.Namespace }}
  labels:
    {{- include "coolapp.labels" . | nindent 4 }}
spec:
  type: {{ .Values.service.type }}
  ports:
    - port: {{ .Values.service.port }}
      targetPort: http
      protocol: TCP
      name: http
  selector:
    {{- include "coolapp.selectorLabels" . | nindent 4 }}
EOF
Create new Notes template:
$ cat <<EOF >./coolapp/templates/NOTES.txt
Get the application URL by running these commands:
{{- if contains "NodePort" .Values.service.type }}
  export NODE_PORT=\$(kubectl get --namespace {{ .Release.Namespace }} -o jsonpath="{.spec.ports[0].nodePort}" services {{ include "coolapp.fullname" . }})
  export NODE_IP=\$(kubectl get nodes --namespace {{ .Release.Namespace }} -o jsonpath="{.items[0].status.addresses[0].address}")
  echo http://\$NODE_IP:\$NODE_PORT
{{- else if contains "LoadBalancer" .Values.service.type }}
     NOTE: It may take a few minutes for the LoadBalancer IP to be available.
           You can watch the status of by running 'kubectl get --namespace {{ .Release.Namespace }} svc -w {{ include "coolapp.fullname" . }}'
  export SERVICE_IP=\$(kubectl get svc --namespace {{ .Release.Namespace }} {{ include "coolapp.fullname" . }} --template "{{"{{ range (index .status.loadBalancer.ingress 0) }}{{.}}{{ end }}"}}")
  echo http://\$SERVICE_IP:{{ .Values.service.port }}
{{- else if contains "ClusterIP" .Values.service.type }}
  export POD_NAME=\$(kubectl get pods --namespace {{ .Release.Namespace }} -l "app.kubernetes.io/name={{ include "coolapp.name" . }},app.kubernetes.io/instance={{ .Release.Name }}" -o jsonpath="{.items[0].metadata.name}")
  echo "Visit http://127.0.0.1:8080 to use your application"
  kubectl --namespace {{ .Release.Namespace }} port-forward \$POD_NAME 8080:80
{{- end }}
EOF
Let's test that template engine is working:
$ cd ~/devops/jenkins
$ helm install --dry-run --debug test --set projectId=${GOOGLE_CLOUD_PROJECT} --set tag=latest ./coolapp
The templating should be working, so we're ready to test it automatically.
Create an integration test
Create a Go module:
$ mkdir -p ~/devops/jenkins/test
$ cd ~/devops/jenkins/test
$ go mod init integration
Create an integration test:
$ touch helm_test.go
$ cloudshell edit helm_test.go
And paste the following content:
package test

import (
        "fmt"
        "log"
        "os"
        "regexp"
        "strings"
        "testing"
        "time"

        "github.com/gruntwork-io/terratest/modules/helm"
        http_helper "github.com/gruntwork-io/terratest/modules/http-helper"
        "github.com/gruntwork-io/terratest/modules/k8s"
        "github.com/gruntwork-io/terratest/modules/random"
)

func TestChartDeploysApplication(t *testing.T) {
        // Get required variables
        namespace := "default"
        if ns := os.Getenv("TEST_NAMESPACE"); ns != "" {
                reg, err := regexp.Compile("[^a-zA-Z0-9]+")
                if err != nil {
                        log.Fatal(err)
                }
                namespace = reg.ReplaceAllString(ns, "-")
        }
        project := os.Getenv("TEST_PROJECT_ID")
        tag := os.Getenv("TEST_TAG")
        // Path to the helm chart we will test
        helmChartPath := "../coolapp"

        // Setup the kubectl config and context. Here we choose to use the defaults, which is:
        // - HOME/.kube/config for the kubectl config file
        // - Current context of the kubectl config file
        // We also specify that the current working namespace
        kubectlOptions := k8s.NewKubectlOptions("", "", namespace)

        // Setup the args.
        options := &helm.Options{
                SetValues:      map[string]string{"projectId": project, "tag": tag},
                KubectlOptions: kubectlOptions,
        }

        // We generate a unique release name so that we can refer to after deployment.
        // By doing so, we can schedule the delete call here so that at the end of the test, we run
        // `helm delete RELEASE_NAME` to clean up any resources that were created.
        releaseName := fmt.Sprintf("test-%s", strings.ToLower(random.UniqueId()))
        defer helm.Delete(t, options, releaseName, true)
        // At the end of the test, make sure to delete the namespace if it's not the default namespace
        if namespace != "default" {
                defer k8s.DeleteNamespace(t, kubectlOptions, namespace)
                // Create the namespace
                k8s.CreateNamespace(t, kubectlOptions, namespace)
        }

        // Deploy the chart using `helm install`.
        helm.Install(t, options, helmChartPath, releaseName)

        // Now that the chart is deployed, verify the deployment.
        svcName := fmt.Sprintf("%s-coolapp", releaseName)
        validateK8SApp(t, kubectlOptions, svcName)
}

// Validate the app is working
func validateK8SApp(t *testing.T, options *k8s.KubectlOptions, svcName string) {
        // This will wait up to 20 seconds for the service to become available, to ensure that we can access it.
        k8s.WaitUntilServiceAvailable(t, options, svcName, 10, 2*time.Second)

        // Now we verify that the service will successfully boot and start serving requests
        url := serviceUrl(t, options, svcName)
        expectedStatus := 200
        expectedBody := `{"message": "hello from production"}`
        maxRetries := 10
        timeBetweenRetries := 3 * time.Second
        http_helper.HttpGetWithRetry(t, url, nil, expectedStatus, expectedBody, maxRetries, timeBetweenRetries)
}

// Get the service URL from Kubernetes
func serviceUrl(t *testing.T, options *k8s.KubectlOptions, svcName string) string {
        service := k8s.GetService(t, options, svcName)
        endpoint := k8s.GetServiceEndpoint(t, options, service, 80)
        return fmt.Sprintf("http://%s", endpoint)
}Check if the test is working:
$ export TEST_TAG=`gcloud container images list-tags gcr.io/${GOOGLE_CLOUD_PROJECT}/example --format='get(tags)' | head -n 1`
$ export TEST_PROJECT_ID=${GOOGLE_CLOUD_PROJECT}
$ go mod tidy
$ go test ./ -v -short
The test should deploy everything and fail after a minute or so as we are not inside the cluster to connect to the ClusterIP Service. Let's modify our Jenkinsfile and run the test inside the cluster!
In Cloud Shell, change to devops/jenkins directory and edit Jenkinsfile:
$ cd ~/devops/jenkins
$ cloudshell edit Jenkinsfile
Paste the following (replace everything!):
pipeline {
    agent none
    environment {
        PROJECT_ID = "GOOGLE_CLOUD_PROJECT"
        BUILD_CONTEXT_BUCKET = "${PROJECT_ID}-artifacts-jenkins"
        BUILD_CONTEXT = "build-context-${BRANCH_NAME}.${BUILD_NUMBER}.tar.gz"
        GCR_IMAGE = "gcr.io/${PROJECT_ID}/example:${BRANCH_NAME}.${BUILD_NUMBER}"
    }
    stages {
        stage('Test and Build the App') {
            agent {
                kubernetes {
                    yaml """
apiVersion: v1
kind: Pod
metadata:
  name: coolappbuilder
  labels:
    robot: builder
spec:
  serviceAccount: my-release-jenkins-agent
  containers:
  - name: jnlp
  - name: golang
    image: golang
    command:
    - cat
    tty: true
"""
                }
            }
            steps {
                container(name: 'golang', shell: '/bin/bash') {
                    // run tests
                    sh 'go test ./ -v -short'

                    // generate artifact
                    sh 'CGO_ENABLED=0 GOOS=linux GOARCH=amd64 go build -a -ldflags \'-w -s -extldflags "-static"\' -o app .'

                    // archive the build context for kaniko
                    sh "tar --exclude='./.git' -zcvf /tmp/$BUILD_CONTEXT ."
                    sh "mv /tmp/$BUILD_CONTEXT ."
                    step([$class: 'ClassicUploadStep', credentialsId: env.PROJECT_ID, bucket: "gs://${BUILD_CONTEXT_BUCKET}", pattern: env.BUILD_CONTEXT])
                }
            }
        }
        stage('Build image with Kaniko') {
            agent {
                kubernetes {
                    yaml """
apiVersion: v1
kind: Pod
metadata:
  name: coolapppusher
  labels:
    robot: pusher
spec:
  serviceAccount: my-release-jenkins-agent
  containers:
  - name: jnlp
  - name: kaniko
    image: gcr.io/kaniko-project/executor:debug
    imagePullPolicy: Always
    command:
    - /busybox/cat
    tty: true
    volumeMounts:
      - name: kaniko-secret
        mountPath: /secret
    env:
      - name: GOOGLE_APPLICATION_CREDENTIALS
        value: /secret/jenkins-sa-key.json
  volumes:
  - name: kaniko-secret
    secret:
      secretName: jenkins-sa
"""
                }
            }
            environment {
                PATH = "/busybox:/kaniko:$PATH"
            }
            steps {
                container(name: 'kaniko', shell: '/busybox/sh') {
                    sh '''#!/busybox/sh
            /kaniko/executor -f `pwd`/Dockerfile -c `pwd` --context="gs://${BUILD_CONTEXT_BUCKET}/${BUILD_CONTEXT}" --verbosity debug --destination ${GCR_IMAGE}
          '''
                }
            }
        }
        stage('Integration Test') {
            agent {
                kubernetes {
                    yaml """
apiVersion: v1
kind: Pod
metadata:
  name: coolapptester
  labels:
    robot: tester
spec:
  serviceAccount: my-release-jenkins-agent
  containers:
  - name: jnlp
  - name: golang
    image: golang
    command:
    - cat
    tty: true
    volumeMounts:
    - name: kubeconfig
      mountPath: /root/.kube
  volumes:
  - name: kubeconfig
    secret:
      secretName: kubeconfig
"""
                }
            }
            environment {
                TEST_NAMESPACE = "${BRANCH_NAME}.${BUILD_NUMBER}"
                TEST_PROJECT_ID = "${PROJECT_ID}"
                TEST_TAG = "${BRANCH_NAME}.${BUILD_NUMBER}"
            }
            steps {
                container(name: 'golang', shell: '/bin/bash') {
                    dir("test") {
                        // get helm cli
                        sh 'curl -fsSL -o helm-v3.4.2-linux-amd64.tar.gz https://get.helm.sh/helm-v3.4.2-linux-amd64.tar.gz'
                        sh 'tar -zxvf helm-v3.4.2-linux-amd64.tar.gz'
                        sh 'chmod +x linux-amd64/helm'
                        sh 'mv linux-amd64/helm /usr/local/bin/helm'
                        // get dependencies
                        sh 'go mod tidy'
                        // run tests
                        sh 'go test ./ -v -short'
                    }
                }
            }
        }
    }
}
Substitute the project id variable:
$ sed -i "s/GOOGLE_CLOUD_PROJECT/${GOOGLE_CLOUD_PROJECT}/g" JenkinsfileBefore pushing we need one final addition, as currently Terratest only supports kubeconfig authorization we need to generate one for our Jenkins Service Account.
$ cd ~/devops
$ secret=`kubectl get sa my-release-jenkins-agent -o jsonpath='{.secrets[0].name}'`
$ ca=$(kubectl get secret/$secret -o jsonpath='{.data.ca\.crt}')
$ token=$(kubectl get secret/$secret -o jsonpath='{.data.token}' | base64 --decode)
$ cat <<EOF >config
apiVersion: v1
kind: Config
clusters:
- name: default-cluster
  cluster:
    certificate-authority-data: ${ca}
    server: https://kubernetes
contexts:
- name: default-context
  context:
    cluster: default-cluster
    namespace: default
    user: default-user
current-context: default-context
users:
- name: default-user
  user:
    token: ${token}
EOF
Create a Kubernetes Secret from the Kubeconfig file to be able to access it in Jenkins.
$ cd ~/devops
$ kubectl create secret generic kubeconfig \
    --from-file=./config
Finally, push the application code to Cloud Source Repositories.
$ cd ~/devops/jenkins
$ git add --all
$ git commit -a -m "Added Integration Test"
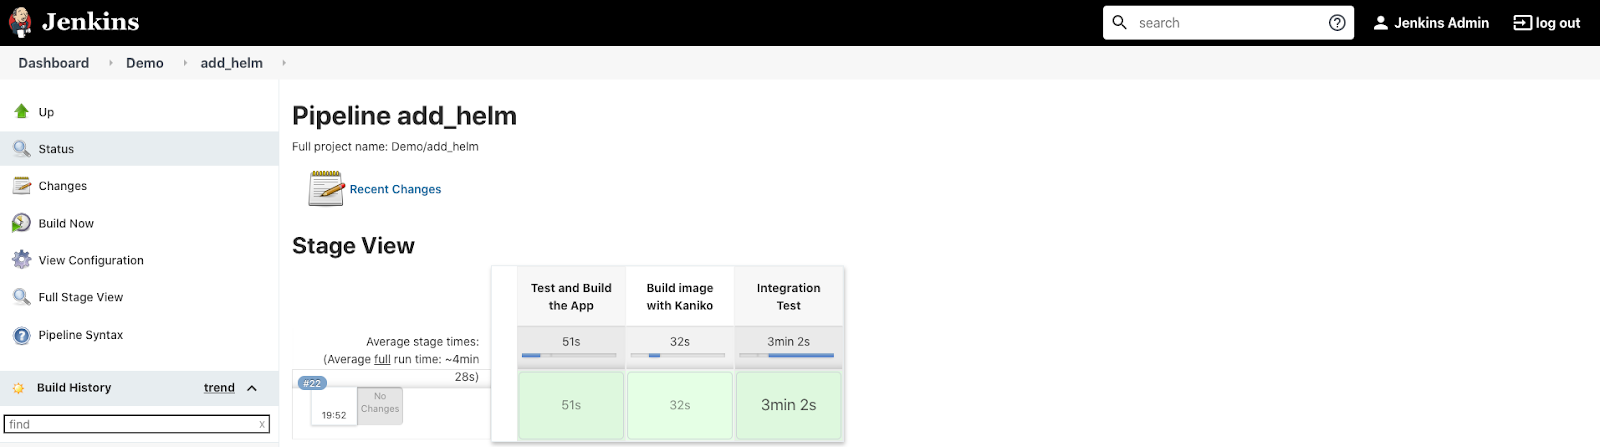
$ git push --set-upstream origin add_helmGo to the Jenkins Web Interface and click the Demo project. Wait up to 1 minute and check if the new branch is being tested.
Click on add_helm to see build details. After about 3-4 minutes the test should be finished.
Before we move on to the next step let's review the new Jenkinsfile configuration.
We've created a new stage, Integration Test, that has it's agent configuration specified as a Pod manifest for Kubernetes plugin. We specify the service account to use with this agent Pod. Also we mount the kubeconfig secret to use with Terratest.
We have 2 containers needed for the job:
- Default Jenkins agent - jnlp
- golang - to test the application.
stage('Integration Test') {
        agent {
          kubernetes {
            yaml """
apiVersion: v1
kind: Pod
metadata:
  name: coolapptester
  labels:
    robot: tester
spec:
  serviceAccount: my-release-jenkins-agent
  containers:
  - name: jnlp
  - name: golang
    image: golang
    command:
    - cat
    tty: true
    volumeMounts:
    - name: kubeconfig
      mountPath: /root/.kube
  volumes:
  - name: kubeconfig
    secret:
      secretName: kubeconfig
"""
          }
        }
        steps {
        ...
        }
      }
    }
The stage's steps download the Helm binary and use Terratest to deploy and test our application inside the cluster.
        steps {
            container(name: 'golang', shell: '/bin/bash') {
                dir("test") {
                    // get helm cli
                    sh 'curl -fsSL -o helm-v3.4.2-linux-amd64.tar.gz https://get.helm.sh/helm-v3.4.2-linux-amd64.tar.gz'
                    sh 'tar -zxvf helm-v3.4.2-linux-amd64.tar.gz'
                    sh 'chmod +x linux-amd64/helm'
                    sh 'mv linux-amd64/helm /usr/local/bin/helm'
                    // get dependencies
                    sh 'go mod tidy'
                    // run tests
                    sh 'go test ./ -v -short'
                }
        }
When we are sure the app is working as intended, we can deploy it to "production".
In Cloud Shell, change to devops/jenkins directory and edit Jenkinsfile:
$ cd ~/devops/jenkins
$ cloudshell edit Jenkinsfile
Paste the following (replace everything!):
pipeline {
    agent none
    environment {
        PROJECT_ID = "GOOGLE_CLOUD_PROJECT"
        BUILD_CONTEXT_BUCKET = "${PROJECT_ID}-artifacts-jenkins"
        BUILD_CONTEXT = "build-context-${BRANCH_NAME}.${BUILD_NUMBER}.tar.gz"
        GCR_IMAGE = "gcr.io/${PROJECT_ID}/example:${BRANCH_NAME}.${BUILD_NUMBER}"
    }
    stages {
        stage('Test and Build the App') {
            agent {
                kubernetes {
                    yaml """
apiVersion: v1
kind: Pod
metadata:
  name: coolappbuilder
  labels:
    robot: builder
spec:
  serviceAccount: my-release-jenkins-agent
  containers:
  - name: jnlp
  - name: golang
    image: golang
    command:
    - cat
    tty: true
"""
                }
            }
            steps {
                container(name: 'golang', shell: '/bin/bash') {
                    // run tests
                    sh 'go test ./ -v -short'

                    // generate artifact
                    sh 'CGO_ENABLED=0 GOOS=linux GOARCH=amd64 go build -a -ldflags \'-w -s -extldflags "-static"\' -o app .'

                    // archive the build context for kaniko
                    sh "tar --exclude='./.git' -zcvf /tmp/$BUILD_CONTEXT ."
                    sh "mv /tmp/$BUILD_CONTEXT ."
                    step([$class: 'ClassicUploadStep', credentialsId: env.PROJECT_ID, bucket: "gs://${BUILD_CONTEXT_BUCKET}", pattern: env.BUILD_CONTEXT])
                }
            }
        }
        stage('Build image with Kaniko') {
            agent {
                kubernetes {
                    yaml """
apiVersion: v1
kind: Pod
metadata:
  name: coolapppusher
  labels:
    robot: pusher
spec:
  serviceAccount: my-release-jenkins-agent
  containers:
  - name: jnlp
  - name: kaniko
    image: gcr.io/kaniko-project/executor:debug
    imagePullPolicy: Always
    command:
    - /busybox/cat
    tty: true
    volumeMounts:
      - name: kaniko-secret
        mountPath: /secret
    env:
      - name: GOOGLE_APPLICATION_CREDENTIALS
        value: /secret/jenkins-sa-key.json
  volumes:
  - name: kaniko-secret
    secret:
      secretName: jenkins-sa
"""
                }
            }
            environment {
                PATH = "/busybox:/kaniko:$PATH"
            }
            steps {
                container(name: 'kaniko', shell: '/busybox/sh') {
                    sh '''#!/busybox/sh
            /kaniko/executor -f `pwd`/Dockerfile -c `pwd` --context="gs://${BUILD_CONTEXT_BUCKET}/${BUILD_CONTEXT}" --verbosity debug --destination ${GCR_IMAGE}
          '''
                }
            }
        }
        stage('Integration Test') {
            agent {
                kubernetes {
                    yaml """
apiVersion: v1
kind: Pod
metadata:
  name: coolapptester
  labels:
    robot: tester
spec:
  serviceAccount: my-release-jenkins-agent
  containers:
  - name: jnlp
  - name: golang
    image: golang
    command:
    - cat
    tty: true
    volumeMounts:
    - name: kubeconfig
      mountPath: /root/.kube
  volumes:
  - name: kubeconfig
    secret:
      secretName: kubeconfig
"""
                }
            }
            environment {
                TEST_NAMESPACE = "${BRANCH_NAME}.${BUILD_NUMBER}"
                TEST_PROJECT_ID = "${PROJECT_ID}"
                TEST_TAG = "${BRANCH_NAME}.${BUILD_NUMBER}"
            }
            steps {
                container(name: 'golang', shell: '/bin/bash') {
                    dir("test") {
                        // get helm cli
                        sh 'curl -fsSL -o helm-v3.4.2-linux-amd64.tar.gz https://get.helm.sh/helm-v3.4.2-linux-amd64.tar.gz'
                        sh 'tar -zxvf helm-v3.4.2-linux-amd64.tar.gz'
                        sh 'chmod +x linux-amd64/helm'
                        sh 'mv linux-amd64/helm /usr/local/bin/helm'
                        // get dependencies
                        sh 'go mod tidy'
                        // run tests
                        sh 'go test ./ -v -short'
                    }
                }
            }
        }
        stage('Wait for SRE Approval') {
            when { branch 'master' }
            steps {
                timeout(time: 12, unit: 'HOURS') {
                    input message: 'Approve deployment?'
                }
            }
        }
        stage('Deploy to Production') {
            when { branch 'master' }
            agent {
                kubernetes {
                    yaml """
apiVersion: v1
kind: Pod
metadata:
  name: coolappdeployer
  labels:
    robot: deploy
spec:
  serviceAccount: my-release-jenkins-agent
  containers:
  - name: jnlp
  - name: helm
    image: ubuntu
    command:
    - cat
    tty: true
"""
                }
            }
            environment {
                TAG = "${BRANCH_NAME}.${BUILD_NUMBER}"
            }
            steps {
                container(name: 'helm', shell: '/bin/bash') {
                    // get helm cli
                    sh 'apt-get update'
                    sh 'apt-get install -y curl'
                    sh 'curl -fsSL -o helm-v3.4.2-linux-amd64.tar.gz https://get.helm.sh/helm-v3.4.2-linux-amd64.tar.gz'
                    sh 'tar -zxvf helm-v3.4.2-linux-amd64.tar.gz'
                    sh 'chmod +x linux-amd64/helm'
                    sh 'mv linux-amd64/helm /usr/local/bin/helm'
                    // install
                    sh 'helm upgrade --install --wait coolapp ./coolapp/ --set projectId=${PROJECT_ID} --set tag=${TAG} --set service.type=LoadBalancer'
                }
            }
        }
    }
}
Substitute the project id variable:
$ sed -i "s/GOOGLE_CLOUD_PROJECT/${GOOGLE_CLOUD_PROJECT}/g" JenkinsfileFinally, push the application code to Cloud Source Repositories.
$ cd ~/devops/jenkins
$ git add --all
$ git commit -a -m "Added Deployment"
$ git checkout master
$ git merge add_helm
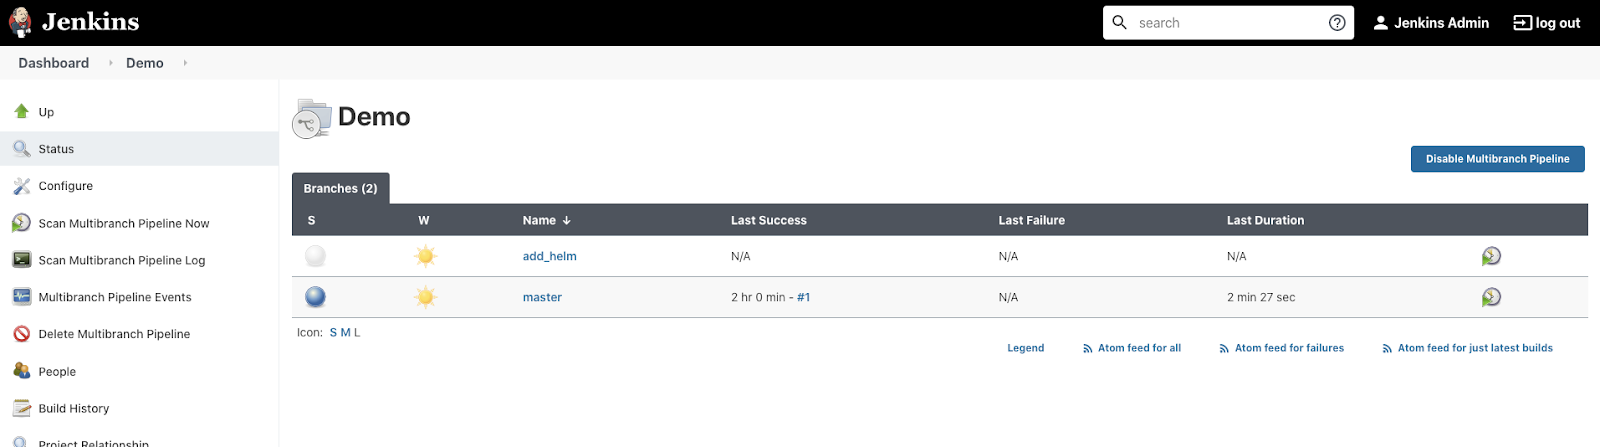
$ git push --allGo to the Jenkins Web Interface and click the Demo project. Wait a few seconds and check if both branches are being tested.
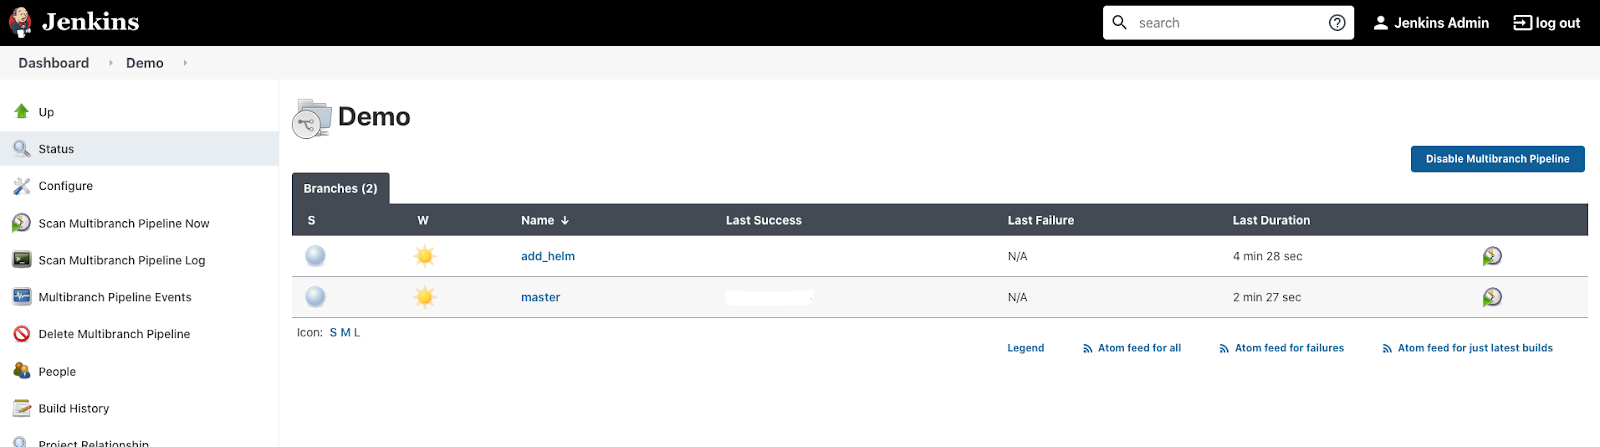
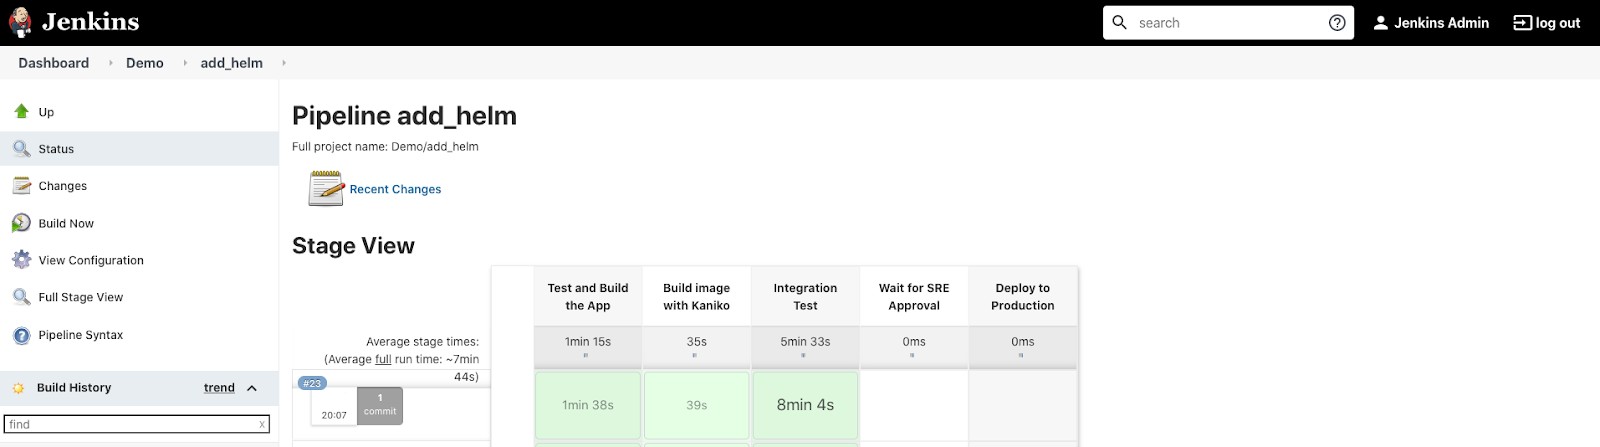
Wait for about 3-5 minutes and click the add_helm branch. You should see that there were only 3 steps executed.
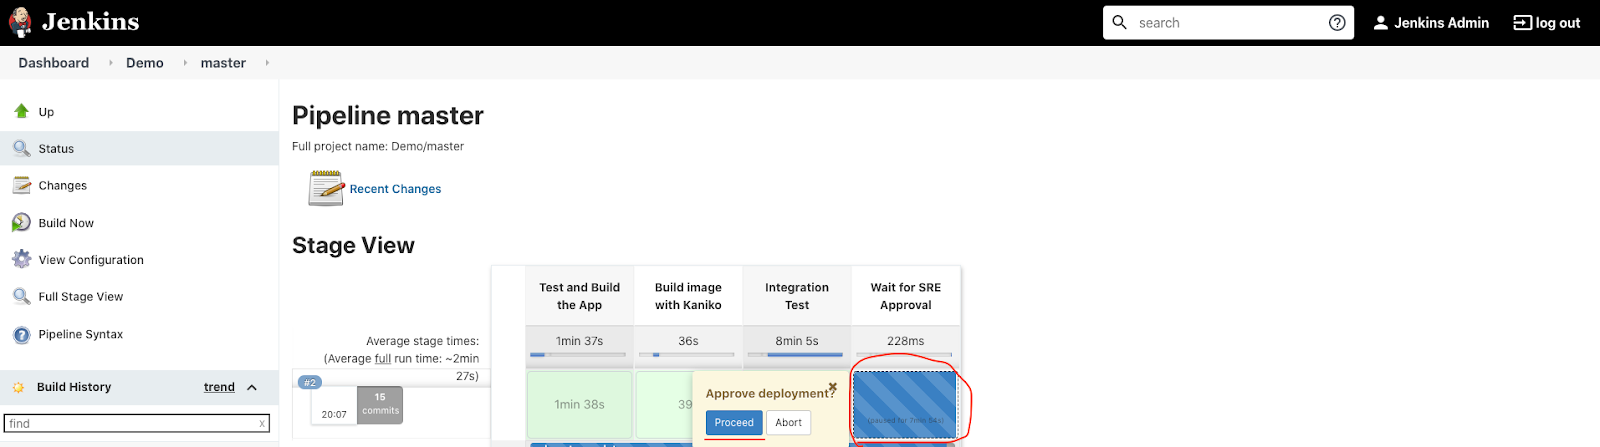
Go back to the Demo project and click the master branch. You should see that there is a pending stage.
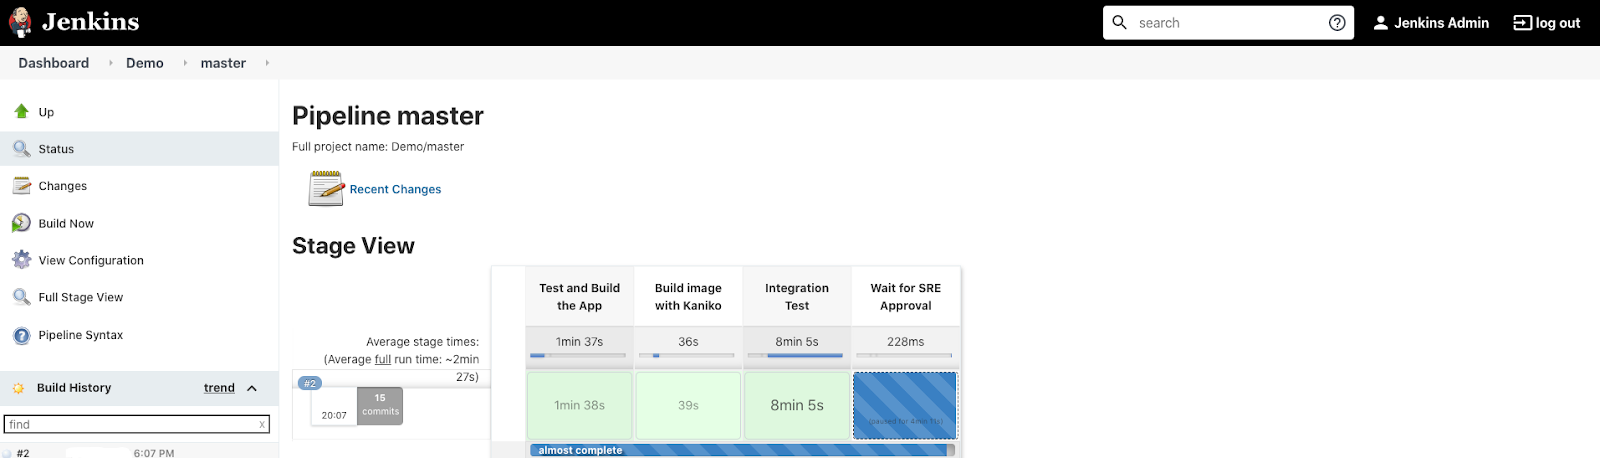
Hover over the pending stage, you should see an approval pop up. Click Proceed.
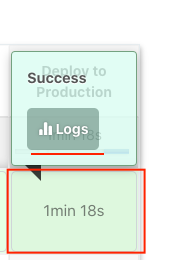
You should see a new stage start. Wait till the application is deployed. Hover over the 'Deploy to production' stage and click Logs.
You should see every command executed during the last stage. Open the very last step (with helm upgrade ...).
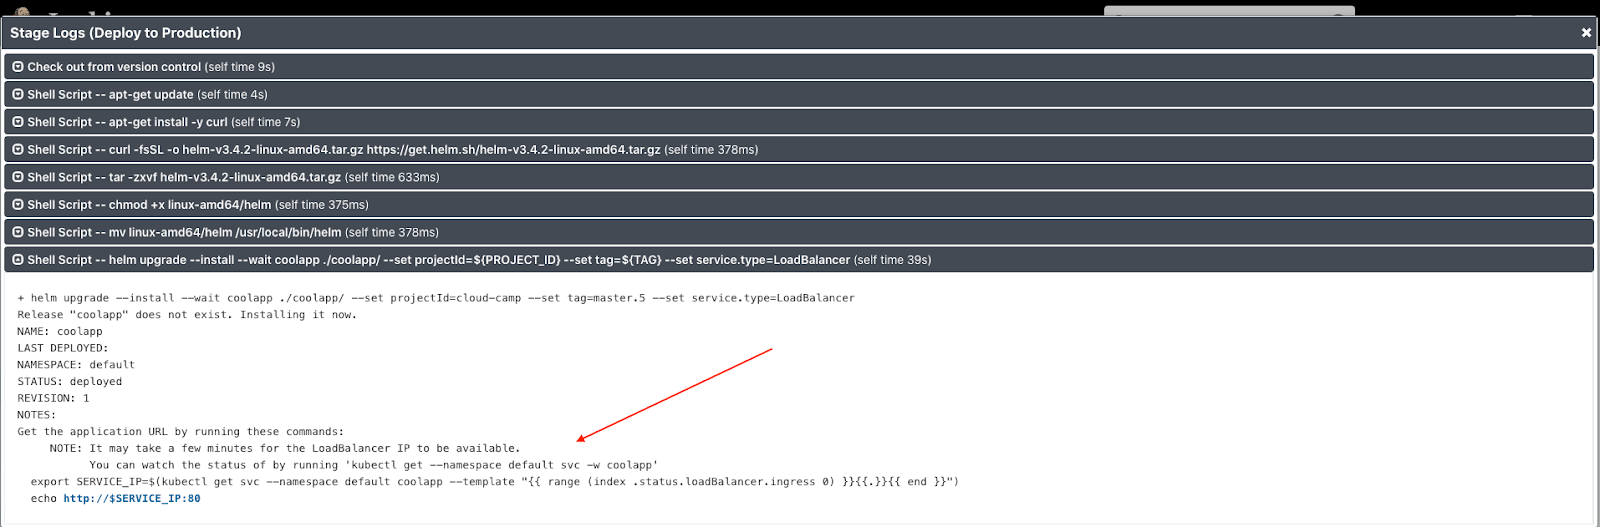
Follow the printed Helm instructions from console output to verify that that application is working.
Let's review the final Jenkinsfile configuration.
We've created two new stages, Wait for SRE Approval and Deploy to Production. The latter has it's agent configuration specified as a Pod manifest for Kubernetes plugin. We specify the service account to use with this agent Pod.
We have 2 containers needed for the job:
- Default Jenkins agent - jnlp
- ubuntu - to install Helm binary and deploy the application.
    stage('Deploy to Production') {
        when { branch 'master' }
        agent {
          kubernetes {
            yaml """
apiVersion: v1
kind: Pod
metadata:
  name: coolappdeployer
  labels:
    robot: deploy
spec:
  serviceAccount: my-release-jenkins-agent
  containers:
  - name: jnlp
  - name: helm
    image: ubuntu
    command:
    - cat
    tty: true
"""
          }
        }
        steps {
        ...
        }
      }
}The stage's steps download the Helm binary and use it to deploy our application inside the default namespace of the cluster. It also configures the service to run as a LoadBalancer type.
        steps {
            container(name: 'helm', shell: '/bin/bash') {
                // get helm cli
                sh 'apt-get update'
                sh 'apt-get install -y curl'
                sh 'curl -fsSL -o helm-v3.4.2-linux-amd64.tar.gz https://get.helm.sh/helm-v3.4.2-linux-amd64.tar.gz'
                sh 'tar -zxvf helm-v3.4.2-linux-amd64.tar.gz'
                sh 'chmod +x linux-amd64/helm'
                sh 'mv linux-amd64/helm /usr/local/bin/helm'
                // install
                sh 'helm upgrade --install --wait coolapp ./coolapp/ --set projectId=${PROJECT_ID} --set tag=${TAG} --set service.type=LoadBalancer'
        }
        }
But before we launch the final stage, we wait for manual approval:
stage('Wait for SRE Approval') {
        when { branch 'master' }
        steps{
            timeout(time:12, unit:'HOURS') {
                input message:'Approve deployment?'
            }
        }
    }
Both of these stages have a condition when { branch 'master' } to trigger only for master branch.
Delete the service account:
$ gcloud iam service-accounts delete jenkins-sa@${GOOGLE_CLOUD_PROJECT}.iam.gserviceaccount.com
$ rm -rf ~/devops
Delete your repository:
$ gcloud source repos delete jenkinsTo delete the image from registry enter the following.
$ gcloud container images list-tags \
    gcr.io/${GOOGLE_CLOUD_PROJECT}/example \
    --format="value(tags)" | \
    xargs -I {} gcloud container images delete \
    --force-delete-tags --quiet \
    gcr.io/${GOOGLE_CLOUD_PROJECT}/example:{}
Delete the Helm releases.
$ helm delete my-release
$ helm delete coolapp
Delete the bucket
$ gsutil -m rm -r gs://${GOOGLE_CLOUD_PROJECT}-artifacts-jenkinsNext, delete the cluster
$ gcloud container clusters delete devops-cluster --zone "europe-west1-b"Finally, check if there are any persistent disks left and delete them:
$ gcloud compute disks list --format="json" | jq .[].name | \
  grep "devops-cluster" | xargs gcloud compute disks delete --zone europe-west1-b
Thank you! :)