
Last Updated: 2020-09-25
HashiCorp Terraform
Terraform is a tool for building, changing, and versioning infrastructure safely and efficiently. Terraform can manage existing and popular service providers as well as custom in-house solutions. Terraform can provision infrastructure across many different types of cloud providers, including AWS, Azure, Google Cloud, DigitalOcean, and many others.
Configuration files describe to Terraform the components needed to run a single application or your entire datacenter. Terraform generates an execution plan describing what it will do to reach the desired state, and then executes it to build the described infrastructure. As the configuration changes, Terraform is able to determine what changed and create incremental execution plans which can be applied.
The infrastructure Terraform can manage includes low-level components such as compute instances, storage, and networking, as well as high-level components such as DNS entries, SaaS features, etc.
What you'll build
In this codelab, you're going to use Terraform to automate infrastructure deployment.
What you'll need
- A recent version of your favourite Web Browser
- Basics of BASH
- GCP Account
Create an Account
In this step, you register for the Google Cloud Platform free trial and create a project. The free trial provides you:
- $300 Credit for Free
- Access to Google Cloud Platform Products
- You Won't be Billed (though you need to enter your credit card)
- Build with the Power, Speed, Security, Reliability, and Scalability of Google
To register for the free trial open the free trial Registration page.
If you do not have a Gmail account, follow the steps to create one. Otherwise, login and complete the registration form.
Read and agree to the terms of service. Click Accept and start a free trial.
Create a Project
Next, create your first project using the Google Cloud Platform Console. The project is used to complete the rest of the lab.
To create a project in the Google Cloud Platform Console, click Select a project > Create a project.
In the New Project dialog: for Project name, type whatever you like. Make a note of the Project ID in the text below the project name box; you need it later. Then click Create.
Upgrade Account (Optional)
In the upper-right corner of the console, a button will appear asking you to upgrade your account. Click Create a Project when you see it. If the Upgrade button does not appear, you may skip this step. If the button appears later, click it when it does.
When you upgrade your account, you immediately have access to standard service quotas, which are higher than those available on the free trial.
Finalize
On the GCP Console, use the left-hand side menu to navigate to Compute Engine and ensure that there are no errors.
At the end of this lab, you may delete this project and close your billing account if desired.
Open CloudShell
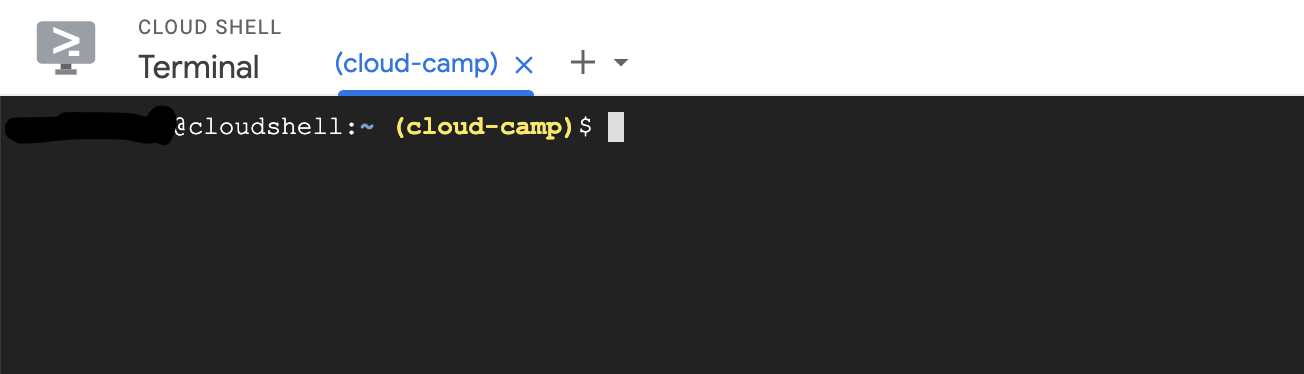
You will do most of the work from the Google Cloud Shell, a command line environment running in the Cloud. This virtual machine is loaded with all the development tools you'll need (docker, gcloud, kubectl and others) and offers a persistent 5GB home directory and runs in Google Cloud, greatly enhancing network performance and authentication. Open the Google Cloud Shell by clicking on the icon on the top right of the screen:

You should see the shell prompt at the bottom of the window:
Once connected to Cloud Shell, you should see that you are already authenticated and that the project is already set to your project ID.
Run the following command in Cloud Shell to confirm that you are authenticated
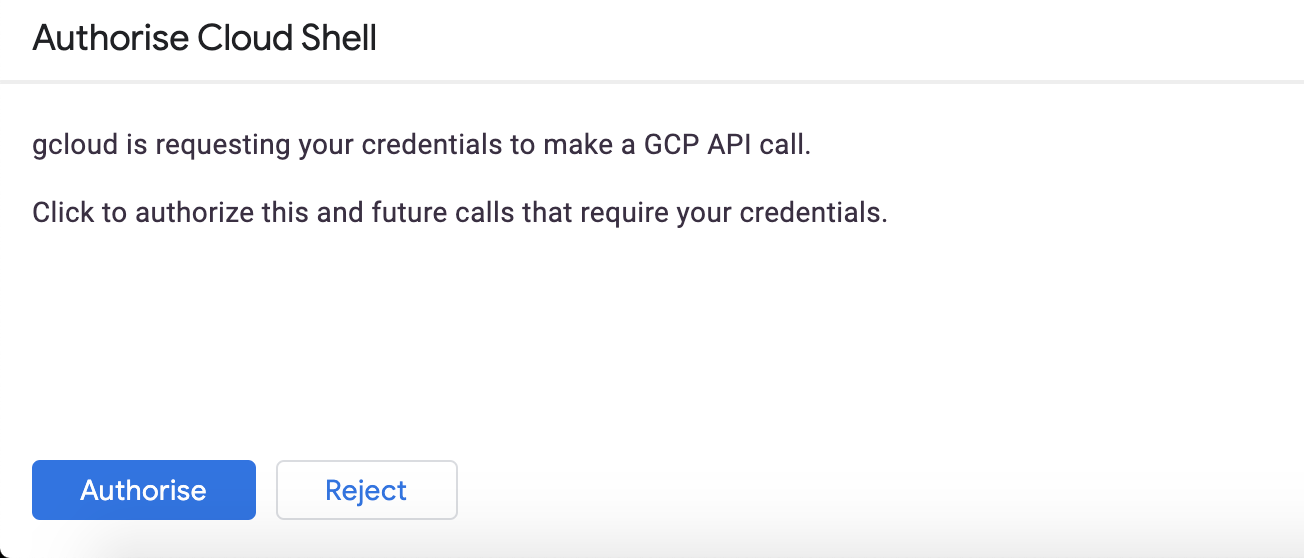
gcloud auth listIf it's the first time you are running Cloud Shell - authorize it.
You might need to run the command again after authorization. Command output:
 Credentialed Accounts
ACTIVE  ACCOUNT
*       <my_account>@<my_domain.com>

To set the active account, run:
$ gcloud config set account `ACCOUNT`Check if your project is set correctly.
gcloud config list projectCommand output
[core]
project = <PROJECT_ID>
If it is not, you can set it with this command:
gcloud config set project <PROJECT_ID>Service Account
You can do everything in Cloud Shell using your Admin credentials. But in real world scenario you will need a limited service account with only necessary permissions (that are still somewhat more permissive for this lab, than they should be in production):
- Compute Admin
- Storage Admin
You can create this account using Identity and Access Management (IAM) console or gcloud.
Create a service account specific to the Terraform lab.
$ gcloud iam service-accounts create terraformAdd the Compute Admin & Storage Admin roles to this service account.
$ gcloud projects add-iam-policy-binding ${GOOGLE_CLOUD_PROJECT} \
  --member serviceAccount:terraform@${GOOGLE_CLOUD_PROJECT}.iam.gserviceaccount.com \
  --role roles/storage.admin

$ gcloud projects add-iam-policy-binding ${GOOGLE_CLOUD_PROJECT} \
  --member serviceAccount:terraform@${GOOGLE_CLOUD_PROJECT}.iam.gserviceaccount.com \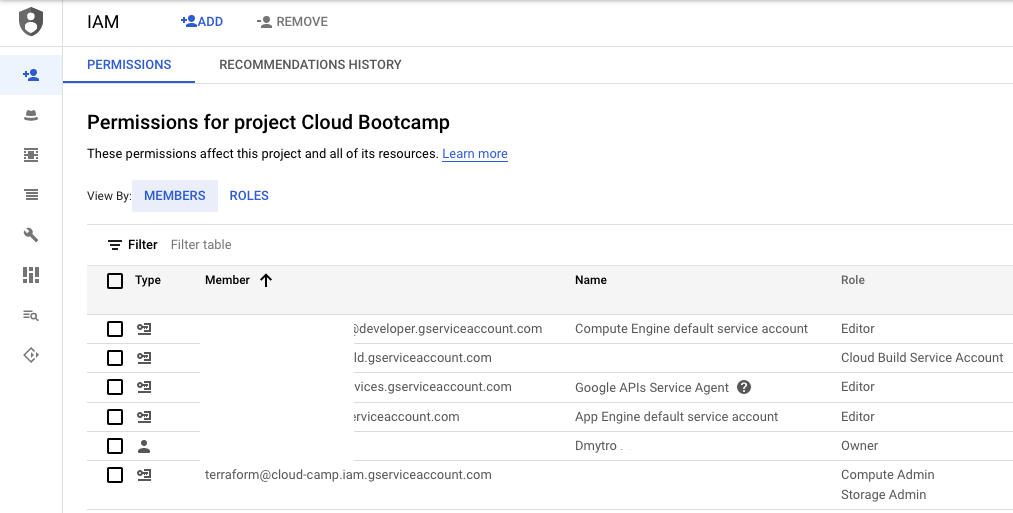
--role roles/compute.adminIn Cloud Console navigate to Identity & Security → Access → IAM.
You should see your service account with two roles in the list:
Generate the JSON key file to be used by Terraform to identify itself using the service account.
$ gcloud iam service-accounts keys create \
    ~/service-account.json \
--iam-account terraform@${GOOGLE_CLOUD_PROJECT}.iam.gserviceaccount.comThen, after receiving your user credentials you should set them up in the terminal, so Terraform can use them to manage infrastructure:
$ export GOOGLE_CREDENTIALS=${HOME}/service-account.jsonCreate basic GCE instance
Terraform code is written in a language called HCL in files with the extension .tf. It is a declarative language, so your goal is to describe the infrastructure you want, and Terraform will figure out how to create it. Terraform can create infrastructure across a wide variety of platforms, or in its terminology - providers, including AWS, Azure, Google Cloud, DigitalOcean, and many others.
The general HCL syntax for a Terraform resource is:
resource "<PROVIDER>_<TYPE>" "<NAME>" {
 [CONFIG ...]
}
Where PROVIDER is the name of a provider, TYPE is the type of resources to create in that provider, NAME is an identifier you can use throughout the Terraform code to refer to this resource, and CONFIG consists of one or more arguments that are specific to that resource.
You can write Terraform code in just about any text editor. If you search around, you can find Terraform syntax highlighting support for most editors (note, you may have to search for the word "HCL" instead of "Terraform"), including vim, emacs, Visual Studio Code, and IntelliJ (the latter even has support for refactoring, find usages, and go to declaration).
Create and change to the Demo directory:
$ mkdir -p ~/terraform-demo/basic
$ cd ~/terraform-demo/basic
The first step to using Terraform is typically to configure the provider(s) you want to use. Create a file called main.tf.
$ touch main.tf
$ cloudshell edit main.tf
and put the following code in it (substitute YOUR_PROJECT_ID with your actual project id):
provider "google" {
  project     = "YOUR_PROJECT_ID"
  region      = "europe-west1"
}
This tells Terraform that you are going to be using the GCP provider and that you wish to deploy your infrastructure in the europe-west1 region.
You can configure other settings for the GCP provider, but for this lab, since you've already configured a service account to have a required role & permissions and exported a path to credentials, you only need to specify the region and project.
For each provider, there are many different kinds of resources you can create, such as servers, databases, and load balancers. Let's first figure out how to deploy a single server that will host a static website. Add the following code to main.tf, which uses the google_compute_instance resource to deploy an GCE Instance:
resource "google_compute_instance" "example" {
  name         = "example"
  machine_type = "f1-micro"
  zone         = "europe-west1-b"

  boot_disk {
    initialize_params {
      image = "debian-cloud/debian-10"
    }
  }
  network_interface {
    network = "default"

    access_config {
      // Ephemeral IP
    }
  }
}
For the google_compute_instance resource, there are many different arguments, but for now, you only need to set the following ones:
name: name of the instance.zone: availability zone in the selected region.network: name of the VPC network to which this instance belongs.image: The Boot Image to run on the GCE Instance. You can find available images in the Cloud Console Compute Images. The image name consists of the image project and image family. It will automatically select the latest image in the family.machine_type: The type of GCE Instance to run.
Now, save the file and run:
$ terraform init

Initializing the backend...

Initializing provider plugins...
- Checking for available provider plugins...
- Downloading plugin for provider "google" (hashicorp/google) 3.48.0...
(...)
* provider.google: version = "~> 3.48"

Terraform has been successfully initialized!
The terraform binary contains the basic functionality for Terraform, but it does not come with the code for any of the providers, so when first starting to use Terraform, you need to run terraform init to tell Terraform to scan the code, figure out what providers you're using, and download the code for them. By default, the provider code will be downloaded into a .terraform folder, which is Terraform's scratch directory (you may want to add it to .gitignore). You'll see a few other uses for the init command and .terraform folder later on.
For now, just be aware that you need to run init any time you start with new Terraform code, and that it's safe to run init multiple times (the command is idempotent).
Now that you have the provider code downloaded, run the terraform plan command:
$ terraform plan

Refreshing Terraform state in-memory prior to plan...

(...)

Terraform will perform the following actions:

  # google_compute_instance.example will be created
  + resource "google_compute_instance" "example" {
      + can_ip_forward       = false
      + cpu_platform         = (known after apply)
      + current_status       = (known after apply)
      + deletion_protection  = false
      + guest_accelerator    = (known after apply)
      + id                   = (known after apply)
      + instance_id          = (known after apply)
      + label_fingerprint    = (known after apply)
      + machine_type         = "f1-micro"
      + metadata_fingerprint = (known after apply)
      + min_cpu_platform     = (known after apply)
      + name                 = "example"
      + project              = (known after apply)
      + self_link            = (known after apply)
      + tags_fingerprint     = (known after apply)
      + zone                 = "europe-west1-b"

      + boot_disk {
          + auto_delete                = true
          + device_name                = (known after apply)
          + disk_encryption_key_sha256 = (known after apply)
          + kms_key_self_link          = (known after apply)
          + mode                       = "READ_WRITE"
          + source                     = (known after apply)

          + initialize_params {
              + image  = "debian-cloud/debian-10"
              + labels = (known after apply)
              + size   = (known after apply)
              + type   = (known after apply)
            }
        }

      + network_interface {
          + name               = (known after apply)
          + network            = "default"
          (...)
        }

(...)

Plan: 1 to add, 0 to change, 0 to destroy.
The plan command lets you see what Terraform will do before actually doing it. This is a great way to sanity check your changes before unleashing them onto the world. The output of the plan command is a little like the output of the diff command: resources with a plus sign (+) are going to be created, resources with a minus sign (-) are going to be deleted, and resources with a tilde sign (~) are going to be modified in-place. In the output above, you can see that Terraform is planning on creating a single GCE Instance and nothing else, which is exactly what we want.
To actually create the instance, run the terraform apply command:
$ terraform apply

(...)
Terraform will perform the following actions:
(...)
Plan: 1 to add, 0 to change, 0 to destroy.

Do you want to perform these actions?
  Terraform will perform the actions described above.
  Only 'yes' will be accepted to approve.

  Enter a value:
You'll notice that the apply command shows you the same plan output and asks you to confirm if you actually want to proceed with this plan. So while plan is available as a separate command, it's mainly useful for quick sanity checks and during code reviews, and most of the time you'll run apply directly and review the plan output it shows you.
Type in "yes" and hit enter to deploy the GCE Instance:
google_compute_instance.example: Creating...
google_compute_instance.example: Still creating... [10s elapsed]
google_compute_instance.example: Creation complete after 14s [id=...]

Apply complete! Resources: 1 added, 0 changed, 0 destroyed.
Now, your instance is deployed with Terraform! To verify this, you can use gcloud.
$ gcloud compute instances list

NAME     ZONE            MACHINE_TYPE  PREEMPTIBLE  INTERNAL_IP  EXTERNAL_IP   STATUS
example  europe-west1-b  f1-micro                   10.132.0.xx  xx.xx.xx.xx   RUNNING
You will see that It's working, but if we later want to access it from the web it doesn't have any network tags. To add one, modify the instance in main.tf file to look like this:
resource "google_compute_instance" "example" {
  name         = "example"
  machine_type = "f1-micro"
  zone         = "europe-west1-b"

  boot_disk {
    initialize_params {
      image = "debian-cloud/debian-10"
    }
  }

  network_interface {
    network = "default"

    access_config {
      // Ephemeral IP
    }
  }

  tags = ["allow-http"]
}
Run terraform apply again to see what this would do:
$ terraform apply
google_compute_instance.example: Refreshing state... [id=...]
(...)
Terraform will perform the following actions:

  # google_compute_instance.example will be updated in-place
  ~ resource "google_compute_instance" "example" {
        can_ip_forward       = false
        cpu_platform         = "Intel Haswell"
        current_status       = "RUNNING"
        deletion_protection  = false
        enable_display       = false
        guest_accelerator    = []
        id                   = "projects/project/zones/europe-west1-b/instances/example"
        instance_id          = "93891174122545187"
        label_fingerprint    = "42WmSpB8rSM="
        labels               = {}
        machine_type         = "f1-micro"
        metadata             = {}
        metadata_fingerprint = "uF3shOhxG3U="
        name                 = "example"
        project              = "project"
        resource_policies    = []
        self_link            = "https://www.googleapis.com/compute/v1/projects/project/zones/europe-west1-b/instances/example"
      ~ tags                 = [
          + "allow-http",
        ]
        (...)
    }
(...)
Plan: 0 to add, 1 to change, 0 to destroy.

Do you want to perform these actions?
  Terraform will perform the actions described above.
  Only 'yes' will be accepted to approve.

  Enter a value:
Terraform keeps track of all the resources it already created for this set of configuration files, so it knows your GCE Instance already exists (notice Terraform says "Refreshing state..." when you run the apply command), and it can show you a diff between what's currently deployed and what's in your Terraform code (this is one of the advantages of using a declarative language over a procedural one). The preceding diff shows that Terraform wants to create a single tag called "allow-http," which is exactly what you need, so type in "yes" and hit enter.
Configuring GCE Instance
Let's configure the GCE instance to run a simple Apache2 web server. We'll use a simple script to do this. Create a file in the same directory as main.tf and call it data.sh.
$ touch data.sh
$ cloudshell edit data.sh
Paste the following content:
#!/bin/bash
sudo apt-get update
sudo apt-get install -y apache2
echo "Hello, World!" | sudo tee /var/www/html/index.html
sudo systemctl restart apache2
Your directory structure should look like this:
/home/user/terraform-demo/
└── basic
    ├── data.sh
    ├── main.tf
Normally, instead of using an empty boot image, you would use some tool (e.g., Packer) to create a custom image that has the web server installed on it. But we're going to run the script above as part of the GCE Instance's startup script, which will execute when the instance is booting:
resource "google_compute_instance" "example" {
  name         = "example"
  machine_type = "f1-micro"
  zone         = "europe-west1-b"

  boot_disk {
    initialize_params {
      image = "debian-cloud/debian-10"
    }
  }

  network_interface {
    network = "default"

    access_config {
      // Ephemeral IP
    }
  }

  tags = ["allow-http"]

  metadata_startup_script = file("data.sh")
}
file is a Terraform's function, which is part of its syntax, read contents of a file.
You need to do one more thing before this web server works. By default, GCP does not allow any incoming traffic to a GCE Instance from the outside world. To allow the GCE Instance to receive traffic on port 80, you need to create a firewall rule targeting our network tag allow-http. Add another resource to main.tf:
resource "google_compute_firewall" "example" {
  name    = "terraform-example-firewall"
  network = "default"

  allow {
    protocol = "tcp"
    ports    = ["80"]
  }

  target_tags = ["allow-http"]
}
This code creates a new resource called google_compute_firewall and specifies that this group allows incoming TCP requests on port 80 any address.
If you run the apply command, you'll see that Terraform wants to add a firewall rule and replace the GCE Instance with a new Instance that has the new startup script:
$ terraform apply
google_compute_instance.example: Refreshing state... [id=...]
(...)
Terraform will perform the following actions:

  # google_compute_instance.example must be replaced
-/+ resource "google_compute_instance" "example" {
        can_ip_forward          = false
      ~ cpu_platform            = "Intel Haswell" -> (known after apply)
      ~ current_status          = "RUNNING" -> (known after apply)
        deletion_protection     = false
      (...)
      + metadata_startup_script = <<~EOT
            #!/bin/bash
            sudo apt-get update
            sudo apt-get install -y apache2
            echo "Hello, World!" | sudo tee /var/www/html/index.html
            sudo systemctl restart apache2
        EOT # forces replacement
        (...)
    }
(...)
Plan: 2 to add, 0 to change, 1 to destroy.

Do you want to perform these actions?
  Terraform will perform the actions described above.
  Only 'yes' will be accepted to approve.

  Enter a value:
The -/+ in the plan output means "replace"; look for the text "forces replacement" to figure out what is forcing Terraform to do a replacement. With GCE Instances, changes to many attributes will force the original Instance to be terminated and a completely new Instance to be created (this is an example of the immutable infrastructure paradigm).
Since the plan looks good, enter "yes" and you'll see your new GCE Instance deploying. Get the list of instances:
$ gcloud compute instances list

NAME     ZONE            MACHINE_TYPE  PREEMPTIBLE  INTERNAL_IP  EXTERNAL_IP   STATUS
example  europe-west1-b  f1-micro                   10.132.0.xx  xx.xx.xx.xx   RUNNING
You'll also see the public IP address of this GCE Instance under EXTERNAL_IP.
Give it a minute or two to boot up and then use a web browser or a tool like curl to make an HTTP request to this IP address at port 80 to see a "Hello, World!" Apache2 page:
$ curl http://<GCE_INSTANCE_PUBLIC_IP>:80
Hello, World!
In our previous examples we hard-coded the name of VPC (e.g. set it to "default") in the instance and firewall rule, but that won't be maintainable or portable (e.g., we need to use different VPCs in stating and production), so a better option is to use data sources to get VPC information.
A data source represents a piece of read-only information that is fetched from the provider (in this case, GCP) every time you run Terraform. Adding a data source to your Terraform configurations does not create anything new; it's just a way to query the provider's APIs for data and to make that data available to the rest of your Terraform code. Each Terraform provider exposes a variety of data sources. For example, the GCP provider includes data sources to look up VPC data, boot images, Storage bucket objects, and much more.
The syntax for using a data source is very similar to the syntax of a resource:
data "<PROVIDER>_<TYPE>" "<NAME>" {
 [CONFIG ...]
}
PROVIDER is the name of a provider (e.g., google), TYPE is the type of data source you want to use (e.g., compute_network), NAME is an identifier you can use throughout the Terraform code to refer to this data source, and CONFIG consists of one or more arguments that are specific to that data source. For example, here is how you can use the google_compute_network data source to fetch the information about any VPC in your GCP project. Add this to your main.tf:
data "google_compute_network" "example-net" {
  name = "default"
}
To get the data out of a data source, you use the following attribute reference syntax:
data.<PROVIDER>_<TYPE>.<NAME>.<ATTRIBUTE>For example, to get the reference to the name of the VPC from the google_compute_network data source, you would use the following:
data.google_compute_network.nameMore generally, this syntax is called Terraform expressions.
An expression in Terraform is anything that returns a value. One particularly useful type of expression is a reference, which allows you to access values from other parts of your code. For example, if we'd like to to access the ID of the instance resource, we are going to need to use a resource attribute reference, which uses the following syntax:
<PROVIDER>_<TYPE>.<NAME>.<ATTRIBUTE>Where PROVIDER is the name of the provider (e.g., google), TYPE is the type of resource (e.g., compute_instance), NAME is the name of that resource (e.g., the instance is named "example"), and ATTRIBUTE is either one of the arguments of that resource (e.g., name) or one of the attributes exported by the resource (you can find the list of available attributes in the documentation for each resource—e.g., here are the attributes for google_compute_instance). The instance exports an attribute called id, so the expression to reference it will look like this:
google_compute_instance.example.idYou can use this ID (or any other available attribute) anywhere you need in your code.
Change the instance and firewall definitions in main.tf to look like this:
resource "google_compute_instance" "example" {
  name         = "example"
  machine_type = "f1-micro"
  zone         = "europe-west1-b"

  boot_disk {
    initialize_params {
      image = "debian-cloud/debian-10"
    }
  }

  network_interface {
    network = data.google_compute_network.example-net.name

    access_config {
      // Ephemeral IP
    }
  }

  tags = ["allow-http"]

  metadata_startup_script = file("data.sh")
}

resource "google_compute_firewall" "example" {
  name    = "terraform-example-firewall"
  network = data.google_compute_network.example-net.name

  allow {
    protocol = "tcp"
    ports    = ["80"]
  }

  target_tags = ["allow-http"]
}
If you run the apply command, you'll see that Terraform will not modify any resources, as they are all the same, we just made it more maintainable.
$ terraform apply
data.google_compute_network.example-net: Refreshing state...
google_compute_firewall.example: Refreshing state... [id=...]
google_compute_instance.example: Refreshing state... [id=...]

Apply complete! Resources: 0 added, 0 changed, 0 destroyed.
When you add a reference from one resource to another, you create an implicit dependency. Terraform parses these dependencies, builds a dependency graph from them, and uses that to automatically figure out in what order it should create resources and/or query data sources. For example, if you were to deploy this code from scratch, Terraform would know it needs to fetch the VPC info before creating the GCE Instance and firewall rule, since the GCE Instance and firewall rule both reference the name of the data source.
When Terraform walks your dependency tree, it will create as many resources in parallel as it can, which means it can apply your changes fairly efficiently. That's the beauty of a declarative language: you just specify what you want and Terraform figures out the most efficient way to make it happen.
Parameterized Configuration
We fixed the VPC name, but it's still hard somewhere in the code. Also, our current Terraform code has the port 80 hardcoded in the firewall rule configuration. In real world scenarios you'll probably use that port number in application configuration too. If you have the port number copy/pasted in two places, it's too easy to update it in one place but forget to make the same change in the other place.
To allow you to make your code more configurable, Terraform allows you to define input variables. The syntax for declaring a variable is:
variable "NAME" {
 [CONFIG ...]
}
The body of the variable declaration can contain three parameters, all of them optional:
description: It's always a good idea to use this parameter to document how a variable is used. Your teammates will not only be able to see this description while reading the code, but also when running theplanorapplycommands.default: There are a number of ways to provide a value for the variable, including passing it in at the command line (using the-varoption), via a file (using the-var-fileoption), or via an environment variable (Terraform looks for environment variables of the nameTF_VAR_). If no value is passed in, the variable will fall back to this default value. If there is no default value, Terraform will interactively prompt the user for one.type: This allows you to enforce type constraints on the variables a user passes in. Terraform supports a number of type constraints, includingstring, number, bool, list, map, set, object, tuple, andany. If you don't specify a type, Terraform assumes the type isany.
For the web server example, here is how you can create a variable that stores the port number. Create a file called variables.tf (the file can be arbitrary named or the code can be even inside main.tf, terraform will parse every .tf file in current directory before doing anything)
$ touch variables.tf
$ cloudshell edit variables.tf
And paste the following:
variable "server_port" {
  description = "The port the server will use for HTTP requests"
  type        = number
}

variable "network_name" {
  description = "The name of the VPC to use"
  type        = string
}
Note that the server_port and network_name input variables have no default, so if you run the apply command now, Terraform will interactively prompt you to enter a value for both server_port and network_name (one by one), and show you the description of the variable:
$ terraform apply
var.server_port
  The port the server will use for HTTP requests

  Enter a value:
If you don't want to deal with an interactive prompt, you can provide a value for the variable via the -var command-line option:
$ terraform apply -var "server_port=80" -var "network_name=default"You could also set the variable via an environment variable named TF_VAR_ where
$ export TF_VAR_server_port=80
$ export TF_VAR_network_name=default
$ terraform apply
And if you don't want to deal with remembering extra command-line arguments every time you run plan or apply, you can specify a default value in variables.tf:
variable "server_port" {
  description = "The port the server will use for HTTP requests"
  type        = number
  default     = 80
}

variable "network_name" {
  description = "The name of the VPC to use"
  type        = string
  default     = "default"
}
To use the value from an input variable in your Terraform code, you can use a new type of expression called a variable reference, which has the following syntax:
var.<VARIABLE_NAME>For example, here is how you can set the name parameter of the network data source to the value of the network_name variable:
data "google_compute_network" "example-net" {
  name = var.network_name
}
We have our server_port set as a number, but in the firewall rule we need to pass it as string. To use a reference inside of a string literal, you need to use a new type of expression called an interpolation, which has the following syntax:
"${...}"You can put any valid reference within the curly braces and Terraform will convert it to a string. For example, here's how you can use var.server_port inside firewall rule ports argument:
resource "google_compute_firewall" "example" {
  name    = "terraform-example-firewall"
  network = data.google_compute_network.example-net.name

  allow {
    protocol = "tcp"
    ports    = ["${var.server_port}"]
  }

  target_tags = ["allow-http"]
}
In addition to input variables, Terraform also allows you to define output variables with the following syntax:
output "<NAME>" {
 value = <VALUE>
 [CONFIG ...]
}
The NAME is the name of the output variable and VALUE can be any Terraform expression that you would like to output. The CONFIG can contain two additional parameters, both optional:
description: It's always a good idea to use this parameter to document what type of data is contained in the output variable.sensitive: Set this parameter totrueto tell Terraform not to log this output at the end ofterraform apply. This is useful if the output variable contains sensitive material or secrets, such as passwords or private keys.
For example, instead of having to manually poke around the using gcloud to find the IP address of your server, you can provide the IP address as an output variable. Create an outputs.tf file:
$ touch outputs.tf
$ cloudshell edit outputs.tf
And paste the following:
output "public_ip" {
  value       = aws_instance.example.public_ip
  description = "The public IP of the web server"
}
Your directory structure should look like this:
/home/user/terraform-demo/
└── basic
    ├── data.sh
    ├── main.tf
    ├── outputs.tf
    ├── terraform.tfstate
    ├── terraform.tfstate.backup
    └── variables.tf
This code uses an attribute reference again, this time referencing the network_interface attribute (and a bunch of nested fields) of the google_compute_instance resource. If you run the apply command again, Terraform will apply any changes, and will show you the new output at the very end:
$ terraform apply

(...)
data.google_compute_network.example-net: Refreshing state...
google_compute_firewall.example: Refreshing state... [id=...]
google_compute_instance.example: Refreshing state... [id=...]

Apply complete! Resources: 0 added, 0 changed, 0 destroyed.

Outputs:

public_ip = x.x.x.x
As you can see, output variables show up in the console after you run terraform apply, which users of your Terraform code may find useful (e.g., you now know what IP to test once the web server is deployed). You can also use the terraform output command to list all outputs without applying any changes:
$ terraform output
public_ip = x.x.x.x
And you can run terraform output to see the value of a specific output called
$ terraform output public_ip
x.x.x.x
This is particularly handy for scripting. For example, you could create a deployment script that runs terraform apply to deploy the web server, uses terraform output public_ip to grab its public IP, and runs curl on the IP as a quick smoke test to validate that the deployment worked.
Input and output variables are also essential ingredients in creating configurable and reusable infrastructure code.
Create Managed Instance Group
The first step in creating a MIG is to create an instance template, which specifies how to configure each GCE Instance in the MIG. From deploying the single GCE Instance earlier, you already know exactly how to configure it, and you can reuse almost exactly the same parameters in the google_compute_instance_template resource. Add one to your main.tf:
resource "google_compute_instance_template" "example" {
  name         = "example"
  machine_type = "f1-micro"

  disk {
    source_image = "debian-cloud/debian-10"
    auto_delete  = true
    boot         = true
  }

  network_interface {
    network = data.google_compute_network.example-net.name
    access_config {
      // Ephemeral IP
    }
  }

  tags = ["allow-http"]

  metadata_startup_script = file("data.sh")

  lifecycle {
    create_before_destroy = true
  }
}
The only new thing here is the lifecycle setting. Terraform supports several lifecycle settings that let you customize how resources are created and destroyed. The create_before_destroy setting controls the order in which resources are recreated. The default order is to delete the old resource and then create the new one. Setting create_before_destroy to true reverses this order, creating the replacement first, and then deleting the old one. Since every change to an instance template creates a totally new instance template, you need this setting to ensure that the new template is created first, so any MIGs using this instance template can be updated to point to the new one, and then the old one can be deleted.
Now you can create the MIG itself using the google_compute_instance_group_manager resource:
resource "google_compute_instance_group_manager" "example" {
  name               = "example"
  base_instance_name = "example"
  zone               = "europe-west1-b"
  target_size        = "2"
  version {
    instance_template  = google_compute_instance_template.example.id
  }
}
Finally, add an Auto Scaler using the google_compute_autoscaler resource:
resource "google_compute_autoscaler" "example" {
  name   = "example"
  zone   = "europe-west1-b"
  target = google_compute_instance_group_manager.example.id

  autoscaling_policy {
    max_replicas    = 5
    min_replicas    = 2
    cooldown_period = 60

    cpu_utilization {
      target = 0.7
    }
  }
}
This MIG will run between 2 and 5 GCE Instances (defaulting to 2 for the initial launch), each tagged with the name "example". The MIG uses a reference to fill in the instance template id.
Create Load Balancer
At this point, you can deploy your MIG, but you'll have a small problem: you'll need to manually create a load balancer to use your new MIG. But we can fix it with Terraform.
GCP offers two different types of load balancers:
- a L3 Network Load Balancer
- a L7 HTTP(s) Load Balancer
Since our web servers use HTTP, the HTTP LB would be the best fit, but it requires more code and more explanation, so to keep this short, we're going to use the Network LB, which is simpler to use.
You can create a Network load balancer by using google_compute_region_health_check and google_compute_backend_service resources in main.tf:
resource "google_compute_region_backend_service" "example" {
  load_balancing_scheme = "EXTERNAL"
  backend {
    group               = google_compute_instance_group_manager.example.instance_group
    balancing_mode      = "CONNECTION"
  }

  region                = "europe-west1"
  name                  = "web-backend"
  protocol              = "TCP"
  timeout_sec           = 10
  health_checks         = [google_compute_region_health_check.example.id]
}

resource "google_compute_region_health_check" "example" {
  name                  = "example-check"
  check_interval_sec    = 1
  timeout_sec           = 1
  region                = "europe-west1"

  tcp_health_check {
    port                = var.server_port
  }
}
This creates a Backend service that will be deployed in Europe West 1 region. Also we have a configured health check that will periodically check the health of your GCE Instances and, if an instance is unhealthy, it will automatically stop routing traffic to it.
Note that the google_compute_backend_service code above doesn't do much until you tell the google_compute_forwarding_rule how to route requests. To do that, you add one or more resource which specify what port the forwarding rule should listen on and where it should route the request to:
resource "google_compute_forwarding_rule" "example" {
  name                  = "example-forwarding-rule"
  region                = "europe-west1"
  port_range            = var.server_port
  backend_service       = google_compute_region_backend_service.example.id
}
In the code above, we are telling the Load Balancer to receive requests on port 80 (specified by our server_port variable) and to route them to the Instances in the MIG through our backend service.
One last thing to do before deploying the load balancer: let's add its IP Address of the load balancer as an output to outputs.tf so it's easier to test if things are working:
output "nlb_public_ip" {
  value       = "http://${google_compute_forwarding_rule.example.ip_address}/"
  description = "The IP address of the load balancer"
}
Run terraform apply and read through the plan output. You should see that additionally to your original single GCE Instance Terraform will create an instance template, MIG, Backend service, health check, and a forwarding rule. If the plan looks good, type in "yes" and hit enter. When apply completes, you should see the nlb_public_ip output in the following format:
Outputs:
(...)
nlb_public_ip = http://xx.xx.xx.xx/
Copy this URL down. It'll take a couple minutes for the Instances to boot and show up as healthy in the backend service. In the meantime, you can inspect what you've deployed. Navigate to Compute → Compute Engine → Instance Groups, and you should see that the MIG has been created.
You may have noticed that when you run the terraform plan or terraform apply commands, Terraform was able to find the resources it created previously and update them accordingly. But how did Terraform know which resources it was supposed to manage?
The answer is that Terraform records information about what infrastructure it created in a Terraform state file. By default, when you run Terraform in the folder (in our case ~/terraform-demo/basic, Terraform creates the file ~/terraform-demo/basic/terraform.tfstate. This file contains a custom JSON format that records a mapping from the Terraform resources in your templates to the representation of those resources in the real world.
If you're using Terraform for a personal project, storing state in a local terraform.tfstate file works just fine. But if you want to use Terraform as a team on a real product, you run into several problems:
- Shared storage for state files: To be able to use Terraform to update your infrastructure, each of your team members needs access to the same Terraform state files. That means you need to store those files in a shared location.
- Locking state files: As soon as data is shared, you run into a new problem: locking. Without locking, if two team members are running Terraform at the same time, you may run into race conditions as multiple Terraform processes make concurrent updates to the state files, leading to conflicts, data loss, and state file corruption.
- Isolating state files: When making changes to your infrastructure, it's a best practice to isolate different environments. For example, when making a change in the staging environment, you want to be sure that you're not going to accidentally break production. But how can you isolate your changes if all of your infrastructure is defined in the same Terraform state file?
Shared storage for state files
The most common technique for allowing multiple team members to access a common set of files is to put them in version control (e.g. Git). With Terraform state, this is a Bad Idea for the following reasons:
- Manual error: It's too easy to forget to pull down the latest changes from version control before running Terraform or to push your latest changes to version control after running Terraform. It's just a matter of time before someone on your team runs Terraform with out-of-date state files and as a result, accidentally rolls back or duplicates previous deployments.
- Locking: Most version control systems do not provide any form of locking that would prevent two team members from running terraform apply on the same state file at the same time.
- Secrets: All data in Terraform state files is stored in plain text. This is a problem because certain Terraform resources need to store sensitive data. For example, if you use the sql_user resource to access a database, Terraform will store the username and password for the database in a state file in plain text. Storing plain-text secrets anywhere is a bad idea, including version control.
Instead of using version control, the best way to manage shared storage for state files is to use Terraform's built-in support for remote backends. A Terraform backend determines how Terraform loads and stores state. The default backend is the local backend, which stores the state file on your local disk. Remote backends allow you to store the state file in a remote, shared store. A number of remote backends are supported, including Amazon S3, Azure Storage, Google Cloud Storage, and HashiCorp's Terraform Pro and Terraform Enterprise.
Remote backends solve all three of the issues listed above:
- Manual error: Once you configure a remote backend, Terraform will automatically load the state file from that backend every time you run
planorapplyand it'll automatically store the state file in that backend after eachapply, so there's no chance of manual error. - Locking: Most of the remote backends natively support locking. To run
terraform apply, Terraform will automatically acquire a lock; if someone else is already running apply, they will already have the lock, and you will have to wait. You can run apply with the-lock-timeout=parameter to tell Terraform to wait up toTIMEfor a lock to be released (e.g.,-lock-timeout=10mwill wait for 10 minutes). - Secrets: Most of the remote backends natively support encryption in transit and encryption on disk of the state file. Moreover, those backends usually expose ways to configure access permissions (e.g., using IAM policies with an GCS bucket), so you can control who has access to your state files and the secrets they may contain.
If you're using Terraform with GCP, Google Cloud Storage, which is Google's managed file store, is typically your best bet as a remote backend for the following reasons:
- It supports encryption, which reduces worries about storing sensitive data in state files.
- It supports locking out of the box.
- It supports versioning, so every revision of your state file is stored, and you can roll back to an older version if something goes wrong.
- It's inexpensive, with most Terraform usage easily fitting into the free tier.
To enable remote state storage with GCS, the first step is to create an GCS bucket. Create new backend directory and change to it:
$ mkdir -p ~/terraform-demo/backend
$ cd ~/terraform-demo/backend
Create a main.tf file in this new folder:
$ touch main.tf
$ cloudshell edit main.tf
And at the top of the file, specify GCP as the provider and bucket configuration by using the google_storage_bucket resource (substitute YOUR_PROJECT_ID with your actual project id):
provider "google" {
  project     = "YOUR_PROJECT_ID"
  region      = "europe-west1"
}

resource "google_storage_bucket" "terraform_state" {
  name = "ita-terraform-state-${random_integer.ri.result}"
  location = "EUROPE-WEST1"
  force_destroy = true
  # Enable versioning so we can see the full revision history of our
  # state files
  versioning {
    enabled = true
  }
}

resource "random_integer" "ri" {
  min = 10000
  max = 99999
}

output "bucket_url" {
  value       = google_storage_bucket.terraform_state.url
  description = "The the URL of the bucket"
}
This code sets four arguments:
name: This is the name of the GCS bucket. Note that GCS bucket names must be globally unique amongst all GCP customers. Therefore, It uses a random number generator resource so the Bucket name is unique with configured output so you can copy the result.versioning: This block enables versioning on the GCP bucket, so that every update to a file in the bucket actually creates a new version of that file. This allows you to see older versions of the file and revert to those older versions at any time.location: This allows us to create either regional or multi-regional GCS buckets.force_destroy: When deleting a bucket, this option will delete all contained objects. You need it, because if you try to delete a bucket that contains objects, Terraform will fail that run.
Run terraform init to download the provider code and then run terraform apply to deploy. Once everything is deployed, you will have an GCS bucket, but your Terraform state will still be stored locally. To configure Terraform to store the state in your GCS bucket (with encryption and locking), you need to add a backend configuration to your Terraform code. This is configuration for Terraform itself, so it lives within a terraform block, and has the following syntax:
terraform {
  backend "<BACKEND_NAME>" {
    [CONFIG...]
  }
}
Where BACKEND_NAME is the name of the backend you want to use (e.g., "gcs") and CONFIG consists of one or more arguments that are specific to that backend (e.g., the name of the GCS bucket to use).
Change back to basic directory:
$ cd ~/terraform-demo/basic
$ cloudshell edit main.tf
Add the backend configuration for a GCS backend to main.tf:
terraform {
  backend "gcs" {
    # Replace this with your bucket name!
    bucket         = "ita-terraform-state-RANDOM_INTEGER"
    prefix         = "prod/state"
  }
}
Let's go through these settings one at a time:
bucket: The name of the GCS bucket to use. Make sure to replace this with the name of the GCS bucket you created earlier. Make sure you use the name without thegs://prefix.prefix: GCS prefix inside the bucket. Named states for workspaces are stored in an object called/ .tfstate
To tell Terraform to store your state file in this GCS bucket, you're going to use the terraform init command again. This little command can not only download provider code, but also configure your Terraform backend. Moreover, the init command is idempotent, so it's safe to run it over and over again:
$ terraform init

Initializing the backend...
Do you want to copy existing state to the new backend?
  Pre-existing state was found while migrating the previous "local" backend to the
  newly configured "gcs" backend. No existing state was found in the newly
  configured "gcs" backend. Do you want to copy this state to the new "gcs"
  backend? Enter "yes" to copy and "no" to start with an empty state.

  Enter a value:
Terraform will automatically detect that you already have a state file locally and prompt you to copy it to the new GCS backend. If you type in "yes," you should see:
Successfully configured the backend "gcs"! Terraform will automatically
use this backend unless the backend configuration changes.
After running this command, your Terraform state will be stored in the GCS bucket. You can check this by running gsutil (Replace the url with your bucket url!):
$ gsutil ls -l gs://ita-terraform-state-RANDOM_INTEGER/prod/state

     21789  2020-09-19T08:39:39Z  gs://ita-terraform-state-RANDOM_INTEGER/prod/state/default.tfstate
TOTAL: 1 objects, 21789 bytes (21.28 KiB)
With this backend enabled, Terraform will automatically pull the latest state from this GCS bucket before running a command, and automatically push the latest state to the GCS bucket after running a command.
When you're done experimenting with Terraform, it's a good idea to remove all the resources you created so GCP doesn't charge you for them. Since Terraform keeps track of what resources you created, cleanup is simple. All you need to do is run the destroy command:
$ cd ~/terraform-demo/basic
$ terraform destroy
(...)
Terraform will perform the following actions:
  # google_compute_autoscaler.example will be destroyed
  - resource "google_compute_autoscaler" "example" {
      (...)
    }
  # google_compute_firewall.example will be destroyed
  - resource "google_compute_firewall" "example" {
      (...)
    }
  # google_compute_forwarding_rule.example will be destroyed
  - resource "google_compute_forwarding_rule" "example" {
      (...)
    }
  (...)
Plan: 0 to add, 0 to change, 8 to destroy.
Do you really want to destroy all resources?
  Terraform will destroy all your managed infrastructure, as shown
  above. There is no undo. Only 'yes' will be accepted to confirm.
  Enter a value:
Once you type in "yes" and hit enter, Terraform will build the dependency graph and delete all the resources in the right order, using as much parallelism as possible. In about a minute, your GCP account should be clean again.
Next delete the GCS Bucket:
$ cd ~/terraform-demo/backend
$ terraform destroy
(...)
When everything is destroyed - delete the Service Account for Terraform:
$ export PROJECT_ID=$(gcloud config list --format 'value(core.project)')
$ gcloud iam service-accounts delete terraform@${PROJECT_ID}.iam.gserviceaccount.com
Thank you! :)